Pages

Sunday, December 28, 2014

2015 Christmas dinner menu

Nearly 25 residents, staff and guests enjoyed a festive dinner at work on Christmas Day. Holidays are important to the residents. With half the residents restricted to the house for various reasons, the meal gave them a chance to celebrate.

Staff do their best to make the recovery house a home during the 90-day program. Christmas tree, presents and frequent visits from family help the residents through the holiday season. One could argue that the holiday meal is the most important aspect of the festivities.

Christmas dinner gave me the opportunity to present a meal that's a cut above the normal fare. With a modest daily food allowance, the high cost of beef roast keeps it off of the menu. And it let the residents enjoy a special meal.

Two chuck shoulder clod roasts, averaging six and one-half pounds each, gave a generous portion. Into a hot oven just before noon, the intense heat developed a richly-colored crust. From that point, a 100-degree reduction in oven temperature (from 425 to 250 degrees F.) let the roasts coast to a perfect medium.

Accompanying the roast were scalloped red potatoes with a rosemary cream cheese sauce, roasted broccoli florets and Dutch apple pie. One of the residents, a former professional cook, assisted me on Thursday. He enjoyed the day as much as I did.

The festive Christmas dinner gave the men the opportunity to enjoy a family tradition, one which gave them a brief respite from their struggles with addiction.

2015 CHRISTMAS DINNER

SALADS
Garden Salad with Ranch & Italian Dressings
Seasoned Croutons
Fresh Vegetables Marinated in Balsamic Vinaigrette

MAIN COURSE
Beef Gravy from Natural Juices
Scalloped Red Potatoes in a Rosemary Cream Cheese Sauce
Broccoli Florets Roasted in Garlic Olive Oil
Freshly Baked Dinner Roll

DESSERT
Dutch Apple Pie

BEVERAGES
French Roast Coffee
Sweet Iced Tea

Monday, December 01, 2014

Meatloaf flop

I won't be posting the recipe to cheeseburger meatloaf anytime soon. After testing the recipe last night, I wasn't pleased with the results. Though the recipe appeared to be straight forward, it needs re-working before I can give it the 'Round the Chuckbox stamp of approval.

I must confess that the failure of the recipe isn't entirely the fault of the source. It was located on the ChefRef cell phone application by Sysco. A major contributing factor was my selection of the wrong measuring cup, something that I rarely do.

The recipe called for a mixture of bread crumbs, chopped pickles, ketchup, Worcestershire sauce, egg and mustard. Once mixed, it was worked into ground beef and shredded cheddar cheese. Since the initial ingredients were portioned in quarter and half-cup increments, I had intended to select the quarter-cup measure.

There's one problem. Our quarter-cup measure has been missing for some time. (It's likely buried in the rice or flour container.) Instead, I absentmindedly selected the third-cup measure. While I enjoyed the basic flavor, I couldn't move beyond the pasty texture. And I couldn't slice it for the plate without it falling apart.

I do intend on presenting a Dutch oven meatloaf recipe on these pages in the coming week or two. I will place the recipe for cheeseburger meatloaf on the back burner for now and work on a basic comfort recipe.

Sunday, November 30, 2014

A sea-going Thanksgiving

SOUDA BAY, Greece (Nov. 27, 2014) -- Guided-missile destroyer USS Cole (DDG 67) is conducting naval operations in the U.S. 6th Fleet area of responsibility in support of U.S. national security interests in Europe.

U.S. Navy photo by Mass Communications Specialist 2nd Class John Herman.

Culinary Specialist 1st Class John Mobley, from Philadelphia, Pa., bastes a turkey for a Thanksgiving meal aboard the Cole.
CS2 David Tiberio, from Red Hook, N.Y., carves turkey food for a Thanksgiving meal.
CS1 John Mobley, prepares a turkey for carving for a Thanksgiving meal. 

Friday, November 28, 2014

Thanksgiving spread at work

For the last month and one-half I've been working at a men's residential recovery program in Sacramento, California. My former boss called me in early October looking for a cook. I agreed to work lunch and dinner until I leave town for my summer job.

Readers who've been around for several years will remember that I previously worked in a woman's recovery home. I am once again working in the same location in mid-town Sacramento. The woman's facility was closed some 20 months ago. Most staff were laid off and the house was converted into a sober living home.

Little has changed in the house other than the fact that male parolees have replaced the women. While the men eat more than the women, they have the same heartfelt appreciation for the meals that I cook during the week. Six weeks ago I move into the job as if I had never left.

This isn't the first time I've talked about Thanksgiving at work. I last featured my menu and prep list in 2011 on 'Round the Chuckbox. Here's the menu for 2014 Thanksgiving dinner:
Roast turkey breast
Sour cream mashed red potatoes
Candied sweet potatoes
Cornbread dressing
Traditional turkey gravy
Orange cranberry sauce
Seasoned green beans
Tossed green salad with homemade ranch dressing
Hot dinner roll
Pumpkin pie 

I miss working in a commercial kitchen with a steam line. Cold food isn't an issue since 25 residents can be served in 15 minutes. I lay the pans out on the counter and on the range and serve each resident as he passes through the kitchen. 

Serving the residents gives me the opportunity to set a nice looking plate. It also ensures even portion control. I want the last resident to receive the same portion as the first. Note that I forgot to place the cranberry sauce on my sample plate.

Thursday, November 20, 2014

Throwback Thursday: Finding inspiration for the camp menu

I originally posted this story in 2006 during the ramp-up to a camp that I worked at for one week each summer. 

I glean menu and recipe ideas from many sources. Professional trade magazines -- Foodservice Director and Food Management among them -- give me ideas that are specially suited for the institutional kitchen. Popular magazines like Sunset also provide inspiration. I can often use an idea and work it until it fits a group setting.

A photograph of an artfully arranged collection of skillets arranged on an outdoor buffet table sparked my cowboy breakfast idea. Twin stacks of blue enamel plates and a lone Dutch oven complete the display -- no fancy garnish for the dudes of the Mountain Sky Guest Ranch, near Emigrant, Montana.

This thousand-word inspiration gave me the impetuous to celebrate our nation's 230th birthday. The crisp, smoky air of the campfire will greet campers next Tuesday. Bright yellow scrambled eggs, airy biscuits smothered in sausage gravy and gallons of cowboy coffee (hot chocolate for campers) will kick off our celebration next week. The meal will be cooked in cast iron that's stood the test of time from the colonial hearth to the Western range to the backyards of today.

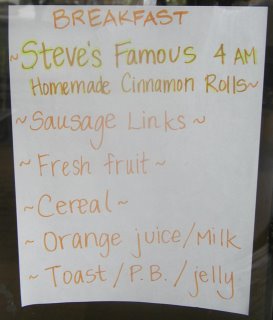
In 2004, campers kept saying, "That's what 4 a.m. rolls look like!," as they walked through the cafeteria line. Their response puzzled me all morning until I walked out into the dining area and saw this hand-printed menu.
Inspiration for camp menu ideas come from many sources. Television programs, cookbooks and magazines have helped my over 35-year culinary career. The one thing that's worked best for me since the late 1980s has been a series of culinary notebooks.

I keep the notebook handy. Now that I'm commuting to Sacramento each day, the 200-page composition book rests in my daypack. I record ideas -- often gathered from professional magazines on my desk -- and clippings on my hour-long commute home. My 18-notebook collection is full of ideas.

It doesn't matter if the idea comes from TV or print. Shows like Al Rocker's Rocker on the Road can give wonderful ideas. Take Douglas Coffin's New Haven, Conn.-based Big Green Pizza Truck (the show that aired last January). I may not be able to restore a 1946 International Harvester flat-bed truck. But the pizza menu idea will come in handy one day.

They key is to clip ideas and place them in your culinary scrapbook. Soon your collection of ideas, complete with thousand-word photographs will have you cooking for a herd of hungry campers.

Sunday, November 16, 2014

Pie dough for a 12-inch skillet

Use this recipe for pie dough with the iron skillet apple pie in a 12-inch pan.

PIE DOUGH FOR A 12-INCH SKILLET

Keep butter and shortening in the refrigerator to ensure a flaky crust.

18 ounces all-purpose flour
1-1/2 teaspoons table salt
9 ounces unsalted butter, cold and cut into 1/2-inch cubes
3 ounces shortening, cold
3/4 cup ice water

Place flour and salt in a mixer bowl. Using flat beater, mix flour and salt on low speed 15 seconds. Place cubed butter and shortening in bowl. Mix on low speed 1 minute, or until mixture resembles cornmeal. Some butter lumps will remain.

With mixer on low speed, gradually add ice water. Mix just until water is absorbed. Do not over work the dough. Scoop dough onto counter. Gently press into a large ball and cut in to two pieces. Flatten each piece into a rounded disk. Place the disks in a zip-top bag. Refrigerate 30 minutes.

Remove dough from refrigerator. Lightly dust each piece with flour. Flatten gently. Using a floured rolling pin, roll lightly with quick strokes from center out to edge in all directions. Form a circle 13 to 14 inches in diameter and about 1/8 inch thick. Bottom crust will be slightly thicker. Shift or turn dough occasionally to prevent sticking. If edges split, pinch cracks together.

BOTTOM CRUST: Fold each piece of rolled dough in half. For iron skillet apple pie, proceed with instructions in the recipe. For other applications, such as chicken pot pie, carefully place in ungreased 12-inch skillet with fold at center. Unfold and fit carefully into skillet, being careful not to leave any air spaces between skillet and dough. Place contents over bottom crust, being careful not to overfill.

TOP CRUST: With top crust folded in half, make several small slits with a knife near center fold to allow steam to vent during baking. Brush outer rim of bottom crust with water. Lay top crust over filling with fold at center. Unfold and press edges of two crusts together lightly. Trim overhanging edges of dough by with a knife or spatula. Seal pie by pressing edges of crust firmly together or crimping with thumb and forefinger to make a fluted edge.

Brush top crust with 1 whisked egg. On fruit pies, sprinkle 2 tablespoons sugar evenly over crust. Do not use sugar on savory pies. Bake pie as directed in recipe. Place pan under skillet to catch syrup spills. Watch skillet pie in oven as it requires longer baking than a traditional 9-inch pie. If needed, shield crust with foil sheet in last 15 to 30 minutes to prevent excessive browning.

Iron skillet apple pie in a 12-inch pan

I presented my version of the iron skillet apple pie last night to a potluck Thanksgiving dinner. The pie was baked in a large cast iron skillet. We arrived just as the last diners we filling their plates. I placed the pie among the other desserts and cut it into 12 servings.

I thought that the crust was the best part of the pie! The crisp crust, both top and bottom, complimented the soft and sweet apples. A clean skillet was all that we brought home. Word of mouth quickly brought diners to the dessert table to try a slice of pie.

Enjoy ...

Iron skillet apple pie in a 12-inch pan will feed a crowd. 
IRON SKILLET APPLE PIE IN A 12-INCH PAN

This is an enlarged version of an on-line recipe MyRecipes.com, from the September 2011 issue of Southern Living. Amounts have been adjusted to fit inside a larger cast iron skillet. I used an 11-1/2-inch Wagner skillet for the test run.

Purchase 5 large Braeburn and 5 large Granny Smith apples. Yield will be approximately 4 pounds, give or take, of apple slices after peeling, coring and slicing. You may need to prepare your own pie dough since the skillet is several inches larger than a 9-inch pie pan. Or you can use my recipe.

2-1/2 pounds Braeburn apples
2-1/2 pounds Granny Smith apples
2 teaspoons ground cinnamon
2 cups sugar
Pinch salt
6 ounces unsalted butter
1-1/2 cups packed light brown sugar
2 pounds 4 ounces pie dough, rolled into 2 pieces
1 egg
2 tablespoons sugar

Pre-heat oven to 350 degrees. Peel and core apples. Cut into 1/2-inch wedges. Toss with cinnamon and 2 cups sugar. In a 12-inch cast iron skillet, melt butter over medium heat. Add brown sugar. Cook, stirring constantly, 1 to 2 minutes, until sugar is dissolved. Do not caramelize. Remove from heat.

Place 1 pie crust over brown sugar mixture. Spoon apples over bottom pie crust. Top with second pie crust (with several slits cut in to vent steam). Pinch crusts to seal. Whisk egg. Brush top crust with egg wash. Sprinkle 2 tablespoons sugar over crust.

Bake for 1 hour 15 minutes to 1 hour 30 minutes or until golden brown and bubbly. Place pan under skillet to catch syrup spills. Shield crust with foil sheet in last 15 to 30 minutes to prevent excessive browning. Cool before serving. Serves 12.

Tuesday, November 11, 2014

Veteran's Day tribute: Navy

ARABIAN GULF (Oct. 24, 2014) -- Culinary Specialist 3rd Class Alkyshia McDonald, from Palm Beach, Fla., prepares food aboard the aircraft carrier USS George H.W. Bush (CVN 77).
ARABIAN GULF (Oct. 24, 2014) Culinary Specialist Seaman Apprentice Patrick Hunn, from Slaton, Texas, left, and Culinary Specialist Seaman Robert Wren, from Kernersville, N.C., prepare food aboard the aircraft carrier USS George H.W.  Bush (CVN 77).

USS George H.W. Bush is supporting maritime security operations and theater security cooperation efforts in the U.S. 5th Fleet area of responsibility. U.S. Navy photo by Mass Communication Specialist 3rd Class Brian Stephens.

Veteran's Day tribute: Coast Guard

Petty Officer 3rd Class Arianne Gunn gracefully decorates the birthday cake the Coast Guard Cutter Polar Star's galley baked in celebration of several crew members, who celebrated their birthdays aboard the ship's two-week shakedown voyage through Washington state's Puget Sound, April 3, 2013. The food service specialists aboard Polar Star work tirelessly doing their part to ensure the crew retains a high level of moral. U.S. Coast Guard photos by Petty Officer 3rd Class Jordan Akiyama.

Veteran's Day tribute: Marine Corps

MARINE CORPS AIR STATION MIRAMAR, Calif. (Aug 26, 2014) - - Lance Cpl. Timothy McKnight, a food service technician at Gonzales Hall, adds peppers to potatoes for the breakfast line before an inspection for the Best of the West competition aboard Marine Corps Air Station Miramar, Calif., Aug. 26. The air station’s mess hall competed in and won the competition in fiscal years 2012, 2013, 2014, and hopes to regain the title for 2015. Photo by Cpl. Christopher Johns.

Veteran's Day tribute: Army

Sgt. Thao Vangsouan, Division Headquarters and Headquarters Battalion, 1st Infantry Division, shows Pfc. Jacques Herrington, Headquarters and Headquarters Company, 705th Military Police Battalion, Fort Leavenworth, Kan., how to properly filet a Dover sole during a cook off as part of the Big Red One's Food Service NCO and Soldier of the Quarter Competition. Five Soldiers participated in a cook off, demonstrating their cooking and presentation skills, and were required to make a meal using Dover sole, bacon, leeks and rice. Competitors took a written test after the cook off and attended a board Thursday, Dec. 8, 2011. Photo by Amanda Kim Stairrett, 1st Inf. Div. Public Affairs.

Veteran's Day tribute: Air Force

Certified Master Chef James Hanyzeski and Airmen of the 374th Force Support Squadron take photos of the healthy breakfast alternatives they made July 15, 2014, on Yokota Air Base, Japan. Hanyzeski's visit provided hands-on training to services Airmen as part of the Healthy Base Initiative. U.S. Air Force photo by Airman 1st Class David Danford.

Thursday, November 06, 2014

Throwback Thursday: Lightening cake with pears and almonds

I posted this recipe from a cookbook of my grandmother's in September 2005.

I suspect that this recipe was called lightning cake because it’s made “lightning fast.” The original cake is a brownie-like dessert with a sugar-cinnamon topping. I adapted it by folding diced Bartlett pears and sliced almonds into the batter. And a used a crumb topping made from oatmeal, flour and sugar.

All meals at grandma Bertha Karoly’s Mill Valley home were good. We often enjoyed a Sunday afternoon roast leg of lamb with roasted potatoes and German red cabbage. Although, I don’t remember many desserts, I’m certain I ate any number of sweets at her table.

This recipe is adapted from Any One Can Bake, published by Royal Baking Powder Company in 1927. My grandmother purchased this book on April 18, 1927 when my father was 17 months old.

LIGHTNING CAKE WITH PEARS AND ALMONDS

Use your favorite crumb topping for the cake. My favorite recipe follows.

1/2 cup milk
3 eggs
1/2 cup melted butter
1-1/2 teaspoon vanilla
1-1/2 cups sugar
1.2 teaspoon salt
3 cups all-purpose flour
1 tablespoon baking powder
2 Bartlett pears, peeled, stemmed and diced
1/2 cup sliced almonds
2 cups crumb topping (recipe follows)

Pre-heat a 12-inch Dutch oven with 9 coals underneath and 18 coals on the lid. Combine milk, eggs, sugar and vanilla in a large bowl. Sift flour, salt and baking powder in a bowl. Add dry ingredients to liquid ingredients and mix thoroughly. Dough will be stiff. Fold in pears and almonds.

Lightly oil Dutch oven. Spread dough in Dutch oven. Sprinkle crumb topping evenly over cake dough. Bake at 375 degrees for 50 minutes or until a toothpick inserted in the center comes out clean. Cool; cut into 12 to 18 servings.

CRUMB TOPPING

1-1/2 cups all-purpose flour
3/4 cup packed brown sugar
1/2 cup sugar
1/4 teaspoon salt
1 teaspoon cinnamon
1-1/2 cups old fashion rolled oats
1/2 cup softened butter, cut into pieces

Combine flour, sugars, salt, cinnamon and oats in a medium bowl. Rub in the butter with your finger tips until it’s well blended and the mixture crumbles coarsely. Refrigerate until needed. Makes about 1 quart.

Tuesday, November 04, 2014

Hot sauce update

Last Saturday I prepared a new batch of hot sauce. This time I multiplied my original recipe by two and one-half times. Fresno chilies stood in for Serrano chilies, mainly because I couldn't locate red Serrano chilies locally. And I even managed to rub capsicum juices in my left eye!

I tasted the hot sauce on Sunday. Coming away with a good, strong medium heat profile, I thought the hot sauce has a lot of potential. My hope is that the sauce will mellow out as it ferments in the refrigerator.

HOT SAUCE, VERSION 2

Weigh about 1 pound chilies at the market if you don't have a scale at home. That will yield around 10 ounces chili flesh. Add just enough water to barely cover the chilies and onions in the skillet. You can locate ground arbol and pequin chiles at MexGrocer.com.

2-1/2 tablespoons vegetable oil
10 ounces red Fresno, jalapeno or Serrano chili peppers, stemmed and sliced
7-1/2 ounces sliced onion
1 ounce minced garlic
1-1/2 teaspoons kosher salt
2 to 3 cups water
1 tablespoon ground arbol chili pepper
1 tablespoon ground pequin chili pepper
1 cup distilled white vinegar

Heat oil in a large heavy skillet over medium-high heat. Add chilies, garlic, onion and salt. Saute 3 minutes. Add water and continue to cook, stirring occasionally, for 20 to 30 minutes, or until peppers are very soft and most of the liquid has evaporated. Ventilate room with exhaust fan if necessary. Stir in ground arbol and pequin chilies.

Puree mixture in a food processor or blender until smooth. With motor running, add vinegar in a steady stream. Adjust seasoning with additional salt if needed. Strain sauce through a fine-mesh strainer, then transfer to sterilized half-pint canning jars. Cover with air-tight lids. Age 14 days in refrigerator before using.

Store in the refrigerator for up to 6 months. This recipe prepares 4 cups hot sauce.

Tuesday, October 28, 2014

Beginning my hot sauce journey

For the last five years I have been working on a variety of fresh and cooked salsas. I posted a series of articles titled, "My salsa journey," in February 2011. (Read the articles here, here and here.) Salsa ranchera is the most popular salsa recipe on 'Round the Chuckbox. Since that time I have featured the salsas at several jobs, including two summers at Oakland Feather River Camp in Quincy, California.

I'm now ready to explorer scratch-made hot sauce. My original thought was to duplicate Cholula brand hot sauce, which is my favorite commercial hot pepper sauce. After a brief Internet recipe search, I changed my focus. I figured that it would be wiser to develop a sauce than to attempt to replicate a commercial sauce. Commercial producers use a variety of production techniques that aren't available to the small producer.

I produced my first batch over two weeks ago. I tasted that hot pepper sauce after a 14-day ferment in the refrigerator. While I'm not entirely satisfied with the flavor, I can accept the hot sauce for now. The texture and spiciness are right on. However, I don't enjoy the sharp tingle from the vinegar. While acid is an essential ingredient of hot sauce, one cup of vinegar is overkill.

My next batch will continue to feature serrano chili peppers. They add a base of flavor to the hot sauce. I'll also hold onto the ground arbol chili pepper. I want to try adding ground pequin chili pepper and reducing the vinegar to less than one-half cup. The pequin chili pepper should compliment the arbol. I look forward to trying my next batch.

SERRANO HOT SAUCE

This recipe is adapted from chef Emeril Lagasse. I used his Food Network recipe as a starting point. I added ground arbol chili pepper for depth of flavor and to boost the rich color. As explained above, my next batch will reduce the amount of vinegar and introduce ground pequin chilies.

1 tablespoon canola oil
4 ounces serrano chili peppers, stemmed and sliced (about 20 chilies)
1-1/2 ounces minced garlic
3 ounces sliced onion (1/2 medium onion)
3/4 teaspoon kosher salt
2 cups water
1 teaspoon ground arbol chili pepper
1 cup distilled white vinegar

Heat oil in a large heavy skillet over medium-high heat. Add serrano chilies, garlic, onion and salt. Saute 3 minutes. Add he water and continue to cook, stirring occasionally, for 20 to 30 minutes, or until peppers are very soft and most of the liquid has evaporated. Ventilate the room with exhaust fan if necessary. Stir in ground arbol chili.

Puree mixture in a food processor or blender until smooth. With the motor running, add vinegar in a steady stream. Adjust seasoning with additional salt if needed. Strain sauce through a fine-mesh strainer, then transfer to sterilized half-pint canning jars. Cover with air-tight lids. Age 14 days in refrigerator before using.

Store in the refrigerator for up to 6 months. This recipe prepares 1-3/4 to 2 cups hot sauce.

Thursday, October 23, 2014

Throwback Thursday: Lots of Sausage Gravy

David passed this recipe on in the wake of Hurricane Katrina in September 2005. Please remember that references to hurricane relief are dated and no longer valid.

As announced in the IDOS Forums, Dave Herzog has accepted a challenge to bake 900 biscuits in a 22-inch MACA Dutch oven. And what’s a biscuit without gravy? Dave’s recipe for six gallons of gravy is posted below. You have to watch Dave in action at the Iron Chef Challenge for Hurricane Victims to learn his biscuit secret.

SAUSAGE GRAVY FOR A 22-INCHER

The recipe for Emeril’s essence is available on Emerils.com.

5 pounds breakfast sausage
5 pounds bacon, diced
2 pounds yellow onions, diced
3/4 cup minced garlic or 1/4 cup granulated garlic
2 tablespoons red pepper flakes
2 tablespoons black pepper
3 tablespoons kosher salt
2 tablespoons Emeril’s essence
5 cups all purpose flour
4 pounds unsalted butter
5-6 gallons whole milk, cool, not fridge cold.

Preheat a MACA 22-inch Dutch oven with about 35 coals underneath. Add the sausage and bacon together and brown until bacon is golden. Stir in onions, garlic, red and black pepper, salt and essence. Sauté until onions just turn opaque.

Add butter. When melted, stir in flour and cook for about 5 minutes, until flour turns light brown. Add milk, 1 gallon at a time, allowing gravy to thicken, up to 5 gallons. If gravy is too thick, add additional milk a little at a time to thin.

Serve over anything you want! Serves 200 to 250, depending on serving size.

Sunday, October 19, 2014

Culinary arrest

This brings to mind an incident during Seabee Operation Bearing Duel in the summer of 1994 at Fort Hunter-Leggett. One afternoon in the scorching heat of the Coast Range, Chief Bob Voigt and I observed an intruder running past the Seventeenth Seabees' galley tent. Bob and I quickly tackled him.

As we marched the intruder to the nearby prisoner of war enclosure, someone yelled, "Blindfold him!" Bob quickly pulled his sweaty t-shirt off his torso and fashioned a blindfold around the runner's eyes. The role-playing Marine wrenched.

We didn't want his to observe the battalion command post and other key facilities in the camp. Once he was turned over to the proper authorities, Bob recovered his t-shirt, apologized and retreated to the safety of the battalion mess. The Opposition Force Marines left the cooks alone for the remainder of the exercise!

Culinary Specialist 3rd Class James C. Tyler, right,from Huntington Beach, Calif., simulates arresting Personnel Specialist 2nd Class Justin O. Gallego, from San Antonio, during a visit, board, search, and seizure exercise on the Arleigh Burke-class guided-missile destroyer USS Dewey (DDG 105). Dewey is deployed as part of the Carl Vinson Carrier Strike Group supporting maritime security operations, strike operations in Iraq and Syria as directed, and theater security cooperation efforts in the U.S. 5th Fleet area of responsibility.

U.S. Navy photo by Mass Communication Specialist 3rd Class James Vazquez.

Thursday, October 16, 2014

Pork tenderloin and apples with cider glaze

Apple cider glaze is amazingly good with pork roast, pork chops and chicken breast. Most recipes direct you to begin with fresh apple cider, then reduce it in a heavy skillet under high heat. A sweetener, such as maple syrup or honey, blends well with the succulent flesh of the meat. Vinegar or wine, mustard and herbs balance the flavor.

Last year I started reducing fresh unfiltered apple cider until it had a syrupy consistency. I've added it to homemade hotcake syrup, roasted Brussels sproutsapple mahogany sauce and apple glaze. I typically purchase the cider in half-gallon bottles and reduce it over high heat to one-quarter its beginning volume (see recipe below). Apple cider is at its peak in the fall.

PORK TENDERLOIN AND APPLES WITH CIDER GLAZE

The recipe for apple mahogany sauce lists several ideas for a sauce such as this one. You can substitute pork chops or chicken breasts for the tenderloin. Saute the meat in a cast iron skillet or grill over hot coals as desired. Brush sauce on the meat during the couple minutes of cooking.

2-1/2 pounds pork tenderloin
Kosher salt and ground black pepper, to taste
2 tablespoons chopped fresh rosemary
2 tablespoons chopped fresh thyme
1 tablespoon unsalted butter
1-1/2 cups apple cider reduction (click for recipe)
2 medium Granny Smith apples, peeled, cored and sliced, 3/4-inch thick
1 tablespoon cider vinegar
2 teaspoons Dijon mustard

Rinse pork and pat dry. Season with salt and pepper. Coat all sides with thyme and rosemary. Melt butter in a 12-inch Dutch oven over medium-high heat. Add pork and cook until browned on all sides.

Place lid on oven and arrange 10 charcoal briquettes under and 19 on lid (heat for 400 degrees F.). Cook 20 to 25 minutes until pork reaches 145 degrees on an instant-read thermometer. Note size and shape will influence cooking time. Place pork on a platter and rest 10 minutes. Pour off any moisture (and reserve for future application, if desired).

Combine cider reduction, vinegar and mustard. Add apples and cider mixture to Dutch oven. Cook over medium heat until apples are al dente and sauce has thickened to glaze consistency. If needed, thin glaze with a small amount (1 tablespoon or less) to apple cider or reserved moisture. Meanwhile, slice pork 1/2-inch thick. Spoon sauce over pork and place apples on either side. If desired, sliced pork can be served from Dutch oven (as pictured).

Makes 6 to 8 servings. Serve with roasted Brussels sprouts and rice pilaf.

Apple cider reduction

Apple cider reduction is used in several recipes at 'Round the chuckbox, as follows:
I use Barsotti organic apple cider, a local El Dorado County, California, company that presses fresh apples at their Apple Hill plant. Barsotti juices can be purchased at many Northern California markets, co-ops and big-box stores, plus a number a local wineries and Apple Hill ranches.

APPLE CIDER REDUCTION

8 cups unfiltered apple cider

Boil apple cider over high heat until reduced to one-fourth its beginning volume, stirring occasionally. Skim surface build up as it collects. Allow as little as 45 minutes and as long as two hours to complete the reduction. The quantity being reduced, size and shape of the saucepan and heat setting determine how long it takes. Freeze leftover cider reduction or use within seven days.

Thursday, October 09, 2014

Throwback Thursday: Frank's killer breakfast

Today's throwback blends two posts from August 2005. Frank and his lovely wife, Ann, have since moved to Boise, Idaho, and have become grandparents. Debbie and I need to travel north and hold a reunion camping trip.

All camp cooks savor a day off from the kitchen. Yesterday was my day off. My duty was to make coffee, lounge beside the campfire and dish out advice. A buddy handled all culinary tasks.
Jacob and I went camping with Frank and Hunter Friday evening.

We spent the night at Wench Creek Campground on the east shore of Union Valley Reservoir in Eldorado National Forest. Camping is pleasant now that the heat wave has subsided in the Sacramento Valley. Friday’s high was about 75 degrees. The overnight low was 50.

Frank prepared a killer breakfast for us. He got up about 45 minutes ahead of me Saturday morning. Frank had a good bed of coals for cooking by the time I got up at 6:30 a.m.
Frank’s breakfast is hearty -- an epicurean contradiction -- good tasting and not-so-good for you, all in one setting. A carpenter and general contractor by trade, he cooked  breakfast in two large cast iron skillets, each course in succession. He normally cooks breakfast in one skillet. When Frank told he about breakfast plans last week, I threw in an extra skillet.

Bacon and sausage patties and links inaugurated the morning meat-egg-potatoes fest. Then in quick succession, Frank fried potatoes to a crisp in the bacon fat and scrambled eggs, again in bacon fat. Lastly he cooked gravy from more bacon grease, flour and milk.

Build a roaring cookfire. I follow two rules: First, build a fire that’s twice to three times the size that you think you need. In pine and cedar country it’s easy to underestimate the amount of wood.

The second rule is equally important. Keep the fire going and avoid the tendency to let it burn out once you start cooking. Otherwise Murphy’s Law steps in and kills any further plans for breakfast.

"I love the smell of bacon in the morning."
Use this time to dice the potatoes, crack and whisk the eggs and form sausage patties. The fire will take 30 to 45 minutes to burn down to a nice bed of coals. Don’t forget to add fresh wood as the fire burns.

With the fire ready, it’s time to cook breakfast. I said that Frank cooks each course in succession. The bacon goes into the first pre-heated skillet.

Push the bacon aside if you’re using a large skillet (14 inches or larger) and add sausage patties to the skillet. You may want to cook the bacon and sausage in batches if you’re using a smaller skillet. Once browned to the desire color, the move the meat waiting plate covered with a double layer of paper towel. (I’m not sure why the paper towels are necessary—you’re going consume enough grease to worry your cardiologist!)

Don’t discard any of the rendered bacon fat. Frank divides it between three dishes (health warnings aside). The potatoes, eggs and gravy all receive generous portions of the swine nectar.

You're allowed to break one egg yoke over a campfire.
A pot-full of diced potatoes are next poured into the meat skillet. Watch for splattering grease! Crumble a few bacon strips and sausage patties into the potatoes if desired.

Fifteen to 20 minutes over a hot fire will crisp the potatoes to a nice golden color. Move the skillet to a cooler spot over the fire. Stir the potatoes occasionally to keep them from burning.

At this point, turn your attention to the scrambled eggs. It’s important to pre-heat the egg skillet over a medium fire. Otherwise, you’ll burn the eggs and ruin breakfast.

Slow cooking is best for the eggs. Stick around once you pour the whipped eggs into the skillet. They require constant stirring until cooked. Frank never left the fire until the eggs were cooked.

The secret to moist scrambled eggs is to cook them over low heat. Remove the eggs when they’re still moisture seeping out. Remember, overcooked eggs in the skillet become overcooked eggs on the plate.

Place the eggs into a waiting bowl, cover with a sheet of foil and wipe the skillet clean. The pour the remaining bacon fat into the skillet and return it to medium heat. Next place enough flour into the skillet to absorb the fat. (You’ll have to judge quantities for yourself.)

Stir the roux for a few minutes over a low flame, being careful not to brown it. The last step before breakfast is to pour three or four cups of milk into the gravy skillet. Stir constantly for about 10 minutes to work the lumps out. Once the gravy thickens, you’re ready to eat.

Give the potatoes a quick stir just before serving. Warm potatoes, eggs and gravy are a must. And pour gravy over the potatoes and eggs. After all, gravy is the culinary elixir that brings the whole meal together.

Wednesday, October 08, 2014

Baking artisan bread in camp

In the nearly two years since I first talked about artisan no-knead bread, I have baked this bread numerous times, based on my standard recipe. I currently have a batch of dough in the refrigerator at home. While camping at Upper Blue Lake last month, I was able to record notes on my baking process in camp.

These instructions are for use in temperate weather. You need to gauge weather conditions and determine how ambient temperature, humidity and wind conditions will influence internal baking temperature and cooking time. Flexibility is the key. As a rule, coals burn hotter in lower humidity and windier conditions. Cooler, wet weather reduces the heating potential of the coals.

For any Dutch oven recipe on 'Round the Chuckbox, the number of coals are calculated for average summer conditions in the Western United States. You need to experiment and learn how to adapt my instructions to seasonal weather conditions where you live and camp. Use my instructions as a starting point. Experiment at home before taking the the bread into camp to bake.

Light campfire. While hardwood is the ideal choice of wood, I usually cook with pine, cedar and fir in the Sierra Nevada. As a rule, I build a fire that's two to three times the size in volume than the Dutch oven. The fire must produce sufficient coals to heat the Dutch oven for one hour. I continue to add wood to the fire once I remove the first coals to have a ready source of fresh coals.
When you desire to bake a loaf of bread, dust surface of chilled dough with flour. Pull a 16- to 24-ounce piece dough out and cut with a knife or kitchen sears. Gently stretch dough by pulling it down to the bottom, turning the dough one-quarter turn each fold. If desired, slash load before setting it in the Dutch oven, as I did here. This dough was made with 20 percent whole wheat flour.
Gentle place the loaf inside a 12-inch deep-style camp oven. Slash the loaf if not done earlier. Place the lid on the oven. Set in shade on a warm day. On a cool day, set in a sunny location. Proof in oven for 40 minutes.
Coals are almost ready. You won't see much noticeable rise during proofing. After the 40-minute fermentation period, the load will be ready for baking. Remove the lid, splash about 1 tablespoon cold water over the loaf and replace the lid.
Hang the Dutch oven about 18 inches above the bed of coals. Shovel a solid bed of coals on the lid. Bake 15 minutes, then lift the lid and quickly check bread. If it's browning properly, remove the coals from the center of the lid. I've found that this is necessary to ensure the loaf bakes without burning. You need coals for 450 degrees (10 under oven and 23 on lid) when using charcoal briquettes. 
Continue baking for an additional 30 to 40 minutes. You're looking for a nicely browned crust and firm to the touch Remove coals and cool. 

Friday, October 03, 2014

Meet the camp cook

You may have noticed the new menu bar just under the masthead. It currently lets you quickly access the homepage and contact information for 'Round the Chuckbox. I just posted a page titled, "Meet the camp cook." In the future, I plan to add one or two more links to the menu bar, including a description of my services as a camp cook. Enjoy ...

Therefore, whether you eat or drink, or
whatever you do, do all to the glory of God”
1 Corinthians 10:31

Sauteing fajitas at Upper Blue Lake, Eldorado National Forest, Calif.
I've long envisioned myself a nineteenth century camp cook. I can see myself cooking for an El Dorado County ranch as it drove cattle drive to summer pasture in the Lake Tahoe basin each spring. Everything about the job appeals to me: family atmosphere, outdoors and good old country cooking.

Chuckwagon cookin' in the rain
Yet, I've one problem: I was born 50 years too late. And I grew up in Fresno and Bakersfield. Those who know me will tell you that I'm a city boy who’s loved the Sierra Nevada high country ever since his father carried him to Peter Grub Hut in 1954.

I’ve only ridden a horse three times in the last forty years and have never driven a chuckwagon or fed a beef-centered diet to cowboys on the Western prairie. Nor have I piled flapjacks onto chipped enamel plates meant for hungry Sierra Nevada lumbermen or slopped biscuits and gravy on trays for a railroad gang.

At this point in my forty-year cooking career I could never call myself a “wagon cook.” While I've cooked in the shadow of one or two chuckwagons, it takes a special breed of cook to wrangle pots like Ramon F. Adam's “Sultan of the Skillets.”

The first time I cooked near a chuckwagon was at Leonard “Wagon Cook” Sander's 50th birthday bash in December 2002. Since that experience – cooking Dutch oven scalloped potatoes and baking bread in driving rain on a porch – I’ve only had the honor to view a couple other chuckwagons.

Seabee cooks of NMCB-17
I prefer Seabee Cook, a moniker earned after years of service in the U.S. Navy Construction Battalions. Like the wagon cook, who was at home on the range, feeding Seabees was special skill developed over a two-decade-long career in the Naval Reserves. I was known as the “field mess guru” during my tour with the 3rd Naval Construction Brigade and Pacific Fleet Seabees.

My large chuckbox, stained in a reddish hue and built to impeccable detail, draws folks to my camp. Since 2001, it has been the signature item in my camp cooking reparatory. Like the back end of the chuckwagon, the chuckbox has become the center point of my camp kitchen.

While the label of wagon cook may be something to aspire, I can only accept the moniker “chuckbox cook” (somehow “box cook” doesn't run off the tongue like Seabee Cook). I'll certainly answer to camp cook any day of the week. The title has an unpretentious ring to it. It's as if you’ve described me as a cook who harkens back to a simpler time, one born in the wrong century.

The chuckbox
For years I compensated on our annual camping trek to the Sierra Nevada Mountains. I lived out a week-long fantasy each summer. You'd think I was fixin’ to feed a crowd of hungry hunters and fishermen. My outfit carried enough cookware to feed a baker's dozen or more. Give me a canvas A-framed cook-tent, a swamper and hungry outdoorsmen that appreciate good old camp grub, and I'm in the right setting.

In the end, my life will have spanned the back end of one century and front end of another, far removed from the glory days of the chuckwagon. As a retiree, I’m free from the day-to-day drudgery of a career. I now can pursue my life-long ambition to be a camp cook.

Each spring, my lovely bride and I journey to Oakland Feather River Camp in Quincy, Calif., where I’m the camp cook and chef for three and one-half months. Around the time I tire of 12-hour days and six-day work weeks, we return home to eight months of relaxation. I’m then free to cook for the El Dorado Western Railroad or camp at my leisure.

Artisan bread in camp
I bake bread in cast iron camp ovens just to give it away. While my camp may not always lodge under canvas, family and friends benefit from camp cuisine. Those that eat vittles ‘round the chuckbox share in my forty-year quest to replicate the life of a camp cook.

Welcome to my camp. From one camp cook to another, enjoy ‘Round the Chuckbox, where we cook delicious camp meals in frying pan, Dutch oven and grill. Cook with passion and “Come an’ Get It” will draw hungry diners to your chuckbox. Give thanks to God, settle into flavorsome grub and take pleasure in good companions.

MSCS Steven C. Karoly, USN, Retired
Camp cook and editor of ‘Round the Chuckbox

Thursday, October 02, 2014

Throwback Thursday: Recipe Use Suggestions

I was working on my 14th notebook when I wrote this article in May 2005. Since that time, my use of journals has risen sharply from one or two each year to four or five. No. 47 carried me through the end of summer camp season in August. Today, I'm 83 pages into journal no. 48. 

Chefs use cookbooks for a variety of reasons. Most of my professional acquaintances use cookbooks to garner fresh ideas for their kitchens. They don’t view the recipe as a hard-fast formula. Instead, chefs use them as a starting point for their next creation.

These recipes are written to my tastes. They're here to give you an idea of how I cook in camp. It's up to you to try the recipes and to adapt them to your likes and dislikes. There's plenty of room for change.

Use the recipes as a guide. Experiment and try different approaches. Alter a few ingredients if some are not to your liking. For example: I can’t stand celery. The stuff gags me. I can’t get past its stringiness and rough texture. But there are recipes that benefit from its nutty flavor. Unless I can strain it out of the dish out of the dish, I add whole stalks and fish them out later.

Here are a few tips to get you started:
  • Before your camping trip, select several recipes and test them at home first. Unless you’re already an experienced camp cook, it’s wise to try each recipe in a familiar kitchen. Once you've figured out each recipe’s idiosyncrasies, you’ll be better equipped to prepare it in camp.
  • Read each recipe twice. With a little practice, you’ll soon visualize the finished product in your mind. This is valuable to see if it’s the dish that you want. It’ll also aid in preparing your grub list and set the instructions in your mind so you don’t have to keep referring back to cookbook while you’re cooking.
  • Gather all ingredients and cookware before starting. A bowl full of flour, salt and spices is useless when an empty can reminds you that you used the last of the baking powder last week. Sometimes, you can make a quick substitution. You can, for example, substitute baking soda with an acid for baking powder in most recipes. But you’re stuck if you discover that you didn't pack the baking soda.
  • Take notes. I keep a camping journal. And since food has been my professional life, you might expect to find more notes about our camp meals than other topics. Even if you just use the journal to chronicle you cooking adventures, it’s a valuable tool. Use a journal to record: what works and what doesn't; what you liked and didn't like about a dish; ideas to improve a dish’s flavor; and creative menus for future meals. And, if you decide to write a cookbook, you’ll already have a notebook (I’m on number 14) bristling with recipes and stories of your culinary adventures.

Monday, September 29, 2014

How to dice an onion

In my culinary career I have used two or three onion dicing techniques. The method I used for the first 20 years of my career differed from the conventional technique. Yet it worked most of the time. I now use a method similar to the one demonstrated by Sporting Chef Scott Laysath.


YouTube description: "Published on Aug 28, 2014. Scott Leysath demonstrates the fast and easy way to dice an onion."

Wednesday, September 24, 2014

New masthead image

For the first time in nearly 10 years, 'Round the Chuckbox has a masthead image. The photograph was taken in Eldorado National Forest during one of my many campfires up Iron Mountain Road in January 2009.

I originally developed this image last year to use as a business card. As shot, the Dutch oven was on the left side. I cannot remember the reason that I flipped the image, although I'm certain it was for some obscure artistic reason. 
Here's a peak Inside the Dutch oven. My cooking journal didn't reveal any details about this pizza. It looks like a take-and-bake pizza from a local shop.

Thursday, September 18, 2014

Lobster, a sea-going favorite

Lobster was a favorite of the crew when I sailed on the USS Stein (DE-1065) in the mid-1970s. We baked it with butter and lemon, grilled over hot coals it on the flight deck and diced leftovers for salad. Our chef (a chief petty officer) was reprimanded for making an unauthorized purchase of lobster in Australia. And yours truly felt the wrath of the chief for noshing on leftovers after a surf and turf barbecue. I suspect lobster remains a seagoing favorite in the US Navy.

PACIFIC OCEAN (Aug. 31, 2014) -- Culinary Specialist 1st Class Marco A. Coll-Dimayo, left, from Rockford, Ill., and Culinary Specialist Seaman Apprentice Dontae R. Flint, from Suffolk, Va., prepare dinner for the crew aboard the guided-missile destroyer USS Dewey (DDG 105). Dewey is underway in the U.S. 3rd Fleet area of responsibility as part of the Carl Vinson Carrier Strike Group.

U.S. Navy photo by Mass Communication Specialist 3rd Class James Vazquez.

Throwback Thursday: Spinach and mushroom lasagna roll-ups

This recipe for rolled single serving lasagna was originally posted in May 2005. Interestingly, I haven't prepared the dish since. My plan was to prepare it at a Dutch oven cookoff, but plans changed.

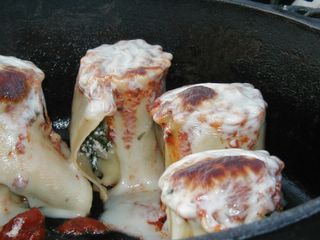
I learned that it's best to leave the last inch or so of lasagna noodle free of filling. The starch in the pasta will bond so the roll-ups don't fall apart as two did for me during the test run. I'll lay them on their side next time I bake the lasagna roll-ups in the Dutch oven.
SPINACH AND MUSHROOM LASAGNA ROLL-UPS WITH MARINARA SAUCE

16 cremini caps, cleaned and finely chopped
1 small onion, finely chopped
2 cloves garlic, minced
2 tablespoons extra-virgin olive oil
1 (10-ounce) package frozen chopped spinach, defrosted and squeezed dry
Salt and pepper
1/4 teaspoon ground nutmeg
2 cups part skim ricotta
8 curly edge lasagna noodles, cooked to al dente (12 to 14 minutes)
2 cups prepared marinara sauce
8 slices mozzarella cheese

In a 10-inch Dutch oven over moderate heat, saute mushrooms, chopped onions, and garlic in oil until mushrooms give off their juices and darken and onions are tender, about 7 or 8 minutes. Season with salt and pepper; the salt will help draw water out of the vegetables as they cook.

Add dry chopped spinach to the pan and heat through for 1 minute. Adjust seasonings with salt, pepper, and a little nutmeg. Add ricotta and stir into mixture to heat cheese through, 1 minute longer. Remove pan from heat but leave in the warm skillet. Place lid on Dutch oven and place about 5 hot coals on lid to keep warm.

Heat marinara sauce in a small pan over moderate heat. Place cooked lasagna noodles on a large work surface or cutting board. Spread lasagna noodles with a layer of spinach-mushroom filling. Leave the last inch of surface free of filling. Roll up pasta and arrange the 8 bundles in a 12-inch Dutch oven. Pour warm sauce over roll-ups and top with mozzarella.

Place lid on Dutch oven and bake at 350-degrees (17 coals on lid and 8 under oven) for 15 minutes or until heated through. At the last minute place about 10 extra coals on lid. Watch closely and remove from heat when cheese starts to brown.

Wednesday, September 17, 2014

20-inch Lodge skillet at Upper Blue Lake

Debbie and I returned from our annual camping trip to Upper Blue Lake with my sister and husband. This year one of our daughters and granddaughters joined us, along with one of the wranglers from Oakland Camp. We enjoyed six days of sun, wind and cool mountain air.

This is the first article from the trip. As I coordinated the menu with my sister, my thought was to prepare several meals in my "new" 20-inch Lodge skillet (model 20SK). I found the skillet at an Eagle Point, Oregon, antique shop last April. Newly re-seasoned, I used the large skillet to cook four meals for the family. I wanted to cook as many meals as possible to hasten the build-up of patina.

Enjoy these photos.

The Lodge model 20SK skillet awaits dinner Thursday evening. I use the large World War II Navy surplus coffee boiler to heat water for washing dishes. The boiler was manufactured by Vollrath.
Spicy Japanese buckwheat noodles (called soba noodles) was on the menu Thursday evening. The sauce was made from sesame oil, rice vinegar, soy sauce and chili garlic sauce. Two (9.5-ounce) packages soba noodles and two pounds shrimp were used.
I fried 1-1/2 pounds thick sliced bacon for breakfast Friday morning. The small pot holds syrup for hotcakes.
Oat blueberry hotcakes were cooked in the skillet. The batter ran until it set in the less than level skillet 
To make the hotcake batter, I doubled my families traditional hotcake recipe, then replaced 1 cup of the flour with a cup of old fashion oats. I dropped a 6-ounce package fresh blueberries to the batter at the last minute.
Friday evening I prepared succotash with kale to accompany grilled chicken. After sauteing onion, roasted red pepper and garlic, I added a bunch of kale.
After adding two (1-pound) packages frozen whole kernel corn to the vegetables, I scooped the dish into the waiting pot. Garlic bread is warming in the foil packages to the left. My brother-in-law grilled chicken for the entree.
We used Saturday's leftover tri-tip to make fajitas for lunch Sunday. I'm seasoning the meat and vegetables with scratch-made taco seasoning.

Thursday, September 11, 2014

Throwback Thursday: Three-sided chicken, use your next campfire to roast a chicken in a Dutch oven

I wrote this article while camping in Oregon's Diamond Lake 10 years ago. It ran in the fall 2004 issue of the IDOS Dutch Oven News. It was written from the perspective of fall camping. With fall quickly approaching, why not give it a try?

Do you remember the last time you stood around a glowing fall campfire? Your backside froze in the crisp autumn air while your front roasted. To equalize the radiant energy of the campfire, you’d momentarily turn your back to the fire. But soon, your front would freeze and you’d once again turn to face the fire.

The autumn campfire gives fall campers the perfect opportunity to cook a favorite among camp dishes. So, why waist a good campfire? Prepare three-sided chicken for dinner with your next fall campfire. Like the two-sided effect of the campfire, a whole chicken fryer roasts on three sides (top, bottom and the side facing the fire) in a deep-model Dutch oven.

Three-sided cooking in camp

Next time you light a campfire on a fall camping adventure, clear a spot in front of the fire for a large Dutch oven. Meanwhile, slip a jacket on to keep your back warm, step over to the chuckbox and rub a fresh four to five pound chicken fryer your favorite seasoning. Once the campfire burns to a nice bed of coals, you’re ready to cook.

You’ll need a large campfire to produce sufficient coals to boost the oven to an estimated internal temperature of 375 degrees to 400 degrees F. The hot oven turns the skin to a crisp golden brown and the breast meat to a succulent juiciness when cooked just right. To evenly brown the bird, apply heat to three sides of the oven. Top, bottom and backside heat creates a bird with perfectly browned skin.

To start, burn a large campfire until a hot, glowing bed of coals remains. This’ll take 30 to 60 minutes, depending on the available wood. Then clear a shallow pit in front of the fire that’s the approximate diameter of a 12-inch Dutch oven. When ready, use a shovel to transfer hot coals to the pit and pre-heat the Dutch oven over the bed of coals.

Since you don’t want to set the chicken onto the floor of the oven, place a round baking rack or Dutch oven trivet in the oven. (Don’t have a trivet? Set the chicken on a bed of roughly chopped onion, carrot and celery.)

Place the seasoned chicken on the rack or trivet. Then place the lid on the oven and shovel a heap of coals over the Dutch oven. It’s this blast of heat that’ll radiate to the skin and transform the chicken into a delicious meal.

The problem with three-sided cooking is that the fourth side languishes without intense heat. It sets at sub-roasting temperatures while the side that faces the fire sizzles dangerously close to carbonization. To ensure even cooking, frequently turn the Dutch oven. At the same time, rotate the lid in the opposite direction. This’ll compensate for the uneven cooking of the coals.

If you haven’t done so already, add fresh firewood to the fire. Heat from the flame and the coals of the fire will radiate to the exposed side of the oven. Next time that you lift the lid, you’ll notice the skin and juices sizzling toward a simple meal.

Senses become your doneness meter

I can’t tell you how long you’ll be able to face the fire before you must turn your body. Each person comes to the campfire with his own tolerances for heat and cold. This is where you’ll have to depend on experience––both as a camper and cook.

Nor can I tell you how many coals that you’ll need to heat the oven to 375 degrees F. Just pile fresh coals on the lid of the oven as often as needed to maintain oven temperature. Experience will teach you how many coals to add to the pot.

Your senses will become your thermometer and doneness indicator. You’ll have to gauge temperature by watching the chicken cook. (Is the skin sizzling or sitting limp? Has the skin started to brown within 20 to 30 minutes?) Since you don’t want to lift the lid too often, listen for cooking sounds (can you hear the sizzle?). And as the chicken cooks, satisfying aromas will waft up to you.

All three--browning action, sizzle and aroma--work together to help you assess the bird’s progress and ultimate doneness. To gauge doneness, simply pull one leg from the body. If it gives with an effortless twist and the juices run clear, the chicken is done. It’ll take 1-1/4 to 1-1/2 hours to roast the chicken.

The key is to cook the chicken just until it’s done––not a minute longer. Overcook the bird and you’ll be rewarded with dry meat. You’ll need a quart of gravy to make the meal palatable. And remember, if it smells burnt, it is.

For a complete meal, add Yukon Gold or Klondike Rose potatoes to the pot about 45 minutes before the chicken is done. One or two small potatoes per person should do. Or cool the chicken slightly and pull the meat off of the bone. Then wrap in flour tortillas with Spanish rice, salsa and sour cream.

Plan to cook three-sided chicken on your next fall camping adventure. Follow these simple techniques and you’ll be rewarding with one of the simplest Dutch oven meals that you can produce in camp. You’ll need a jacket to warm your back and a campfire to heat your front and roast the chicken.

The softwood solution

I depend on downed softwood in the Sierra Nevada high country to build my campfires. To me, it’s a waste of precious dollars to haul oak firewood or charcoal briquettes to the campground. I instead rely of the natural resources of the forest.

I’ve learned that to be successful with softwood you must pay constant attention to your Dutch oven. Pine, fir and cedar burns quickly. As a result, you need watch your oven and replenish the coals often.

I don’t focus oven temperature when camping. I just pile hot coals from the campfire onto the oven with a gloved hand and a pair of 14-inch tongs. I use experience and the five senses to approximate the correct number of coals.

I usually build a campfire that’s four to five times the volume of the camp oven and burn it down to a glowing bed of coals. You can accomplish this in approximately 30 minutes with pine, fir and cedar.

I've learned from many poorly cooked dishes that you can never have too many campfire coals. To make sure I finish the dish with sufficient heat, I continue to feed the campfire even after I’ve heated the oven. I keep feeding the fire as long as I have a plentiful supply of firewood.

TIPS FOR A PERFECTLY ROASTED CHICKEN
  • Don’t truss the chicken. Though recommended by chefs, trussing forces the breast up into the oven’s head space. This reduces the likelihood that the chicken will brown properly.
  • Rotate the Dutch oven often. For a perfectly browned chicken, rotate the oven in increments. You have to judge how often based on experience and observation. As the skin in the first section browns, give the oven a 45- to 90-degree turn to brown the next section.
  • Think food safety. A bout of Salmonella is the last thing you want in camp. Freeze the bird at home. Then wrap it in two sheets of newsprint and enclose it in a large zipper-lock bag. And thoroughly scrub your hands in warm soapy water after handling the chicken.