
As I posted last year, I have several playlists on my YouTube channel. Playlists are a popular way to collect videos in a single location to share with the public. With some exceptions, these videos were created by others. Here are my current playlists:
Bread bakers -- I lead off my bread baker's playlist with a series by Ken Forkist, author of Flour Water Salt Yeast and owner of Ken's Artisan Bread & Pizza in Portland, Oregon. Ken walks you through his process for baking bread, from autolese to baking, in eight videos
Scones -- Scones fascinate me. I enjoy a good scone. They come together much like a biscuit and can be prepared in the afternoon for baking in the morning. Both videos currently in the scone playlist are imports from "across the pond." Included are the metric formula for basic scones.
Techniques for the Professional Baker -- This is a series of baking videos by King Arthur Flour in Norwich, Vermont. Bakery director Jeffery Hamelman leads viewers through the professional bread baking process with head baker Martin Philip. Interesting watching for anyone that would like to see how the pros do it.
Filipino cooking -- My fascination with Filipino cooking grew out traveling in and out of the Philippine Islands back in the 1970s. It’s been said that Filipino cuisine was fusion long before the term was fashionable. Filipino food is a “melting pot” of food and foodways from throughout Asia, the Iberian Peninsula and the Americas. It’s a blending of wide-ranging cultural influences over many centuries.
Feather River Camp -- I've been know to shoot a video or two at Oakland Feather River Camp, where I am the executive chef each summer. Watch a Union Pacific freight train slide past the camp or view (almost) humorous videos from the kitchen.
Check back frequently as the lineup changes. From time to time, I add (and occasionally remove) videos from my playlists. I plan to add more baking videos and to develop a playlist on cast iron cooking. Enjoy ...
Showing posts with label camp cooking. Show all posts
Showing posts with label camp cooking. Show all posts
Monday, December 04, 2017

Tuesday, November 28, 2017
Cooking in a hunting camp
 |
| Dining tent and kitchen trailer |
I enjoyed interacting with the guides and hunters. And after cooking for thousands, preparing meals for 20 to 25 was a refreshing change from my full-time career (US Navy, hospitals and state prisons). I've adapted many old Navy standards, like Yankee pot roast and baking powder and yeast biscuits for the camp menu. These dishes, a long with many others, were well accepted and loved by the hunters.
 |
| Sliced challah bread for French Toast |
To make breakfast easier, I prepared everything the afternoon prior. That included baking (biscuits, cinnamon rolls and challah bread for French toast), panning breakfast meats (mainly ham, bacon or sausage), filling the coffee pot and setting eggs out.
 |
| Biscuits and gravy |
While some wait until morning to prepare breakfast, I've found over my career that the meal flows smoothly when I prepare components of the meals the afternoon before. As mentioned, the potatoes are pre-cooked and cooled in the refrigerator in the afternoon. For omelets, I crack and whisk the eggs and cut the filling ingredients. Hot cake wet and dry ingredients are prepared, as well as French toast batter.
 |
| My home in camp |
Baking, breakfast prep and dinner prep began in early afternoon. I made a prep list for both meals and any lunch prep so I didn't forget anything. This time was also used to prepare syrup, salsa and a variety of other sauces.
I usually lumped baking together. That way I saved steps by weighing out the ingredients for the two or three products at the same time. I did have to time proofing and oven time carefully so the bread didn't over-proof. I baked all the bread except sandwich breads.
 |
| Brothers enjoying pork chops |
The owners gave me a wide berth on the menu. The only complaints that I received were related to a very spicy breakfast. (It seems the guides and hunters don't enjoy relieving themselves on the trail in the dark!) Since this a big meat and potatoes crowd, most of my meals are based on comfort food. The photos show the setting and meals I've cooked.
Tuesday, October 10, 2017
Open face breakfast sandwiches

That's when I thought of preparing breakfast sliders. Since breakfast comes early (at 4 a.m.), I prepared the sandwiches on the afternoon before. After slicing enough ham and cheese for the open face sandwiches, I slivered an onion on the meat slicer and sliced six medium tomatoes by hand. I also prepared a batch of cilantro sauce for garnish. Everything was placed under refrigeration until morning.
In the morning, I placed ham and cheese on each biscuit half, then heated the sandwiches in the over to melt the cheese. As the hunters and guides filtered into the dining tent for breakfast, I placed cottage fried red potatoes on the place along with two open face sandwiches, two tomatoes, some onion and three dill pickle chips. The sandwiches were garnished with cilantro sauce.
 |
| Toasting the biscuits on the flat-top. |
OPEN FACE BREAKFAST SANDWICHES
Use this recipe to use an oversupply of biscuits. You may use any flavor of cheese desired. I used pepper jack cheese.I didn't add fried eggs because of a shortage in camp.
24 buttermilk biscuits, cut in half
4 ounces butter, melted
24 (1 ounce) slices ham, cut in half
24 (2/3 ounce) slices cheese, cut in half
48 fried eggs (optional)
48 slices tomato
1 medium onion, shaved or sliced thin
72 dill pickle chips
2 to 3 cups cilantro sauce (recipe follows)
Brush melted butter on each half biscuit. Toast in a skillet over medium heat. Alternatively, you can toast the biscuits on a flat-top griddle. When toasted, remove biscuit halves and arrange on a sheet pan. Keep the bottom and top half of each biscuit together. If preparing ahead, place the ham, cheese, tomatoes, onions, pickles and cilantro sauce in the refrigerator.
In the morning, arrange a half-slice of both ham and cheese on top of each biscuit half. Heat the sandwiches in a 350-degree oven until the ham is warm and the cheese melts. Remove from the oven and place a fried egg (if used) on each sandwich.
To serve, place two open-face sandwiches on each plate. Arrange two tomato slices, some onion and three dill pickle chips on each plate. Spoon a tablespoon cilantro sauce over the sandwiches on each plate. If desired, the sauce can be served on the side. Serve with cottage fried red potatoes.
Makes 24 servings.
CILANTRO SAUCE
I serve serve cilantro sauce with grilled pork chops, roasted pork loin, sauteed chicken breasts and breakfast eggs.
6 cloves garlic
3alapeno chile peppers
1-1/2 teaspoon ground cumin
1-1/2 teaspoon kosher salt
1 tablespoon fresh oregano
1/3 cup flat leaf parsley
1-1/2 cups cilantro
In a food processor or blender, process garlic, jalapeno, cumin, salt, oregano, parsley and cilantro to form a smooth paste. With food processor running, drizzle in olive oil. Add small amount of water until sauce is thick. Drizzle in vinegar until smooth. Adjust seasoning.
Makes about 2-1/4 cup sauce.
Tuesday, December 27, 2016
SeabeeCook's playlists on YouTube
I have two channels on YouTube. While I'm not sure how it happened, they are Steven Karoly's channel and SeabeeCook's channel. One day I will merge the two.
I've created several playlists on my named channel. Playlists are a popular way to collect videos in a single location to share with the public. With some exceptions, these videos were created by others. Here are my current playlists:
Bread bakers -- I lead off my bread baker's playlist with a series by Ken Forkist, author of Flour Water Salt Yeast and owner of Ken's Artisan Bread & Pizza in Portland, Oregon. Ken walks you through his process for baking bread, from autolese to baking, in eight videos. Next is a three-part series on Saveurs, a traditional French boulangerie, chocolaterie and patisserie in Dartmouth, England. Included in the 20-some videos are several that I shot at a baking workshop.
Scones -- Scones fascinate me. I enjoy a good scone. They come together much like a biscuit and can be prepared in the afternoon for baking in the morning. Both videos currently in the scone playlist are imports from "across the pond." Included are the metric formula for basic scones.
Techniques for the Professional Baker -- This is a series of baking videos by King Arthur Flour in Norwich, Vermont. Bakery director Jeffery Hamelman leads viewers through the professional bread baking process with head baker Martin Philip. Interesting watching for anyone that would like to see how the pros do it.
Feather River Camp -- I've been know to shoot a video or two at Oakland Feather River Camp, where I am the executive chef each summer. Watch a Union Pacific freight train slide past the camp or view (almost) humorous videos from the kitchen.
Check back frequently as the lineup changes. From time to time, I add (and occasionally remove) videos from my playlists. I plan to add a Filipino cooking playlist soon. Enjoy ...
Saturday, November 12, 2016
Sicilian-style cast iron skillet pizza

After testing a recipe from the Serious Eats website two weeks ago, cast iron skillet pizza sounded good. I wanted a recipe that I can use at my summer job and when camping. This recipe will serve both purposes. It can either be baked in a half-sized (13x18-inch) sheet pan or in two large cast iron skillets (10- to 12-inch diameter).
The camp edition of the pizza can be baked with charcoal briquettes or inside the home oven. While this recipe uses a stand mixer (I use a Kitchen Aid 5-quart mixer), the Serious Eats website has instructions for hand-mixing the dough. You can use an inverted Dutch oven as well. I will post hand-mixing instructions when I get a chance.
The full-sized (18x26-inch) sheet pan will be used for the camp. It takes six to eight sheet pan pizzas for each 100 campers. Pizza is often pared with honey barbecued chicken wings, pasta salad and a loaded salad bar. We typically feature cheese pizza, pepperoni pizza, vegan pizza and a meat-lover's pizza.
 |
| I proofed the dough on the picnic table on the patio. The skillet in the foreground in a Lodge No. 12. The other one is a Wagner 1891. My wife and I purchased the Wagner in the early 1980s when we were first married. |
 |
| The pizza is ready for toppings. Each skillet pizza needs 1/4- to 1/2-cup sauce, 3 to 4 ounces shredded cheese and 2 to 4 ounces meat (if used). I added a bunch of sauteed spinach to both pizzas. Four ounces sliced chicken sausage with feta and spinach was used on the larger pizza. |
 |
| You have to pile the charcoal briquettes to achieve a close approximation of 550 degrees F. Lighting 10 extra briquettes will give you extra heat should you need it. |
 |
| Finished pizzas. The crust could've been a bit more crisp. The smaller pizza is vegetarian. |
 |
| Sheet pan pizza prepared from the same recipe. I will use this recipe to bake pizza in full-sized (18x26-inch) sheet pans for Oakland Feather River Camp, where I am the executive chef. Four sheet pans yield 96 slices. |
This recipe requires two large cast iron skillets, 10- to 13-inches in diameter. Match each skillet to the rimmed Dutch oven lid (or camp-style Dutch oven) that fits best. The 12-inch lid will fit the smaller skillet while the larger skillets will require the 14-inch lid.
To bake in a rimmed 13x18-inch half-sized sheet pan, pour remaining oil (in second paragraph of instructions) into a half sheet pan. Place dough on sheet pan and let rise as directed. About 30 minutes before baking, preheat home oven to 550 degrees with rack in the middle position. Proceed to stretch dough to the sides and corners of the pan, as directed. Double toppings and bake 15 to 20.
This recipe was adapted from the SeriousEats.com website.
17-1/2 ounces bread or all-purpose flour
2 teaspoons kosher salt
1 teaspoon instant yeast
1/2 cup olive oil, divided
12-1/4 ounces room temperature water
Combine flour, salt, yeast and 2 tablespoons oil in the bowl of a stand mixer. Whisk to combine. Add water and mix on medium speed until it comes together and no dry flour remains. Increase speed to medium-high and mix until the dough is stretchy and smooth, about 6 minutes. The dough should stick to the bottom of the bowl but pull away from the sides.
Divide oil between 2 cast iron skillets and spread over surface with hands. Divide dough in half and place one piece in each. (Add slightly more dough to the larger skillet when using mismatched pans.) Rub top surface with oil until thoroughly coated. Cover with plastic wrap. Allow to rise at room temperature until dough has spread out to nearly touch each rim of each skillet, about 2 hours.
Carefully remove plastic wrap. Using oiled hands and being as gentle as possible to maintain air bubbles, push and stretch dough into corners of each skillet by pressing out from the center and lifting and stretching it beyond the rim of each skillet. The dough should pull back until the skillet is just filled with dough.
Light 45 to 60 charcoal briquettes in a charcoal chimney about 30 minutes before the dough is ready. One lid is needed since you will bake the pizzas one at a time. For 550 degrees, use around 45 briquettes (30 on lid and 15 under skillet) on the 12-in camp-style Dutch oven lid. The 14-inch lid requires around 60 briquettes (40 on lid and 20 under skillet).
Top each pizza with about 1/3- to 1/2-cup sauce, 3 to 4 ounces shredded mozzarella cheese, plus additional toppings as desired. Place the first skillet on trivet. Place the lid from a Dutch oven on top of the skillet. Bake with charcoal briquettes for 550 degrees until bottom is crisp and top surface is bubbling, 15 to 30 minutes. Repeat for second skillet. Allow to cool at room temperature for 5 minutes. Slice as desired.
Thursday, October 29, 2015
Throwback Thursday: How many servings will a 12-inch Dutch oven deliver?
This article was originally posted on Tuesday, March 25, 2008.
The topic of catering large groups often surfaces on Dutch oven discussion boards, like the IDOS forum and Camp-cook.com. Conversation rarely centers on the business side catering. It's the culinary side of feeding large groups that draws most of the attention. Questions about menus, portion sizes, amount to prepare and equipment are among the most common.
The last discussion that I joined in on began with a question from a Dutch oven group in Porterville, California. Dutchin' Dave, a member of the Sequoia Dutch Ovens, asked this question at Camp-cook.com:
 He planned to prepare one recipe in a 12-inch Dutch oven and scoop the cobbler out in 2- to 3-ounce portions. Dave estimated that the his recipe would yield about 15 servings. The results will, of course, depend on the volume of fruit and topping in his recipe.
To feed 225 guests, Dave figures it will take 15 (12-inch) ovens. He believes "approximately 3/4 of them will want dessert." The remaining 25 percent will avoid dessert due to health concerns or personal taste, said Dave.
Number of cobbler servings per No. 12 Dutch oven
Let me answer Dave's question in two parts. I'll address his immediate cobbler question first since that's the main point of his discussion. Then in a couple days, I'll address the broader question of catering large groups out of Dutch ovens.
I always work from volume, not some generalized table of servings per Dutch oven. Most Dutch oven food is semi-liquid or semi-solid. It spoons or ladles out very well. The key is to calculate the volume each Dutch oven holds for a particular dish and divide by the serving size. That's the basic formula for determining portions per Dutch oven.
There are other factors, like toppings and the number of pieces (of meat, chicken, potatoes, etc.) in the pot. It's hard to serve 20 (1-cup) servings out a pot of pork chops and gravy when there's only 15 chops in there to begin with. Toppings will also limit the number of servings. A pot pie or cobbler that's topped with 15 biscuits will only give you 15 servings.
I like to work out of 14-inch oven when cooking for a crowd. They're lighter than 16-inch ovens and holds more than a 12-inch oven. The 14-inch is a happy medium between lugging heavy 16-inchers and having to wrestle lots and lots of 12-inch ovens. I recommend that you locate as many 14-inch ovens as possible.
I don't recommend using deep-style ovens for recipes that use a topping as a key component of the dish. Deeper ovens are best reserved for bread loaves, large cuts of meat and soups, chili and stew.
The problem with baking a cobbler or crisp in a deep-style oven is it can hold a larger ratio of filling to topping. You'll run out of topping long before the filling is gone. The people at the head of the dessert line will get all the topping.
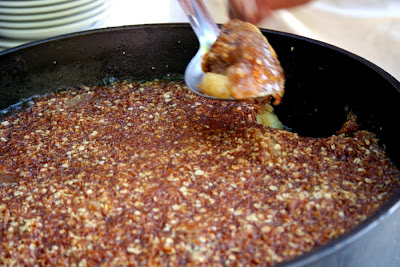 For the cobbler, I use 2 or 3 (14-inch) Dutch ovens to serve apple crisp to 150 campers. A 14-inch regular oven holds 8 quarts full to the brim. A good working volume is about 2/3 of the oven capacity, or about 5-1/3 quarts of product. Divide that by 1/2-cup into 5-1/3 quarts and you get about 42 servings per 14-inch regular oven. I round to 40. My recipe (below) uses three 14-inch ovens to feed 100 campers.
You can get 50 servings if you push the volume to 6 quarts. Just make sure you leave enough head room for the crisp topping to brown. But remember, to get 50 (1/2-cup) servings per 14-inch oven, you need about 6-1/2 quarts crisp/cobbler in each oven. And don't forget my caution about the filling to topping ratio above.
APPLE CRISP FOR A CROWD
Dutch oven instructions are located in the notes.
FILLING
3 (#10) cans sliced apple
1/2 cup lemon juice
1 tablespoon lemon zest
2-3/4 pounds sugar
8 ounces cornstarch
3 tablespoons ground cinnamon
1 tablespoon salt
TOPPING
3 pounds brown sugar
1-1/4 pound rolled oats
1-1/4 pounds all-purpose flour
1-2/3 teaspoons baking powder
1-3/4 teaspoons baking soda
1 tablespoon salt
2 pounds butter, softened
Arrange 4-1/2 quarts apples in each greased 18x26-inch sheet pan. Sprinkle juice and zest over apples. Combine granulated sugar, starch, cinnamon and salt; sprinkle half over apples in each pan.
Combine brown sugar, flour, baking powder, baking soda, salt and butter or margarine; blend to form a crumbly mixture. Sprinkle an equal quantity of the mixture evenly over apples in each pan.
Using a convection oven, bake at 350 deg F for 30 minutes or until top is bubbling and lightly browned on low fan, open vent. Cut each pan 6 by 9. Serve with serving spoon or spatula.
Yield: 2 sheet pans
Serving ideas: Serve 1 piece or approx 1/2-cup per portion. Acceptability is approx. 100 percent.
NOTES: Use 3 #10 cans sliced apples per 100 portions. Use two 18x26-inch sheet pans per 100 portions. Three lemons will yield 1/2-cup juice. Two pounds flour (total) may be used in place of rolled oats.
For 14-inch Dutch oven, use 1 #10 can of canned apples and a 1/3 the remaining ingredients per oven. This will yield approx 33 (1/2-cup) servings per oven.
The topic of catering large groups often surfaces on Dutch oven discussion boards, like the IDOS forum and Camp-cook.com. Conversation rarely centers on the business side catering. It's the culinary side of feeding large groups that draws most of the attention. Questions about menus, portion sizes, amount to prepare and equipment are among the most common.
The last discussion that I joined in on began with a question from a Dutch oven group in Porterville, California. Dutchin' Dave, a member of the Sequoia Dutch Ovens, asked this question at Camp-cook.com:
Got a problem. We've been asked to do cobbler for 300 folks at a fancy fundraising dinner for our Cancer Camp for children. We're thrilled to do it, but the problem stems from the fact that the majority of our Sequoia Dutch Ovens chapter is already committed to another function and there will only be 4-5 of us left. Under the circumstances, it's going to be critical that our operation run as efficiently and streamlined as possible. We need to figure out how many ovens these 4-5 cooks are going to have to manage and so we need to calculate pretty closely how many servings we can get out of an oven.Dave went on to explain his thought process on the issue. Even though he knows how many servings can be served from a 12-inch regular Dutch oven ("6-18 servings of a 'main dish' or 'to 30' servings of a 'side dish'"), he recognized that the number of servings per pot depends upon the portion size.
 He planned to prepare one recipe in a 12-inch Dutch oven and scoop the cobbler out in 2- to 3-ounce portions. Dave estimated that the his recipe would yield about 15 servings. The results will, of course, depend on the volume of fruit and topping in his recipe.
To feed 225 guests, Dave figures it will take 15 (12-inch) ovens. He believes "approximately 3/4 of them will want dessert." The remaining 25 percent will avoid dessert due to health concerns or personal taste, said Dave.
Number of cobbler servings per No. 12 Dutch oven
Let me answer Dave's question in two parts. I'll address his immediate cobbler question first since that's the main point of his discussion. Then in a couple days, I'll address the broader question of catering large groups out of Dutch ovens.
I always work from volume, not some generalized table of servings per Dutch oven. Most Dutch oven food is semi-liquid or semi-solid. It spoons or ladles out very well. The key is to calculate the volume each Dutch oven holds for a particular dish and divide by the serving size. That's the basic formula for determining portions per Dutch oven.
There are other factors, like toppings and the number of pieces (of meat, chicken, potatoes, etc.) in the pot. It's hard to serve 20 (1-cup) servings out a pot of pork chops and gravy when there's only 15 chops in there to begin with. Toppings will also limit the number of servings. A pot pie or cobbler that's topped with 15 biscuits will only give you 15 servings.
I like to work out of 14-inch oven when cooking for a crowd. They're lighter than 16-inch ovens and holds more than a 12-inch oven. The 14-inch is a happy medium between lugging heavy 16-inchers and having to wrestle lots and lots of 12-inch ovens. I recommend that you locate as many 14-inch ovens as possible.
I don't recommend using deep-style ovens for recipes that use a topping as a key component of the dish. Deeper ovens are best reserved for bread loaves, large cuts of meat and soups, chili and stew.
The problem with baking a cobbler or crisp in a deep-style oven is it can hold a larger ratio of filling to topping. You'll run out of topping long before the filling is gone. The people at the head of the dessert line will get all the topping.
 For the cobbler, I use 2 or 3 (14-inch) Dutch ovens to serve apple crisp to 150 campers. A 14-inch regular oven holds 8 quarts full to the brim. A good working volume is about 2/3 of the oven capacity, or about 5-1/3 quarts of product. Divide that by 1/2-cup into 5-1/3 quarts and you get about 42 servings per 14-inch regular oven. I round to 40. My recipe (below) uses three 14-inch ovens to feed 100 campers.
You can get 50 servings if you push the volume to 6 quarts. Just make sure you leave enough head room for the crisp topping to brown. But remember, to get 50 (1/2-cup) servings per 14-inch oven, you need about 6-1/2 quarts crisp/cobbler in each oven. And don't forget my caution about the filling to topping ratio above.
APPLE CRISP FOR A CROWD
Dutch oven instructions are located in the notes.
FILLING
3 (#10) cans sliced apple
1/2 cup lemon juice
1 tablespoon lemon zest
2-3/4 pounds sugar
8 ounces cornstarch
3 tablespoons ground cinnamon
1 tablespoon salt
TOPPING
3 pounds brown sugar
1-1/4 pound rolled oats
1-1/4 pounds all-purpose flour
1-2/3 teaspoons baking powder
1-3/4 teaspoons baking soda
1 tablespoon salt
2 pounds butter, softened
Arrange 4-1/2 quarts apples in each greased 18x26-inch sheet pan. Sprinkle juice and zest over apples. Combine granulated sugar, starch, cinnamon and salt; sprinkle half over apples in each pan.
Combine brown sugar, flour, baking powder, baking soda, salt and butter or margarine; blend to form a crumbly mixture. Sprinkle an equal quantity of the mixture evenly over apples in each pan.
Using a convection oven, bake at 350 deg F for 30 minutes or until top is bubbling and lightly browned on low fan, open vent. Cut each pan 6 by 9. Serve with serving spoon or spatula.
Yield: 2 sheet pans
Serving ideas: Serve 1 piece or approx 1/2-cup per portion. Acceptability is approx. 100 percent.
NOTES: Use 3 #10 cans sliced apples per 100 portions. Use two 18x26-inch sheet pans per 100 portions. Three lemons will yield 1/2-cup juice. Two pounds flour (total) may be used in place of rolled oats.
For 14-inch Dutch oven, use 1 #10 can of canned apples and a 1/3 the remaining ingredients per oven. This will yield approx 33 (1/2-cup) servings per oven.
Tuesday, October 27, 2015
Barbecued beef shepherd's pie in 14-inch Dutch oven
 |
| Crossing Mother Lode Drive at Mile Post 136.8. |
Since I haven't cooked for the railroad in nearly two years, the crew boss and thought this would be the perfect opportunity to treat the hard-working crew to a Dutch oven lunch. With plenty of room to safely fire charcoal briquettes, I set up my kitchen on the tracks. The first charcoal chimney was fired around 9:30 a.m. The crew enjoyed lunch three hours later.
I wanted to change the lunch entree for this cook date. Over the past 10 years, I have often prepared some form of chili con carne for the railroad crew. For over a week I had been working on a Dutch oven version of shepherd's pie. Instead of a traditional shepherd's pie with lamb, shredded beef chuck road, braised in beer and barbecue sauce formed the protein base. Since the biscuits, cobbler and coffee are crew favorites, I left them on the menu. The menu consisted of:
- Barbecued beef shepherd's pie in 14-inch camp oven
- Cream coleslaw
- Buttermilk biscuits in a 14-inch camp oven
- Mixed berry cobbler in a 12-inch camp oven
- Railroad coffee
 |
| We let the rail cars pass first as they were going to be working the area behind the camera. I set up my firepan and chuckbox between the rails to keep a safe distance from the brush.We don't cook with charcoal on the right-of-way in the summer months due to the fire danger. |
 |
| The first thing I did was to bake buttermilk biscuits. To ease preparation on site, I weighed the dry ingredients and cut in the shortening at home on Thursday. The biscuit mix was stored in the refrigerator to keep the shortening cold. I added the buttermilk and cut large biscuits (3-1/2-inch diameter) once on the railroad. |
 |
| With the biscuits on heat, I turned to the coleslaw, berry cobbler and shepherd's pie, in order. To prepare the meat for the shepherd's pie, I braised a 3-1/2-pound chuck roast in beer and barbecue sauce on Thursday. After cutting the roast into large pieces, I seared them in bacon fat in a cast iron skillet. The braising liquid consisted of 1-1/2 cups IPA beer, 1-1/2 cups barbecue sauce, 1/4 cup chopped parsley, 2 bay leaves and 1 teaspoon dried thyme. The braising liquid was poured over the meat in the skillet. After covering with aluminum foil, it was placed in a 300-degree oven for about 5 hours. Once the meat tender enough to pull, I placed it in a zipper lock bag and in the refrigerator. The braising liquid was strained and placed in the refrigerator as well. |
 |
| As the biscuits were baking in a 14-inch camp oven, I cooked 5 pounds red potatoes in the stockpot. Once mashed, the potatoes would be used as the topping for the shepherd's pie. |
 |
| To prepare the shepherd's pie, I shredded the chuck roast by hand and placed it in the 14-inch camp oven (see picture above with the peas). I then skimmed the fat off of the braising liquid and poured it over the pulled meat, along with 8 ounces frozen peas. Next a thick layer of mashed potatoes was spooned oven the meat and peas. I baked the pie with coals for around 375 degrees until crisp potato peaks had formed and the sauce was buddling, about 45 minutes. I used 1-1/2 rings of charcoal on the lid and 8 coals under the pot. |
 |
| The finished meal. Lunch was served to 8 crew members around 12:30. I was able to send cobbler, biscuits and shepherd's pie home with several crew members. We could've easily fed 12 to 15 with the 3 pots. |
Tuesday, October 20, 2015
Pasta salad with golden cherry tomatoes & fresh mozzarella

With three additional campers, we though a simple buffet lunch would be in order. The menu (pictured above) included a cheese and salami board, pasta salad, salsa ranchera with tortilla chips and clam dip with potato chips. The salsa and clam dip were prepared at home for the trip.
The seven campers only ate around half of the pasta salad. The prospect of taking leftovers home concerned me until I heard the five families in the campground had planned a potluck dinner that evening. I quickly threw the pasta salad in as our contribution, along with my secret barbecue sauce and leftover salsa.
My sister contributed campfire roasted tri-tip. Our neighboring campers contributed cowboy sushi roll, fresh abalone, fresh canteloupe and a big tossed salad, plus a few miscellaneous items. Some 20 campers devoured the food.
 |
| I mixed the ingredients for the pasta salad in my 10-inch Griswold cast iron skillet. To expedite preparation in camp, the pasta was precooked at home. I also pre-prepared the sherry vinaigrette with sherry vinegar, Dijon mustard, garlic, dried basil, salt, pepper and olive oil. |
 |
| Dishes like the pasta salad are often thrown together on the fly. You can substitute red cherry tomatoes or dice fresh tomatoes for the golden tomatoes in the recipe. If desired, add 8 to 12 ounces diced cooked chicken or cuded salami to the salad. |
You my want to cut this recipe in half for a smaller family.
12 ounces penne regate
1 bunch green onions, thinly sliced
2 tablespoons fresh sliced basil
1/4 cup chopped fresh flat leaf parsley
1 (8 ounce) container fresh mozzarella cheese, drained and sliced in half
1 (10-1/2-ounce) container golden cherry tomatoes. sliced in half
1 (4-ounce) jar capers, drained and rinsed (optional)
3/4 to 1 cup vinaigrette or Italian salad dressing
Salt and ground black pepper, to taste.
AT HOME: Cook pasta according to package instructions. Cool under cold running water. Drain and place inside a 1-gallon zipper-lock bag. Prepare or purchase your favorite vinaigrette or Italian dressing. Store in refrigerator until you are ready to pack for the trip.
IN CAMP: Slice the green onions, parsley and basil. Place inside a large bowl. Drain mozzarella cheese. Slice each cheese ball in half. Slice tomatoes in half. Place cheese and tomatoes in bowl with the herbs. Drain and rinse capers. Place in bowl.
Lightly toss pasta, herbs, tomatoes, cheese and capers with the salad dressing. Season with salt and pepper to taste. Cover. Place in cooler until needed for the meal. Serves 8 to 10.
Tuesday, October 13, 2015
Navy bean soup at Upper Blue Lake
Last month I prepared Navy bean soup for my sister and her husband at Upper Blue Lake in Eldorado National Forest. This was the fifth year that Debbie and I joined them at the lake. They camped at the lake several years before us.
In the weeks leading up to the trip, my sister and I coordinate the menu. We split the dinners and breakfasts. Each family is left to its own devises for lunch. I usually pack too much food. My original thought was to prepare Navy bean soup for lunch. The planned meal (sauteed chicken breast with cilantro cream sauce) remained in the cooler.
Since we snacked that day, I suspended a 10-inch Dutch oven over the fire at noon and began the soup. This not the first time I have cooked soup at the lake. In 2011, I prepared split pea soup for our mother, who was camping with us. You can view the recipe and the story behind the recipe.
 |
| To begin the soup, I set the Dutch oven over the cooking fire. After it pre-heated, 6 ounces diced salt pork was rendered in the pot. One diced carrot and 1 diced onion went into the pot next. The vegetables and salt pork were stirred every couple minutes until lightly caramelized. |
 |
| One pound small white beans were added to the pot along with 6 cups cold water. The beans were seasoned with bay leaves, granulated garlic, coarse ground black pepper and cayenne pepper. I added 2 additional cups of water after the beans had cooked three hours. I spent most of the afternoon reading and tending the fire. |
 |
| Around 4 o'clock, I hiked up the mountain to this grove of Lodgepole pine trees. The is situated on a shelf on southern slope of The Nipple, a peak that overlooks Upper Blue Lake. During the hike, I left the soup over a small cooking fire. I added water to the beans and recharged the fire upon my return, about 45 minutes later. |
 |
| The pot of soup was suspended over the fire from on a tripod. I left the lid on the pot to aid in cooking the beans. Given the altitude of 8,100 feet above sea level, it took just over 6 hours to soften the beans to the consistence of soup. The soup was ready to serve around 6 p.m. The convertible fire iron set was built by Campmaster of Mesa, Arizona, in the early 1990s. The iron set can be set up as a bipod or trip pod. |
Saturday, March 07, 2015
Baked steel cup oats with fresh berries
.jpg)
Several Internet searches led me to baked oatmeal. The idea of its rustic texture, browned with molasses or brown sugar, fascinated me. Baking the oats would add interest and appeal over traditional cooked oatmeal.
Then a culinary student at the Christian Culinary Academy presented individual bowls of baked oatmeal with strawberries last Thursday. The texture was amazing. Rustic and deep brown, her dish was a welcome change from cooked oatmeal. The oatmeal resembled a moist homemade granola.

In the morning, light the charcoal briquettes in a charcoal chimney. Remove the bowl from the cooler, stir and pour into an oiled 10-inch Dutch oven. Brew the morning coffee as the oats bake and you ready yourself for the days activities. By the time everyone awakes, you'll enjoy a rustic breakfast made for the outdoors.
My purchase goof has opened my eyes to a new flavorful way to prepare oats in the morning. I plan to bake larger quantities for Oakland Feather River Camp this summer. Testing for a 12 by 20-inch hotel pan will begin in May. In addition to baked oats in the forest, larger quantities for the camp will enhance the breakfast meal.
Baked steel cut oats with fresh berries
I adapted this recipe from a 2013 blog post at Alexandra's Kitchen. Her recipe includes instructions for baking in individual dishes. My scratch-made syrup stood in for genuine maple syrup. I used a mixture of blueberries and raspberries for the test run.
3/4 cup steel cut oats
1/2 cup slivered almonds
1 teaspoon baking powder
1-1/2 teaspoons ground cinnamon
1/2 teaspoon kosher salt
1 cups fresh berries
2 cup milk
1/3 cup maple syrup
1 large egg
3 tablespoons unsalted butter, melted and cooled slightly
2 teaspoons vanilla extract
In a small bowl, mix together oats, nuts, baking powder, cinnamon and salt. In a second bowl, whisk together milk, syrup, egg, butter and vanilla. Pour the milk mixture over the oat mixture. Stir to combine. Store mixture in refrigerator or camp cooler overnight.
In the morning, scatter berries into a lightly oiled 10-inch camp-style Dutch oven. Pour milk-oat mixture over berries. Bake with coals for 375 degrees (18 coals under oven and 6 on lid) for 60 minutes or until the oats are firm and milk thoroughly absorbed. Bake several additional minutes for a crispier crust. Let cool for a few minutes before serving.
Serve with fresh berries and cream or milk. Makes about 6 servings.
Sunday, February 15, 2015
Dutch oven meatloaf
Though meatloaf reaches back to Roman times, the invention of the hand-cranked meat grinder hastened its acceptance as classic comfort food. Topped a tangy ketchup glaze, meatloaf is the perfect centerpiece for the traditional American meal. For many, it brings back memories of one or two fat slices, served with a heap of mashed potatoes.
I prefer a traditional loaf, one made with sauteed aromatics, finely ground bread crumbs, ketchup or milk, eggs and two or three ground meats. Baking the meatloaf in a camp-style Dutch oven lets you enjoy a good meal in camp. If desired, you can mix the meat in the home kitchen, shape it into a round loaf and place in the ice chest for the trip to the campground.
Enjoy ...
DUTCH OVEN MEATLOAF
Most recipes (including this one) instruct you to avoid over-mixing the meatloaf. While giving the loaf a thorough mix is essential, mixing it longer than needed will yield a tough loaf. Mix the loaf just to the point where each ingredient is developed into a smooth texture. This will help the load hold together.
1 tablespoon olive oil
1/2 cup onion, finely chopped
1/2 cup carrot, finely grated
3 cloves garlic, minced
1 pound ground beef
1 pound ground pork
1/3 cup bread crumbs
1/2 cup ketchup
2 large eggs, lightly whipped
3/4 teaspoon kosher salt
1/2 teaspoon ground black pepper
Pinch cayenne pepper (optional)
Glaze:
1/4 cup ketchup
2 tablespoons packed brown sugar
1 teaspoon prepared mustard
1/2 teaspoon Worcestershire sauce
Pinch nutmeg
Pre-heat a 12-inch camp-style Dutch oven over a bed of charcoal briquettes or camp burner. Pour in olive oil. Add onion, carrot and garlic. Saute until onions are translucent. Do not brown vegetables. Place vegetables in a medium bowl and cool slightly. Wipe Dutch oven with paper towel.
Add beef, pork, bread crumbs, ketchup, eggs, salt, pepper and cayenne to bowl with vegetables. Mix with your hands, until thoroughly blended. Do not over mix. Mold meat mixture into a round, about 7 to 8 inches in diameter. Place into a 12-inch camp-style Dutch oven.
Combine glaze ingredients in a small bowl. Brush glaze over meat loaf. Place lid on oven. Bake with coals for 350 degrees (approximately 8 charcoal briquettes under oven and 16 to 20 on lid) about 60 minutes, or until internal temperature reaches 165 degrees. Rest 10 minutes before slicing.
I prefer a traditional loaf, one made with sauteed aromatics, finely ground bread crumbs, ketchup or milk, eggs and two or three ground meats. Baking the meatloaf in a camp-style Dutch oven lets you enjoy a good meal in camp. If desired, you can mix the meat in the home kitchen, shape it into a round loaf and place in the ice chest for the trip to the campground.
Enjoy ...
 |
| Mold the meat mixture into a seven- to eight-inch round inside the 12-inch camp-style Dutch oven. If desired, shape it into a traditional rectangular loaf. |
 |
| Many meatloaf recipes instruct you to brush the glaze on in the last 20 to 30 minutes of baking to avoid burning. I find that the moist environment in the Dutch renders this step unnecessary. Brush the glaze on the uncooked meatloaf. |
 |
| Asparagus sauteed in butter and garlic and mashed Klondike Rose potatoes were served alongside Dutch oven meatloaf. |
Most recipes (including this one) instruct you to avoid over-mixing the meatloaf. While giving the loaf a thorough mix is essential, mixing it longer than needed will yield a tough loaf. Mix the loaf just to the point where each ingredient is developed into a smooth texture. This will help the load hold together.
1 tablespoon olive oil
1/2 cup onion, finely chopped
1/2 cup carrot, finely grated
3 cloves garlic, minced
1 pound ground beef
1 pound ground pork
1/3 cup bread crumbs
1/2 cup ketchup
2 large eggs, lightly whipped
3/4 teaspoon kosher salt
1/2 teaspoon ground black pepper
Pinch cayenne pepper (optional)
Glaze:
1/4 cup ketchup
2 tablespoons packed brown sugar
1 teaspoon prepared mustard
1/2 teaspoon Worcestershire sauce
Pinch nutmeg
Pre-heat a 12-inch camp-style Dutch oven over a bed of charcoal briquettes or camp burner. Pour in olive oil. Add onion, carrot and garlic. Saute until onions are translucent. Do not brown vegetables. Place vegetables in a medium bowl and cool slightly. Wipe Dutch oven with paper towel.
Add beef, pork, bread crumbs, ketchup, eggs, salt, pepper and cayenne to bowl with vegetables. Mix with your hands, until thoroughly blended. Do not over mix. Mold meat mixture into a round, about 7 to 8 inches in diameter. Place into a 12-inch camp-style Dutch oven.
Combine glaze ingredients in a small bowl. Brush glaze over meat loaf. Place lid on oven. Bake with coals for 350 degrees (approximately 8 charcoal briquettes under oven and 16 to 20 on lid) about 60 minutes, or until internal temperature reaches 165 degrees. Rest 10 minutes before slicing.
Saturday, January 31, 2015
World War II Army field kitchen
Yes, I'm still alive! My last post to 'Round the Chuckbox was over a month ago. I do intend on resuming posts soon. In the meantime, enjoy these videos of World War II era U.S. Army field stoves.
Video description: "Byron "Cooky" Vinyard explains the M1937 field range stove."
Video description: "It has been said that an army marches on their stomachs. For American units in World War II, the field kitchen was the only thing between the hated C-rations and hunger for GIs near the front lines. This functioning field kitchen was set up in the Allied encampment at the Collings Foundation's 2013 Battle for the Airfield re-enactment."
Thursday, November 20, 2014
Throwback Thursday: Finding inspiration for the camp menu
I originally posted this story in 2006 during the ramp-up to a camp that I worked at for one week each summer.
I glean menu and recipe ideas from many sources. Professional trade magazines -- Foodservice Director and Food Management among them -- give me ideas that are specially suited for the institutional kitchen. Popular magazines like Sunset also provide inspiration. I can often use an idea and work it until it fits a group setting.
A photograph of an artfully arranged collection of skillets arranged on an outdoor buffet table sparked my cowboy breakfast idea. Twin stacks of blue enamel plates and a lone Dutch oven complete the display -- no fancy garnish for the dudes of the Mountain Sky Guest Ranch, near Emigrant, Montana.
This thousand-word inspiration gave me the impetuous to celebrate our nation's 230th birthday. The crisp, smoky air of the campfire will greet campers next Tuesday. Bright yellow scrambled eggs, airy biscuits smothered in sausage gravy and gallons of cowboy coffee (hot chocolate for campers) will kick off our celebration next week. The meal will be cooked in cast iron that's stood the test of time from the colonial hearth to the Western range to the backyards of today.
Inspiration for camp menu ideas come from many sources. Television programs, cookbooks and magazines have helped my over 35-year culinary career. The one thing that's worked best for me since the late 1980s has been a series of culinary notebooks.
I keep the notebook handy. Now that I'm commuting to Sacramento each day, the 200-page composition book rests in my daypack. I record ideas -- often gathered from professional magazines on my desk -- and clippings on my hour-long commute home. My 18-notebook collection is full of ideas.
It doesn't matter if the idea comes from TV or print. Shows like Al Rocker's Rocker on the Road can give wonderful ideas. Take Douglas Coffin's New Haven, Conn.-based Big Green Pizza Truck (the show that aired last January). I may not be able to restore a 1946 International Harvester flat-bed truck. But the pizza menu idea will come in handy one day.
They key is to clip ideas and place them in your culinary scrapbook. Soon your collection of ideas, complete with thousand-word photographs will have you cooking for a herd of hungry campers.
I glean menu and recipe ideas from many sources. Professional trade magazines -- Foodservice Director and Food Management among them -- give me ideas that are specially suited for the institutional kitchen. Popular magazines like Sunset also provide inspiration. I can often use an idea and work it until it fits a group setting.
A photograph of an artfully arranged collection of skillets arranged on an outdoor buffet table sparked my cowboy breakfast idea. Twin stacks of blue enamel plates and a lone Dutch oven complete the display -- no fancy garnish for the dudes of the Mountain Sky Guest Ranch, near Emigrant, Montana.
This thousand-word inspiration gave me the impetuous to celebrate our nation's 230th birthday. The crisp, smoky air of the campfire will greet campers next Tuesday. Bright yellow scrambled eggs, airy biscuits smothered in sausage gravy and gallons of cowboy coffee (hot chocolate for campers) will kick off our celebration next week. The meal will be cooked in cast iron that's stood the test of time from the colonial hearth to the Western range to the backyards of today.
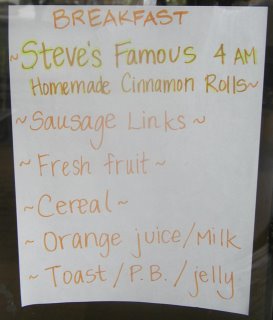 |
| In 2004, campers kept saying, "That's what 4 a.m. rolls look like!," as they walked through the cafeteria line. Their response puzzled me all morning until I walked out into the dining area and saw this hand-printed menu. |
I keep the notebook handy. Now that I'm commuting to Sacramento each day, the 200-page composition book rests in my daypack. I record ideas -- often gathered from professional magazines on my desk -- and clippings on my hour-long commute home. My 18-notebook collection is full of ideas.
It doesn't matter if the idea comes from TV or print. Shows like Al Rocker's Rocker on the Road can give wonderful ideas. Take Douglas Coffin's New Haven, Conn.-based Big Green Pizza Truck (the show that aired last January). I may not be able to restore a 1946 International Harvester flat-bed truck. But the pizza menu idea will come in handy one day.
They key is to clip ideas and place them in your culinary scrapbook. Soon your collection of ideas, complete with thousand-word photographs will have you cooking for a herd of hungry campers.
Thursday, October 09, 2014
Throwback Thursday: Frank's killer breakfast
Today's throwback blends two posts from August 2005. Frank and his lovely wife, Ann, have since moved to Boise, Idaho, and have become grandparents. Debbie and I need to travel north and hold a reunion camping trip.
All camp cooks savor a day off from the kitchen. Yesterday was my day off. My duty was to make coffee, lounge beside the campfire and dish out advice. A buddy handled all culinary tasks.
Jacob and I went camping with Frank and Hunter Friday evening.
We spent the night at Wench Creek Campground on the east shore of Union Valley Reservoir in Eldorado National Forest. Camping is pleasant now that the heat wave has subsided in the Sacramento Valley. Friday’s high was about 75 degrees. The overnight low was 50.
Frank’s breakfast is hearty -- an epicurean contradiction -- good tasting and not-so-good for you, all in one setting. A carpenter and general contractor by trade, he cooked breakfast in two large cast iron skillets, each course in succession. He normally cooks breakfast in one skillet. When Frank told he about breakfast plans last week, I threw in an extra skillet.
Bacon and sausage patties and links inaugurated the morning meat-egg-potatoes fest. Then in quick succession, Frank fried potatoes to a crisp in the bacon fat and scrambled eggs, again in bacon fat. Lastly he cooked gravy from more bacon grease, flour and milk.
Build a roaring cookfire. I follow two rules: First, build a fire that’s twice to three times the size that you think you need. In pine and cedar country it’s easy to underestimate the amount of wood.
The second rule is equally important. Keep the fire going and avoid the tendency to let it burn out once you start cooking. Otherwise Murphy’s Law steps in and kills any further plans for breakfast.
Use this time to dice the potatoes, crack and whisk the eggs and form sausage patties. The fire will take 30 to 45 minutes to burn down to a nice bed of coals. Don’t forget to add fresh wood as the fire burns.
With the fire ready, it’s time to cook breakfast. I said that Frank cooks each course in succession. The bacon goes into the first pre-heated skillet.
Push the bacon aside if you’re using a large skillet (14 inches or larger) and add sausage patties to the skillet. You may want to cook the bacon and sausage in batches if you’re using a smaller skillet. Once browned to the desire color, the move the meat waiting plate covered with a double layer of paper towel. (I’m not sure why the paper towels are necessary—you’re going consume enough grease to worry your cardiologist!)
Don’t discard any of the rendered bacon fat. Frank divides it between three dishes (health warnings aside). The potatoes, eggs and gravy all receive generous portions of the swine nectar.
A pot-full of diced potatoes are next poured into the meat skillet. Watch for splattering grease! Crumble a few bacon strips and sausage patties into the potatoes if desired.
Fifteen to 20 minutes over a hot fire will crisp the potatoes to a nice golden color. Move the skillet to a cooler spot over the fire. Stir the potatoes occasionally to keep them from burning.
At this point, turn your attention to the scrambled eggs. It’s important to pre-heat the egg skillet over a medium fire. Otherwise, you’ll burn the eggs and ruin breakfast.
Slow cooking is best for the eggs. Stick around once you pour the whipped eggs into the skillet. They require constant stirring until cooked. Frank never left the fire until the eggs were cooked.
The secret to moist scrambled eggs is to cook them over low heat. Remove the eggs when they’re still moisture seeping out. Remember, overcooked eggs in the skillet become overcooked eggs on the plate.
Place the eggs into a waiting bowl, cover with a sheet of foil and wipe the skillet clean. The pour the remaining bacon fat into the skillet and return it to medium heat. Next place enough flour into the skillet to absorb the fat. (You’ll have to judge quantities for yourself.)
Stir the roux for a few minutes over a low flame, being careful not to brown it. The last step before breakfast is to pour three or four cups of milk into the gravy skillet. Stir constantly for about 10 minutes to work the lumps out. Once the gravy thickens, you’re ready to eat.
Give the potatoes a quick stir just before serving. Warm potatoes, eggs and gravy are a must. And pour gravy over the potatoes and eggs. After all, gravy is the culinary elixir that brings the whole meal together.
All camp cooks savor a day off from the kitchen. Yesterday was my day off. My duty was to make coffee, lounge beside the campfire and dish out advice. A buddy handled all culinary tasks.
Jacob and I went camping with Frank and Hunter Friday evening.
We spent the night at Wench Creek Campground on the east shore of Union Valley Reservoir in Eldorado National Forest. Camping is pleasant now that the heat wave has subsided in the Sacramento Valley. Friday’s high was about 75 degrees. The overnight low was 50.
 |
| Frank prepared a killer breakfast for us. He got up about 45 minutes ahead of me Saturday morning. Frank had a good bed of coals for cooking by the time I got up at 6:30 a.m. |
Bacon and sausage patties and links inaugurated the morning meat-egg-potatoes fest. Then in quick succession, Frank fried potatoes to a crisp in the bacon fat and scrambled eggs, again in bacon fat. Lastly he cooked gravy from more bacon grease, flour and milk.
Build a roaring cookfire. I follow two rules: First, build a fire that’s twice to three times the size that you think you need. In pine and cedar country it’s easy to underestimate the amount of wood.
The second rule is equally important. Keep the fire going and avoid the tendency to let it burn out once you start cooking. Otherwise Murphy’s Law steps in and kills any further plans for breakfast.
 |
| "I love the smell of bacon in the morning." |
With the fire ready, it’s time to cook breakfast. I said that Frank cooks each course in succession. The bacon goes into the first pre-heated skillet.
Push the bacon aside if you’re using a large skillet (14 inches or larger) and add sausage patties to the skillet. You may want to cook the bacon and sausage in batches if you’re using a smaller skillet. Once browned to the desire color, the move the meat waiting plate covered with a double layer of paper towel. (I’m not sure why the paper towels are necessary—you’re going consume enough grease to worry your cardiologist!)
Don’t discard any of the rendered bacon fat. Frank divides it between three dishes (health warnings aside). The potatoes, eggs and gravy all receive generous portions of the swine nectar.
 |
| You're allowed to break one egg yoke over a campfire. |
Fifteen to 20 minutes over a hot fire will crisp the potatoes to a nice golden color. Move the skillet to a cooler spot over the fire. Stir the potatoes occasionally to keep them from burning.
At this point, turn your attention to the scrambled eggs. It’s important to pre-heat the egg skillet over a medium fire. Otherwise, you’ll burn the eggs and ruin breakfast.
Slow cooking is best for the eggs. Stick around once you pour the whipped eggs into the skillet. They require constant stirring until cooked. Frank never left the fire until the eggs were cooked.
The secret to moist scrambled eggs is to cook them over low heat. Remove the eggs when they’re still moisture seeping out. Remember, overcooked eggs in the skillet become overcooked eggs on the plate.
Place the eggs into a waiting bowl, cover with a sheet of foil and wipe the skillet clean. The pour the remaining bacon fat into the skillet and return it to medium heat. Next place enough flour into the skillet to absorb the fat. (You’ll have to judge quantities for yourself.)
Stir the roux for a few minutes over a low flame, being careful not to brown it. The last step before breakfast is to pour three or four cups of milk into the gravy skillet. Stir constantly for about 10 minutes to work the lumps out. Once the gravy thickens, you’re ready to eat.
Give the potatoes a quick stir just before serving. Warm potatoes, eggs and gravy are a must. And pour gravy over the potatoes and eggs. After all, gravy is the culinary elixir that brings the whole meal together.
Wednesday, October 08, 2014
Baking artisan bread in camp
In the nearly two years since I first talked about artisan no-knead bread, I have baked this bread numerous times, based on my standard recipe. I currently have a batch of dough in the refrigerator at home. While camping at Upper Blue Lake last month, I was able to record notes on my baking process in camp.
These instructions are for use in temperate weather. You need to gauge weather conditions and determine how ambient temperature, humidity and wind conditions will influence internal baking temperature and cooking time. Flexibility is the key. As a rule, coals burn hotter in lower humidity and windier conditions. Cooler, wet weather reduces the heating potential of the coals.
For any Dutch oven recipe on 'Round the Chuckbox, the number of coals are calculated for average summer conditions in the Western United States. You need to experiment and learn how to adapt my instructions to seasonal weather conditions where you live and camp. Use my instructions as a starting point. Experiment at home before taking the the bread into camp to bake.
 |
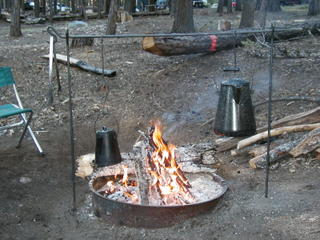
| Light campfire. While hardwood is the ideal choice of wood, I usually cook with pine, cedar and fir in the Sierra Nevada. As a rule, I build a fire that's two to three times the size in volume than the Dutch oven. The fire must produce sufficient coals to heat the Dutch oven for one hour. I continue to add wood to the fire once I remove the first coals to have a ready source of fresh coals. |
 |
| When you desire to bake a loaf of bread, dust surface of chilled dough with flour. Pull a 16- to 24-ounce piece dough out and cut with a knife or kitchen sears. Gently stretch dough by pulling it down to the bottom, turning the dough one-quarter turn each fold. If desired, slash load before setting it in the Dutch oven, as I did here. This dough was made with 20 percent whole wheat flour. |
 |
| Gentle place the loaf inside a 12-inch deep-style camp oven. Slash the loaf if not done earlier. Place the lid on the oven. Set in shade on a warm day. On a cool day, set in a sunny location. Proof in oven for 40 minutes. |
 |
| Coals are almost ready. You won't see much noticeable rise during proofing. After the 40-minute fermentation period, the load will be ready for baking. Remove the lid, splash about 1 tablespoon cold water over the loaf and replace the lid. |
 |
| Hang the Dutch oven about 18 inches above the bed of coals. Shovel a solid bed of coals on the lid. Bake 15 minutes, then lift the lid and quickly check bread. If it's browning properly, remove the coals from the center of the lid. I've found that this is necessary to ensure the loaf bakes without burning. You need coals for 450 degrees (10 under oven and 23 on lid) when using charcoal briquettes. |
 |
| Continue baking for an additional 30 to 40 minutes. You're looking for a nicely browned crust and firm to the touch Remove coals and cool. |
Friday, October 03, 2014
Meet the camp cook
You may have noticed the new menu bar just under the masthead. It currently lets you quickly access the homepage and contact information for 'Round the Chuckbox. I just posted a page titled, "Meet the camp cook." In the future, I plan to add one or two more links to the menu bar, including a description of my services as a camp cook. Enjoy ...
I've long envisioned myself a nineteenth century camp cook. I can see myself cooking for an El Dorado County ranch as it drove cattle drive to summer pasture in the Lake Tahoe basin each spring. Everything about the job appeals to me: family atmosphere, outdoors and good old country cooking.
Yet, I've one problem: I was born 50 years too late. And I grew up in Fresno and Bakersfield. Those who know me will tell you that I'm a city boy who’s loved the Sierra Nevada high country ever since his father carried him to Peter Grub Hut in 1954.
I’ve only ridden a horse three times in the last forty years and have never driven a chuckwagon or fed a beef-centered diet to cowboys on the Western prairie. Nor have I piled flapjacks onto chipped enamel plates meant for hungry Sierra Nevada lumbermen or slopped biscuits and gravy on trays for a railroad gang.
At this point in my forty-year cooking career I could never call myself a “wagon cook.” While I've cooked in the shadow of one or two chuckwagons, it takes a special breed of cook to wrangle pots like Ramon F. Adam's “Sultan of the Skillets.”
The first time I cooked near a chuckwagon was at Leonard “Wagon Cook” Sander's 50th birthday bash in December 2002. Since that experience – cooking Dutch oven scalloped potatoes and baking bread in driving rain on a porch – I’ve only had the honor to view a couple other chuckwagons.
I prefer Seabee Cook, a moniker earned after years of service in the U.S. Navy Construction Battalions. Like the wagon cook, who was at home on the range, feeding Seabees was special skill developed over a two-decade-long career in the Naval Reserves. I was known as the “field mess guru” during my tour with the 3rd Naval Construction Brigade and Pacific Fleet Seabees.
My large chuckbox, stained in a reddish hue and built to impeccable detail, draws folks to my camp. Since 2001, it has been the signature item in my camp cooking reparatory. Like the back end of the chuckwagon, the chuckbox has become the center point of my camp kitchen.
While the label of wagon cook may be something to aspire, I can only accept the moniker “chuckbox cook” (somehow “box cook” doesn't run off the tongue like Seabee Cook). I'll certainly answer to camp cook any day of the week. The title has an unpretentious ring to it. It's as if you’ve described me as a cook who harkens back to a simpler time, one born in the wrong century.
For years I compensated on our annual camping trek to the Sierra Nevada Mountains. I lived out a week-long fantasy each summer. You'd think I was fixin’ to feed a crowd of hungry hunters and fishermen. My outfit carried enough cookware to feed a baker's dozen or more. Give me a canvas A-framed cook-tent, a swamper and hungry outdoorsmen that appreciate good old camp grub, and I'm in the right setting.
In the end, my life will have spanned the back end of one century and front end of another, far removed from the glory days of the chuckwagon. As a retiree, I’m free from the day-to-day drudgery of a career. I now can pursue my life-long ambition to be a camp cook.
Each spring, my lovely bride and I journey to Oakland Feather River Camp in Quincy, Calif., where I’m the camp cook and chef for three and one-half months. Around the time I tire of 12-hour days and six-day work weeks, we return home to eight months of relaxation. I’m then free to cook for the El Dorado Western Railroad or camp at my leisure.
I bake bread in cast iron camp ovens just to give it away. While my camp may not always lodge under canvas, family and friends benefit from camp cuisine. Those that eat vittles ‘round the chuckbox share in my forty-year quest to replicate the life of a camp cook.
Welcome to my camp. From one camp cook to another, enjoy ‘Round the Chuckbox, where we cook delicious camp meals in frying pan, Dutch oven and grill. Cook with passion and “Come an’ Get It” will draw hungry diners to your chuckbox. Give thanks to God, settle into flavorsome grub and take pleasure in good companions.
MSCS Steven C. Karoly, USN, Retired
Camp cook and editor of ‘Round the Chuckbox
Therefore, whether you eat or drink, or
whatever you do, do all to the glory of God”
1 Corinthians 10:31
 |
| Sauteing fajitas at Upper Blue Lake, Eldorado National Forest, Calif. |
 |
| Chuckwagon cookin' in the rain |
I’ve only ridden a horse three times in the last forty years and have never driven a chuckwagon or fed a beef-centered diet to cowboys on the Western prairie. Nor have I piled flapjacks onto chipped enamel plates meant for hungry Sierra Nevada lumbermen or slopped biscuits and gravy on trays for a railroad gang.
At this point in my forty-year cooking career I could never call myself a “wagon cook.” While I've cooked in the shadow of one or two chuckwagons, it takes a special breed of cook to wrangle pots like Ramon F. Adam's “Sultan of the Skillets.”
The first time I cooked near a chuckwagon was at Leonard “Wagon Cook” Sander's 50th birthday bash in December 2002. Since that experience – cooking Dutch oven scalloped potatoes and baking bread in driving rain on a porch – I’ve only had the honor to view a couple other chuckwagons.
 |
| Seabee cooks of NMCB-17 |
My large chuckbox, stained in a reddish hue and built to impeccable detail, draws folks to my camp. Since 2001, it has been the signature item in my camp cooking reparatory. Like the back end of the chuckwagon, the chuckbox has become the center point of my camp kitchen.
While the label of wagon cook may be something to aspire, I can only accept the moniker “chuckbox cook” (somehow “box cook” doesn't run off the tongue like Seabee Cook). I'll certainly answer to camp cook any day of the week. The title has an unpretentious ring to it. It's as if you’ve described me as a cook who harkens back to a simpler time, one born in the wrong century.
 |
| The chuckbox |
In the end, my life will have spanned the back end of one century and front end of another, far removed from the glory days of the chuckwagon. As a retiree, I’m free from the day-to-day drudgery of a career. I now can pursue my life-long ambition to be a camp cook.
Each spring, my lovely bride and I journey to Oakland Feather River Camp in Quincy, Calif., where I’m the camp cook and chef for three and one-half months. Around the time I tire of 12-hour days and six-day work weeks, we return home to eight months of relaxation. I’m then free to cook for the El Dorado Western Railroad or camp at my leisure.
 |
| Artisan bread in camp |
Welcome to my camp. From one camp cook to another, enjoy ‘Round the Chuckbox, where we cook delicious camp meals in frying pan, Dutch oven and grill. Cook with passion and “Come an’ Get It” will draw hungry diners to your chuckbox. Give thanks to God, settle into flavorsome grub and take pleasure in good companions.
MSCS Steven C. Karoly, USN, Retired
Camp cook and editor of ‘Round the Chuckbox
Subscribe to:
Comments (Atom)
