Saturday, December 31, 2005

Grilled Leg Of Lamb With Rosemary, Roasted Pears, and Black Pepper Polenta

Unlike Thanksgiving, Christmas dinner was a little more adventuresome, but not by much. Those in attendance -- my parents and brother David's family -- all enjoy a good leg of lamb, especially one that's roasted over a fire.

GRILLED LEG OF LAMB WITH ROSEMARY, ROASTED PEARS, AND BLACK PEPPER POLENTA

Have your butcher butterfly the lamb for you. I added the juice from one lemon to the oil and garlic mixture.

1 head garlic, cloves removed and peeled
2 fresh rosemary sprig, needles stripped from stem, plus 8 sprig
Extra-virgin olive oil
Salt and fresh ground black pepper
5 to 7 pound leg of lamb, boned butterflied and surface fat removed
Salt and pepper
8 red-skinned pears
4 tablespoons balsamic vinegar
8 fresh rosemary sprig
Black Pepper Polenta, recipe follows

Preheat oven to 350 degrees F. In a blender, combine the garlic, rosemary, and 3/4-cup of oil; season with salt and pepper. Puree until everything comes together to form a paste; set aside for a few minutes to let the flavors marry.

Lay the lamb out flat, open like a book. Score the surface lightly with a paring knife. Rub the lamb with the garlic paste, being sure to get in the incisions. Roll up the lamb and tie with butcher's twine to hold the roast together.

Prepare an outdoor gas or charcoal grill. Season the lamb generously with salt and pepper, and then place it on the hot grill (put it on the top rack if you are using a gas grill). Sear the outside of the meat, turning, until brown all around, but do not char. Close the grill cover and roast for 30 minutes. The lamb is done when the center is still pink and the internal temperature reads 135 degrees. Allow the lamb to stand 10 minutes to let the juices settle before cutting off the twine and slicing.

To prepare the pears, halve the pears lengthwise and cut out the cores. Place the pears face down on a baking pan. Drizzle with 4 tablespoons of oil, toss the 8 rosemary sprig on top, and season with salt and pepper. Bake for 20 to 25 minutes, until the pears are fork tender.

To serve, spoon some polenta on the base of the plate and lay a few slices of the lamb on top; drizzle with a little oil and season with salt and pepper. Put a pear on each plate, face up, and drizzle them with balsamic vinegar. Garnish with a rosemary sprig.

SOFT POLENTA WITH PARMESAN AND BLACK PEPPER

2 quarts chicken stock
1 teaspoon salt
2 cups polenta or yellow cornmeal
1/3 cup heavy cream
2 tablespoons unsalted butter, at room temperature
1 cup freshly grated Parmesan
1 1/2 teaspoons freshly ground black pepper

In a large pot, bring the chicken stock and salt to a boil. Gradually whisk in the cornmeal in a slow steady stream. The liquid will be absorbed and the cornmeal will lock up; don't freak, just whisk through it. Lower the heat and continue to whisk until the polenta is thick and smooth, about 20 minutes. Add the cream and butter; continue to stir until incorporated, about 10 minutes.

Remove from heat, fold in the Parmesan and black pepper and serve.

This recipe by Tyler Florence was adapted from the Food Network website.

Tuesday, December 27, 2005

Now that the holidays are over ...

Now that the holidays are over and we’re tired of leftover turkey (okay, I still have a zipper bag in the freezer), it’s time to move onto broader culinary delights.

We had to wonderful meals this year. Turkey and all the fixin’s for Thanksgiving and lamb for Christmas. Both meals were roasted to perfection on the Webber kettle barbecue.

Tradition was the watch word last month for a large family Thanksgiving. With some 20 in attendance, the Karoly-Enriquez clan enjoyed a meal that was repeated in thousands of homes across this great land. Mashed potatoes, stuffing with rustic mushrooms, giblet gravy and German red cabbage complimented a 15-pound roasted tom turkey and honey-baked ham.

Thanksgiving has been my favorite holiday since childhood. As a kid it was mostly about the food. We always had oven-roasted turkey. Over the years, Dad roasted the heavy bird (always in the 20- to 22-pound range) on his no-name, non-descript barbecue rotisserie (you know, the kind with a half-dome hood that held the spit and motor).

Karoly Thanksgivings have rarely been used as R&D sessions. Mom prepared mashed potatoes, stuffing and gravy from the same family-tested recipes year after year. Good food was always placed on the table through my 18 years of home life.

One family custom always bothered me. In later years, each person at the table was asked to express what he or she’s thankful for. I don’t remember when this annual ritual started. Knowing my mother, it goes back to the 1950s or my grandmother’s table.

I have much to be thankful for -- a beautiful wife, three children who love the Lord, a son-in-law who loves my daughter and the most beautiful granddaughter on earth. The though of expressing all this in front of my siblings sent terror through my veins. I’d usually mutter, “I’m thankful for my life and please pass the gravy.”

As I said to the family this year before the blessing, I have a lot to be thankful for -- prime among that is my salvation in our Lord and Savior Jesus Christ. A wife who is a “fellow heir of the grace of life” (1 Peter 3:7); children who, after much discipline and instruction (Ephesians 6:1-4), have named the name of Jesus; and a 2 year old granddaughter who can recite “Jesus Loves Me” in toddlereeze all bring tears to my eyes. There’s much more -- like home and job -- all of which can be lost at a moment’s notice.

Sunday, December 11, 2005

Roaring Camp & Big Trees Railroad

I rode in the cab of Roaring Camp & Big Trees Narrow Gauge Railroad yesterday on the downgrade trip from Bear Mountain.

After the climb to the summit -- an eight percent grade at times -- I was taking pictures of the two-truck Shay locomotive. I was under the mistaken impression that the Dixiana was an old West Side Lumber Co. Shay. I asked the conductor, but directed me to the engineer.

So I walked over to Tom the engineer as he inspected the train for the return trip to the depot. Tom told me that the RC&BTNGRR #1 locomotive came from the east and that it had five or six pervious owners before Roaring Camp purchased it in the early 1960s. (The WSL Shay that's owned by roaring camp is the former West Side #7.) I had confused Roaring Camp with the Yosemite line, which owns two WSL Shays -- #10 and #15.

I introduced myself to Tom as one of the guys who's renovating the Diamond & Caldor Ry. No. 4 in Placerville. In discussion, it was evident that Tom was very knowledgeable of the El Dorado Western Railway Foundation's effort to restore the Four-Spot to its former glory.

Tom motioned me to follow him around the train as he made his inspection (and picked garbage up). We talked. He has seen the West Side & Cherry Valley Ry. parlor and combine cars that EDWRF is restoring. And he knew of the Michigan-California Lumber Co. 0-4-0 Poter locomotive in the yard of the museum.

I followed Tom to the rear of the train and up the fireman's side as we talked. By the time we had passed the first passenger car I had a sense that he was going to invite me into the cab.

A hot, greasy rattletrap -- that was my first impression of the cab ride. When I commented on the heat that radiated off the boiler head, Tom said, "You should've been in here on the uphill trip!" It made me appreciate the intermittent wafts of cool mountain air. The cab must be unbearable in the summer, I thought.

As a railroading novice, I find it hard to describe the trip to the depot. Tom and Doug worked in unison, rarely speaking except to discuss restoration efforts at Roaring Camp. The only command Tom gave was, “Open 'er up, Doug.” Doug responded with no more than a grunt as he jumped into action, turning valves.

Nor can I explain Tom's actions as he led the 93-year old Shay off the mountain. The geared locomotive never got above a walk, even when Tom fed steam to the three verticle engines. The weight on the engine and low gear ration restrained the train from its natural inclincation to run down the hill.

In all, I spent 20 to 25 minutes in the cab of the Shay. It's a ride that I'll repeat again. For the next trip, I'd like to learn the duties of the fireman and engineer. It will be a much more rewarding trip if know what they were doing.

Sunday, December 04, 2005

Spicy Polenta Lasagna

The El Dorado Western Railway Foundation held its annual Christmas party and pot luck dinner last Thursday. We offered spicy polenta lasagna, made from Italian sausage and store-bought polenta. Spicy polenta lasagna is adapted from an Associated Press recipe in the October 19, 2005 Sacramento Bee Taste section.

SPICY POLENTA LASAGNA

Use a 12-inch Dutch oven for a double recipe.

8 ounces sweet Italian sausage
1 medium onion, diced
1 (14-1/2 ounce) diced tomatoes
2 teaspoons hot pepper sauce
2 tablespoons chopped flat leaf parsley
2 tablespoons butter
1 (18-ounce) tube prepared polenta, cut into 1-2-inch thick slices
1 cup shredded mozzarella cheese
1/4 cup grated Parmesan cheese

Cook sausage until well-browned in 10-inch Dutch oven medium heat. Break up sausage as it cooks. (Remove casings from meat first if using links.) Remove sausage to bowl.

In drippings remaining in Dutch oven, cook onion until softened over medium heat. Add to bowl with sausage. Stir in tomatoes and their liquid, hot pepper sauce and parsley.

Melt 1 tablespoon butter in same skillet. Cook polenta, half at a time, until browned on both sides. Repeat with remaining butter and polenta slices. Set polenta aside on plate.

Spoon half of the sausage mixture into Dutch oven. Top with half of polenta slices and half of mozzarella and Parmesan cheeses. Repeat layer again, ending with Parmesan cheese.

Bake 20 minutes or until cheese is melted and bubbling. Serves 4.

Wednesday, November 30, 2005

Don Mason's Dutch Oven Newsletter

Here's the latest issue of Don Mason's Dutch Oven Newsletter from Northern California. Email Don at iron_kettle@hotmail.com to receive an electronic copy.

Don said in a recent email: "Your Blogger site is working. I am getting requests for our newsletter from Utah, Kansas, Michigan, New York and Vermont."


Friday, November 18, 2005

Barbecued Thanksgiving Turkey

Thanksgiving is one of those holidays where food is almost as important as the meaning behind the holiday. I’m thankful to have been raised in a family that agrees with me. It doesn’t matter which direction we travel -- south to one of the in-law’s houses, or to my sister’s in San Jose -- a roasted turkey awaits us.

A barbecued turkey at Thanksgiving -- or any other time of the year -- is simply divine. It's browned to perfection in the barbecue. Instead of filling the house with the pleasant aroma of a roasting turkey, you’ll be inviting all of your neighbors as its scent wafts over the fence into their yard. Better set extra place settings just in case.

BARBECUED TURKEY

I find that a fifteen-pound turkey is about right for the barbecue. But the important question is this: Will the turkey fit under the dome lid? On their Website, Weber advises that turkeys over 24 pounds may not fit under the lid of their barbecue kettles.

Completely thaw your turkey before grilling. It should be thawed in the refrigerator. A 15-pound turkey takes about three days to thaw. Thaw the turkey on the lowest shelf and place it over a pan to catch juices. Never thaw a turkey at room temperature.

I don’t recommend stuffing the bird. Instead, place the stuffing into a baking pan and place the pan on the grill (or in a Dutch oven) during the last 45 to 60 minutes that the turkey is on the grill. Use a thermometer to test the stuffing for doneness. It should reach 165 degrees. If the stuffing isn’t hot enough, leave it on the grill while the turkey cools. A colorful alternative is to stuff green, red and yellow bell peppers with your favorite stuffing. Grill alongside the turkey.

1 (15 pound) turkey, thawed if frozen
Olive or vegetable oil
Salt and pepper to taste
1 chopped medium onion
2 stalks diced celery
2 diced carrots

Consult the instructions for your charcoal barbecue kettle before proceeding. The amount of needed charcoal briquettes will vary slightly from model to model. This recipe is written for the Weber 22-1/2-inch Bar-B-Kettle™ Grill.

Ignite 50 charcoal briquettes and let them burn until they are barely covered with ash, about 20 to 30 minutes. While charcoal is burning, rinse thoroughly turkey under running cold water and pat dry. Rub skin with oil. Season with salt and pepper inside and out. Place turkey, breast side up, on a baking rack.

When charcoal is ready, place an even number of briquettes on the left and right sides of the lower grill. Place a drip pan between the charcoal. Position the cooking grill with the handles directly over the charcoal. This will make adding fresh briquettes easier. Adjust the top and bottom vents to maintain the barbecue at 325 degrees.

Place the turkey (in the baking rack) on the cooking grill. Make sure to center the turkey directly over the drip pan. Cover barbecue kettle. Add 7 charcoal briquettes to each side each hour. A 15-pound turkey is done in about 3 hours. During the last hour of grilling, add onion, carrot and celery to drip pan if desired to flavor drippings. You don’t have to turn or baste the turkey.

When the thermometer reaches 170 degrees in the breast or 180 degrees in the thigh, remove turkey from the grill. Let cool about 20 minutes before carving. The meat just under the skin will be pink. Figure about 1 pound of turkey (with bones) for each person.

Strain vegetables into a pint-sized measuring cup. Skim fat from drippings. Discard vegetables. Reserve 1/4 cup of the fat for the gravy, and discard the remainder. Serve sliced turkey with camp mashed potatoes and turkey gravy.

According the Weber Website, unstuffed turkeys will take:

10-11 pounds -- 1-3/4 to 2-1/2 hours
12-14 pounds -- 2-1/4 to 3 hours
15-17 pounds -- 2-3/4 to 3-3/4 hours
18-22 pounds -- 3-1/2 to 4hours
23-24 pounds -- 4 to 4-1/2 hours

This article was originally posted on www.Suite101.com in November 2000.

Saturday, November 12, 2005

Dutch Oven at El Dorado County Historical Museum

Two weeks ago, while working on rolling stock for the El Dorado Western Railway Foundation, Keith took me inside the county museum to view a recently donated Dutch oven.

Here's a few photographs of the cast iron oven:

The oven measures about 9-1/2 inches in diameter and 4 inches deep. The only marking that I found is the number 8 on the lid.

The interior of the oven. Note that it need to be scrubbed and re-seasoned.

The underside of the oven.

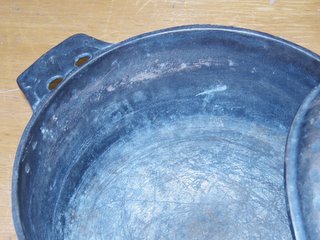
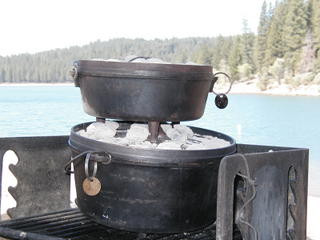
The inside of the lid. Note the rust. The oven is in very good shape.

Sunday, November 06, 2005

Beef Stew

Although I've been enjoying a self-imposed sabbatical from 'Round the Chuckbox, it's time to get cookin' again. My son and I enjoyed a simple beef stew last night that I baked in the oven

Here's the recipe:


BEEF STEW

2 pounds beef chuck roast, cubed
1 medium onion, chopped.
1 cup red wine
1-1/2 cups beef broth
2 tablespoons Worcestershire sauce
1 tablespoon tomato paste
2 bay leaves
1 teaspoon dried thyme
3 tablespoons all-purpose flour
2 medium carrots, cut into 1/2-inch rounds
4 medium potatoes, cut ieighth'shths

Pre-heat oven to 350 degrees. Lightly season cubed beef chuck roast salt and ground black pepper. Brown beef in hot oil in a 3-quart Dutch oven in 2 to 3 batches to avoid overcrowding. Remove each batch of beef to a plate after it is browned. Sauté onions in hot oil until browned, about 5 minutes.

Return browned beef to Dutch oven. Add red wine, beef broth, Worcestershire sauce, tomato paste, bay leaves and thyme to Dutch oven. Stir, replace lid and set inside oven. Bake for 1 hour. Prepare a slurry by whisking flour into 1/2-cup cold water. Remove lid and pour slurry into stew. Immediately stir until thickened. Replace lid and return to oven.

Meanwhile, prepare vegetables. Bring 1-quart salted water to a boil in a medium saucepan. Add potatoes and carrots. Reduce heat to a simmer and continue cooking until fork tender, about 10 to 15 minutes. Drain vegetables. Remove stew from the oven Stir vegetables into the stew. Return stew to the oven. Continue cooking until beef is tender.

Total cooking time for the stew will be approximately 1-1/2 to 2 hours. Makes about 2 quarts.

Tuesday, October 25, 2005

Don Mason's Dutch Oven Newsletter

Here's the latest issue of Don Mason's Dutch Oven Newsletter from Northern California. Email Don at iron_kettle@hotmail.com to receive an electronic copy.


Monday, October 24, 2005

More on "The Complete Guide to Making Sauces"

I can't find any information on The Complete Guide to Making Sauces on the Internet.

The publisher's website at Alibris also draws a blank. A search for author Christine France yields 53 books that she wrote or co-wrote. Titles include everything from Chocolate to Low Calorie Desserts to The Barbecue Book. Tomatoes is another popular theme.

But no The Complete Guide to Making Sauces. She did write a book on Salsas, Dips, Dressings, and Marinades, as well as Cook's Book of Sauces.

Quick and Easy Sauces: Over 70 Delicious Recipes to Transform Sweet or Savoury Dishes is the closest title to the book that I purchased at Borders.

Since the tag line for The Complete Guide to Making Sauces says, "Transform your cooking with over 200 step-by-step great recipes for classic sauces, toppings, dips, dressings, marinades, relishes, condiments and accompaniments," I suspect that this book is a compilation of her prior cookbooks on everything related to sauces, salsas and the like.

Sunday, October 23, 2005

Sweet Bell Pepper Salsa

Here's a second salsa from The Complete Guide to Sauce Making. I served this and fiery citrus salsa last light with grilled chicken breast for a friend who recently suffered a heart attack. He and his wife must now eat a heart-friendly diet. I though the salsas would liven the meal with flavor.


SWEET BELL PEPPER SALSA

This recipe is adapted from The Complete Guide to Sauce Making by Christine France.

1 red bell pepper
1 yellow bell pepper
1 red chili, seeded
2 tablespoons chopped cilantro leaves
2 tablespoons olive oil
1 tablespoon red wine vinegar
1 teaspoon cumin
Salt and ground black pepper, to taste

Blacken the skins of the bell peppers under a broiler or over the flame of a gas burner. Place peppers in a bowl and cover with a clean dish towel. Leave for 5 minutes so the steam helps to lift the skin from flesh. Remove the dish towel.

When the peppers are cool enough to handle,, pierce a hole in the bottom of each and squeeze out the juices into a bowl. Peel, core and seed the peppers, then process the flesh in and juices in a blender or food processor with the chilies until finely chopped. Stir in oil, vinegar and cumin. Season with salt and ground black pepper to taste. Serve immediately.

Saturday, October 22, 2005

Fiery Citrus Salsa

I made a rare addition to my cookbook library on my way home from work Friday. I often stop at Borders to purchase a magazine and enjoy a mug of iced tea before making the commute up the hill.

The price and the pictures are the best things about The Complete Guide to Making Sauces by Christine France. The $7.99 price tag initially attracted me to the book. Its 256 glossy pages are full of instructive pictures for everything from heavy traditional sauces to lighter fruit-based salsas.


FIERY CITRUS SALSA

This recipe is adapted from The Complete Guide to Making Sauces. The original recipe called for fresh mint, a herb that I dislike. Cilantro will also work in this recipe.

This spicy salsa is a nice alternative to heavy, fat-laden sauces. Use a Granny Smith apple for more tart sauce. For a milder or hotter salsa, vary the number and type of hot chilies. Fiery citrus salsa is delicious alongside grilled shrimp or chicken breasts.

1 orange
1 green apple
2 fresh red chilies, halved and seeded
1 garlic clove
8 fresh parsley leaves
Juice of 1 lemon
Salt and ground black pepper, to taste

Peel and section the orange into bowl. Peel the apple, cut into wedges and remove the core. Place chilies in a blender or food processor with orange segments, apple wedges, garlic and parsley leaves. Process for a few seconds until smooth. Then with the motor running, slowly pour the lemon juice into the mixture. Season with salt and ground black pepper to taste. Serve immediately.

Wednesday, October 19, 2005

More Beyond

As you know, the Strait of Gibraltar connects the Mediterranean Sea with the Atlantic Ocean. The narrow passage is about 40 miles long and varies in width from about nine to 24 miles. All ships that sail from the Atlantic to the Mediterranean—and vice versa—must pass through the straits.

Prominent mountains (known as promontories) flank the entrance to the Strait of Gibraltar from the east. These guardians were known to antiquity as the “Pillars of Hercules.” The Rock of Gibraltar guards the European shore of the strait. To the south, a mountain in Morocco, Jebel Musa, guards the African shore.

The Spanish drew the Pillars on their 15th century coat of arms. The scroll that crossed the Pillars contained the Latin motto: Ne Plus Ultra—No More Beyond. These words warned sailors not to enter the Atlantic Ocean, for they believed nothing existed beyond the Pillars. Certain death lay beyond the Pillars, where mariners would surely sail off the edge of the earth.

However, in 1492 Christopher Columbus destroyed that common belief by sailing far out into the Atlantic Ocean—beyond the Pillars of Hercules. He discovered the New World on October 12, 1492, after a 36-day voyage from the Canary Islands.

In Valladolid, Spain, where Christopher Columbus died in 1506, stands a monument commemorating the great discoverer. Perhaps the most interesting feature of the memorial is a statue of a lion destroying one of the Latin words that had been part of Spain’s motto for centuries. The word being torn away by the lion is the Latin word Ne, to make it read Plus Ultra, which means More Beyond.

Columbus had proven that there was indeed “more beyond” the Pillars of Hercules.

When you think about it, the Sadducees espoused Ne Plus Ultra as well. Like the early mariners of the Mediterranean Sea, who said there was no more beyond the Pillars, the Sadducees said there was no more beyond the grave.

Jesus corrected the Sadducees’ mistaken understanding of God’s power to resurrect:

Jesus answered and said to them, “You are mistaken, not knowing the Scriptures nor the power of God. For in the resurrection they neither marry nor are given in marriage, but are like angels of God in heaven. But concerning the resurrection of the dead, have you not read what was spoken to you by God, saying, ‘I am the God of Abraham, the God of Isaac, and the God of Jacob’? God is not the God of the dead, but of the living.” (Matthew 22:29-32).
Jesus Christ, the “Lion of Judah,” through His life, death, and resurrection, has torn that word Ne from the phrase, giving us the reality of More Beyond. Jesus clearly taught the Sadducees that Abraham, Isaac and Jacob had moved beyond the grave to be with Him in heaven.

The Hebrew writer cautioned: “And as it is appointed for men to die once, but after this the judgment” (Hebrews 9:27). Beyond the grave, there are two destinies: The righteous shall enter into eternal life, and the wicked into everlasting punishment, according to Jesus in Matthew 25:46.

Because there is “more beyond” the grave, Jesus pleaded:

Enter by the narrow gate; for wide is the gate and broad is the way that leads to destruction, and there are many who go in by it. Because narrow is the gate and difficult is the way which leads to life, and there are few who find it (Matthew 7:13-14).
What is your destiny beyond the grave? Which way will you take?

Will you stand with the Sadducees and proclaim that there is no more beyond the grave? To do so is to “go away onto everlasting punishment” when you die.

Or will you pass through the narrow “strait”—that is to heaven? Jesus has prepared a home for you in heaven (John 14:1-3). Be ready, for there is more beyond.

Adapted from an invitation by Brent Wiley, evangelist for the church of Christ in Los Osos, California.

Tuesday, October 18, 2005

IDOS Fall Convention in Camp Verde, Arizona

Here's an email from Mark Wilkins, director of the Arizona Chapter of IODS. This will be the second year that the convention is being held in Arizona. Next year, the convention will move elsewhere, likely somewhere in the west.

=====<<>>=====

Reminder of the upcoming IDOS Fall Convention & DOG

When: Saturday, November 5, 2005

Where: Camp Verde, Arizona Community Center

Come enjoy a great day learning & sharing about Dutch ovens at the International Dutch Oven Society Fall Convention in Camp Verde November 5th, 2005 at the Community Center in downtown Camp Verde. Classes will begin at 9 a.m. and will run 50 minutes each until 3 p.m.

Topics to be covered are:
  1. Dutch Oven Beginner Basics -- selection, seasoning, cleaning, care, accessories, are just a few of the ideas discussed.
  2. Fabulous Breakfasts -- Various ideas & samples of great Breakfast dishes that can be prepared in Dutch Oven.
  3. "Don't Be Chicken" -- Variety of chicken ideas and methods of preparation for the Dutch Oven.
  4. Creative Dutch Oven Tips & Tricks -- explore some innovative and creative ways to use your Dutch Oven & accessories. Ever make Ice Cream in your Dutch Oven?
  5. Ultimate Dutch Oven -- demonstration & methods for cooking in the Camp Chef Ultimate Dutch oven & Camp Chef Turkey Roasters.
  6. Breads & Cakes -- The fun & ease of preparing fabulous breads & cakes in the Dutch Oven.
There will also be a few vendors on hand with Dutch Oven related items, as well as a Taste of Dutch booth with samples throughout the day. Meet the current president of IDOS Clyde Miller. Vice-president & former world champion Randy Macari who will be on hand to greet and meet you along with other IDOS Board members, including the leadership of the Southern California Chapter Brenda Wildish and her gang.

There will be a IDOS member meeting from 3:15 to 4 p.m. with the leadership of IDOS on hand to explain the future goals of IDOS and answer any questions or suggestions from the floor. This is open to all to attend.

And then, at 4 p.m. the real fun begins! We invite all those in attendance to bring their ovens, equipment and supplies to prepare their favorite dish on site for our evening potluck. Serving time to be 6 p.m. If your new to Dutch oven and not quite confident yet -- bring your stuff and there will be plenty of folks on hand to walk you thru your first Dutch oven experience to make it a pleasant and successful experience! For those that arrive early, on Friday evening we will do a mini-DOG for those that are there and wish to participate.

A list of local hotels and RV Campgrounds in the area is posted on the http://www.blogger.com/www.idos.org website, or email me at: cobweb7513@qwest.net for a listing.

We look forward to seeing as many of you as possible as this is the last time we will have the opportunity to host the Fall Convention for a while as next year it will move to another location.

Saturday, October 08, 2005

Pot Luck with Family and Friends

There's nothing better than to attend a pot luck dinner with family and friends. The food is always delicious. And the company is even better.

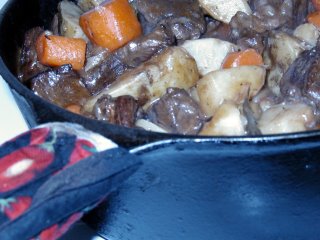
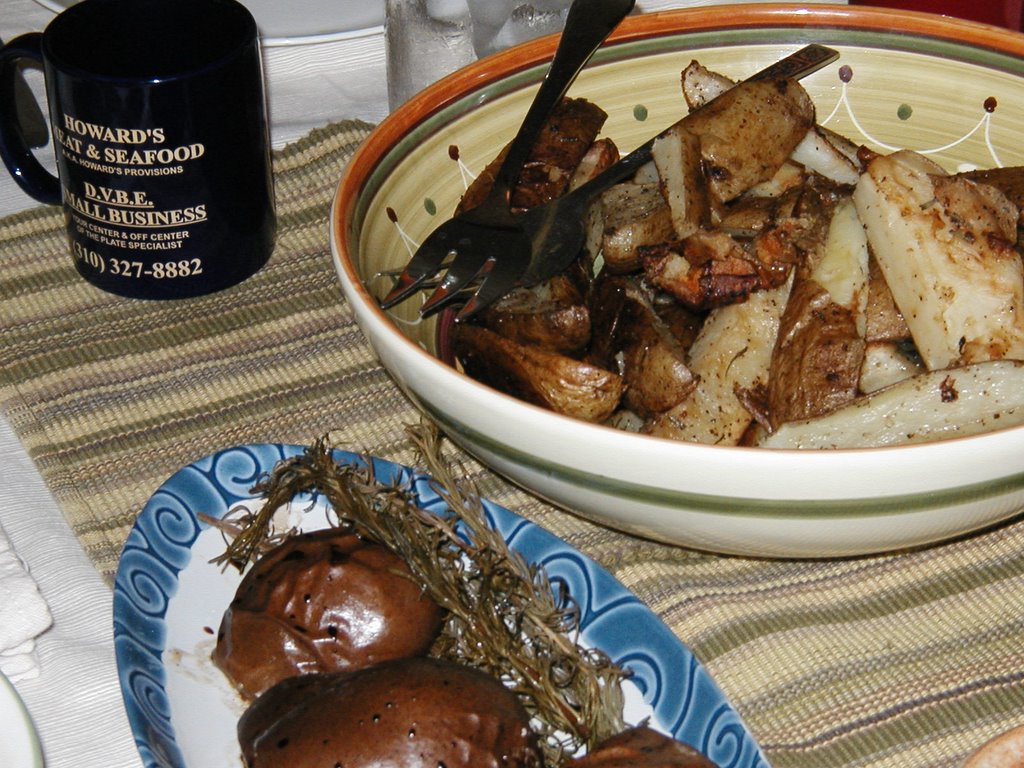
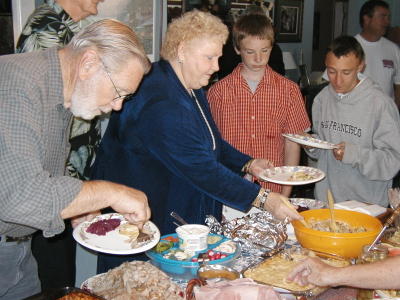
If it weren't for the company, the food would be the best part of any pot luck dinner.

Most pot lucks offer a wide variety of dishes.

I brought this relish tray to the pot luck.

Friday, October 07, 2005

Old West's Restaurant on the Range

The chuckwagon -- a moving storehouse and kitchen for the Old West's cowhand. This weekend, authentic cowboy cooks from some 25 ranches are competing in Ruidoso, New Mexico in one of the nation's richest chuckwagon cookoffs.

Here's an article on the Lincoln County Cowboy Symposium by Martha Hollis, from last July:
Put on your cowboy hat and working pair of boots to celebrate the Old West's restaurant on the range — the chuckwagon. Betcha there will be no microwave ovens in the infield of the Ruidoso Downs Race Track on New Mexico Highway 70 where 40 cowboy cookin' teams will compete over open fires for a large purse for their beef, beans, potatoes, biscuit and dessert creations. Judges points are swayed by authenticity. This competition is the hottest in the West. (Continue reading on SouthernNewMexico.com.)

Thursday, October 06, 2005

Lincoln County Cowboy Symposium

For the chuckwagon enthusiasts our there in blogland, the Lincoln County Cowboy Symposium (and here) and Chuckwagon Cookoff is happening this weekend in Ruidoso Downs, New Mexico.

Here's the address incase you're ridin' through:

The Hubbard Museum of the American West
841 Hwy 70 West
PO Box 40
Ruidoso Downs, NM 88346

Photos from the 2004 event can be found here.

The symposium schedule is full of serious stuff, like "Ranching for Substainability and Profit." There's also plenty of campfires, barbecues and entertainment for us city folk.

Monday, October 03, 2005

Iron Chef Challenge Location in Reno Update

Dave Herzog posted this message on the IDOS Forum this afternoon:

=====<<>>=====

Ok everyone! here is the latest info on the DOG in Reno. I have lined up 2 hotel/motels with lodging discounts for the weekend. just mention that you are with the Dutch oven Cook-off to save on the hotel rates!

The first is the Meyer Crest Quality Inn in Reno at 1-800-626-1900 or 775-329-10011, 885 S. Virginia St., Reno, Nevada. Price including tax is $56.00 per night. Cut off date for this price is October 12.

The second one is the Super 8 Motel in Sparks at 775-358-8884, 1900 E. Greg St, Sparks, Nevada. Price is $59.99 with no cut off date on this one.

I'm working on a third but, no promises!

This weekend in Reno will be a busy and full weekend with pro bull riding in town and a few other big events, so book as soon as you can! Also for the DOG contact me now for a space with a table to use in your cooking area. I have only a few left, after they are gone you will need to supply your own tables for prep, etc.

I hope to see you there! Gary Bergoff (Radar from M*A*S*H) is going to try to fly from Florida to Judge! But, no promises! He told me he can't promise because of his schedule, but, he will try.

Saturday, October 01, 2005

Cobb Salad with Roast Beef

I enjoy a crisp green dinner salad all year. Salads with few ingredients are winners in my book. I'm not a fan of complex salads. You can please me with iceberg, romaine or red leaf lettuce. Add a little color--shredded carrot and red cabbage--and a creamy homemade blue cheese dressing.

Don't cloud the salad with celery (the stuff gags me!), broccoli flowerets (I love it cooked, though) or those tiny pickled corn cobs. I don’t mind pickled red beets (in fact, I love them). And a few cauliflower flowerets on the side as fine with me.

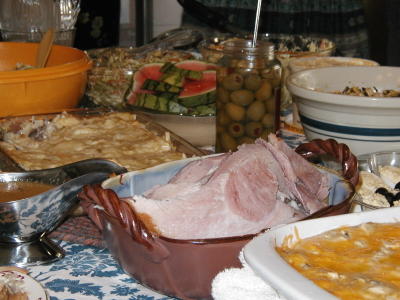
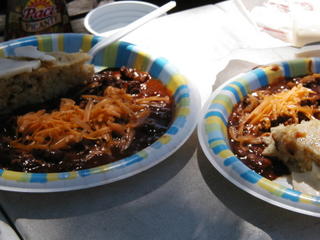
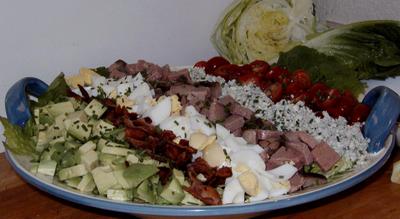
And forget the fresh tomatoes. My mother tried, but failed to pass the Karoly’s summer-long love affair with garden fresh tomatoes on to me. Pass catsup, salsa and canned tomatoes by my plate and I’ll bite. I’ll leave the fresh tomatoes to others.

Sometimes I think my obsession with green dinner salads is just an excuse to eat blue cheese dressing. But it’s one obsession that’s rubbed off on my daughters. Together we serenade “Blue cheese, blue cheese, blue cheese” when we order salads. My son has to be different. He’ll ask for Italian.

I’ve said all this to say this: When I find a restaurant that serves a first-rate Cobb salad, I latch on to it. So much so, that I’ll only order that entrée from that particular restaurant. Locally, Main Street Grill in Placerville, California offers a great tri-tip Cobb with avocado, bacon, hard-cooked eggs, tomatoes and blue cheese crumbles.

I enjoy a hearty meat salad summer or winter. They’re ideal when the thermometer passes the century mark. Leftover grilled meat and the opportunity to run an oven-free kitchen make the Cobb salad the ideal summertime dinner entrée.

But what about fall and winter when the sun wanes over the horizon? A Cobb is the ideal entrée for a lazy fall day. No cooking is required if the meats and eggs are cooked ahead. The Cobb can be the perfect vessel for leftover items.

Unless you’re chilled to the bone and need a hearty bowl of soup to warm you through, try Cobb salad this week.

COBB SALAD WITH ROAST BEEF

Any meat or poultry can be used for this salad. Grilled meat adds a nice charred flavor to the salad. Dice the meat and arrange in rows with the avocado, tomato, bacon, blue cheese and eggs. Dress with your favorite salad dressing if desired.

4 cups iceberg (about 1/2 head), cut into bite-size pieces
1 bunch watercress, stems removed
2 cups romaine (about 1/2 head), leaves separated and torn into bite-size pieces
8 ounces cooked roast beef or steak, diced
2 medium tomatoes, diced
4 strips cooked bacon, crumbled
3 hard-cooked eggs, diced
1 ripe avocado, peeled and diced
4 ounces blue cheese, crumbled
2 tablespoons finely cut chives
1 cup Cobb dressing (recipe follows)

Arrange lettuce and watercress in a large bowl or individual serving bowls. Arrange beef, tomatoes, bacon, eggs, avocado and blue cheese in neat rows on top of greens. Completely cover the greens. Sprinkle chives over the salad to garnish. Dress the salad just before serving. Toss if desired. Serves 6.

COBB DRESSING

3 tablespoons red wine vinegar
1 tablespoon fresh lemon juice
2 teaspoons Dijon mustard
1 small clove garlic, minced
1/2 teaspoon salt
1/2 teaspoon ground black pepper
1/2 cup extra-virgin olive oil

Whisk together all ingredients except oil in a small bowl. Add oil in a slow stream, whisking until emulsified.

Friday, September 30, 2005

Camp Kitchens for Hurricane Katrina Relief Workers, #5

.
New Orleans, Louisiana, September 17, 2005 -- Gallon-sized cans of green beans are open and ready to be cooked at a field kitchen set up by the Arkansas branch of the Southern Baptist relief association. The American Red Cross provides these hot meals using their feeding trucks to people throughout the city . Win Henderson/FEMA photo. (A #10 can is actually 3 quarts in volume.)

Thursday, September 29, 2005

Camp Kitchens for Hurricane Katrina Relief Workers, #4

.
Base Camp, New Orleans, Louisiana, September 15, 2005 -- A cook prepares the grill to cook a meal at Base Camp Zephyer Field. This mobile kitchen is operated by Port-A-Pit Catering Services of Tuscon, Arizona. Marvin Nauman/FEMA photo.

Camp Kitchens for Hurricane Katrina Relief Workers, #3

.
Base Camp, Louisiana, September 15, 2005 -- A relief worker hands out a meal to a disaster worker at Base Camp Zephyer Field. Marvin Nauman/FEMA photo.

Wednesday, September 28, 2005

Camp Kitchens for Hurricane Katrina Relief Workers, #2

.
Base Camp, New Orleans, Louisiana, September 15, 2005 -- The food line for emergency workers and relief workers at Base Camp, Zephyer Field. Hotel rooms are difficult to find and many workers sleep in tents, sleeping bags, cars or where ever they can. Many areas of the city are still without power and utilities. Marvin Nauman/FEMA photo.

Camp Kitchens for Hurricane Katrina Relief Workers, #1

.
New Orleans, Louisiana, September 15, 2005 -- Disaster Workers at Base Camp are lined up at one of the kitchens to get a meal. During a disaster all of the needs of disaster workers must be met along with those of the victims. Marvin Nauman/FEMA photo.

Tuesday, September 27, 2005

Shrimp and Pasta with Creamy Pesto Sauce

I love versatile recipes, especially recipes where you can trade ingredients on a one-for-one basis. Any recipe that adapts to leftovers and stocked pantry items is versatile in my estimation. Sunset’s recipe for shrimp and pasta with creamy pesto sauce is the perfect example.

I’ve had my eye on pasta for over a week now. On the way home from work I purchased a 12-ounce box of angle hair pasta (my country market carries three pastas: spaghetti, angle hair and elbow macaroni). A small jar of traditional pesto, three leftover chicken thighs and the remains of a bag of sun-dried tomatoes all went into my spur-of-the-moment pasta for dinner.

My 13-year old son wolfed down two helpings despite the fragrant aroma from the basil. He even managed to work around the sun-dried tomatoes. I have a hit!

SHRIMP AND PASTA WITH CREAMY PESTO SAUCE

This recipe was published in Sunset Magazine, February 2003. I prefer roasted red pepper pesto to traditional pesto made with basil and pine nuts.

12 ounces penne pasta
1 pound shrimp, cooked, frozen
1/2 cup prepared pesto
1/4 cup heavy cream
1/4 cup chicken broth
3 tablespoon dried tomatoes, oil-packed
Salt and black pepper, to taste

In a 4- to 6-quart pan over high heat, bring 3 quarts water to a boil. Add pasta and cook, stirring occasionally, until tender to bite, 7 to 12 minutes. Drain and return to pan.

Add shrimp, pesto, cream, stock and dried tomatoes to pasta. Stir over medium heat until hot and evenly incorporated, 2 to 3 minutes. Add salt and pepper to taste. Makes 3 to 4 servings.

Sunday, September 25, 2005

Sailor Becomes Navy's First, Only Personal Executive Chef

By JO2 (SW) Ahron Arendes, Commander, Naval Air Forces Public Affairs

Culinary Specialist 1st Class (SW) Brandon Parry became the first Sailor to earn the title of Personal Certified Executive Chef (PCEC) May 13, 2005.

An enlisted aide to Commander, Naval Air Forces (COMNAVAIRFOR), VADM James Zortman, Parry earned the certification after passing the practical exam, a written exam, and nearly a decade of culinary education.

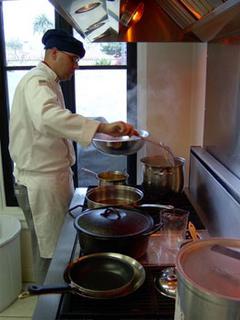
CS1 (SW) Brandon Parry became the first Sailor to earn the title of Personal Certified Executive Chef (PCEC). Pictured above he is at the stove taking the practical cooking exam for the certification.

"It's awesome!" Parry said about earning the qualification. "So far, this is the pinnacle in my culinary career. A lot of people can cook well, but the certification process forces you to learn everything there is to know about being a chef."

According to the American Culinary Federation (ACF), a PCEC is a chef with advanced culinary skills and a minimum of seven years of professional cooking experience, with a minimum of two years as a personal chef. They provide cooking services on a "cook-for-hire basis" to a variety of clients. They are responsible for menu planning and development, marketing, financial management, operational decisions, and providing nutritious, safe, eye-appealing and properly-flavored foods.

The PCEC certification, which the ACF created in 2003, is awarded based on excellence in three areas: education, work experience, and tests.

The education portion includes formal schooling (high school to graduate studies) and continuing education. In addition to these, each candidate must complete food safety, sanitation, nutrition, hospitality and supervisory courses. The work experience portion includes a practical cooking exam where candidates prepare two different three-course menus, while practical examiners and executive chefs observe and critique the candidate's cooking and sanitation skills. The written exam portion includes 100 questions on basic and advanced cooking, sanitation, nutrition, personal chef management, and basic and advanced baking. The test must be completed in one hour with a score of at least 70 percent.

"The [practical] exam can be a little intimidating, because it's outside of the normal type of procedure that we do, but I think CS1 did very well," said Chef Michael Harants, Corporate Chef of the Navy at Naval Supply Systems Command (NAVSUP) and practical examiner.

Parry said that reaching his goal of earning the PCEP qualification was something he has been focused on for several years.

"I have been working for this my whole career," said the 15-year Sailor. "When I first came in, I was 18 and stationed on the USS Independence (CV 62). I was put into the bake shop, baking 3,000 loaves of bread a day. I found out then that I was a natural at cooking. About midway through my career, I decided I wanted the certification, and I had been working for that since then."

According to Parry, being an E-7 to E-8 is a requirement for the qualification, but since he has been performing the job of an E-7, he was able to have that waived. He also said that in order to reach his goal, he had to have ambition and a deep passion for culinary arts.

"CS1 stands out because of his ambition," said Harants. "Culinary certification was one of his career goals, and he did what he needed to do to reach that goal." Harants added that culinary certification is an opportunity for Sailors to validate their skills and knowledge. "The certification application process that a cook or chef has to go through is not just checks in the box. There is a written and a practical exam demonstrating that one is knowledgeable and can apply those skills to everyday duties," he said. "One of the significant factors of certification is the level of professionalism that one demonstrates by going the extra mile."

According to Marylin Burchfield, ACF certification programs coordinator, Parry is not only the first Sailor in the Navy to have the PCEC certification, but he's only the second in the Department of Defense. She said the PCEC certification or any certification, will help people get better jobs and better pay once they reach the civilian sector. They will also have the skills and knowledge to run their own businesses.

"If one wants to take their culinary skills to the next level, then they have to put forth the effort to seek out any additional culinary education they can to excel and set themselves above the rest," said Harants. "The Navy offers CSs several avenues for continuing education in culinary arts. The Adopt-a-Ship program, bringing industry professionals to the CS community, is one way they can open up new culinary experiences. Culinary internship opportunities in the local fleet area can also help one to progress with culinary skills and knowledge."

"I think certification is important to the Navy," Parry said. "It forces people to know the formal aspects and history of cooking. The whole process also forces you to be a good cook, and that is what it's all about, knowing the nitty-gritty of food."

For more information on the certification process or future culinary educational opportunities, contact Chef Michael Harants by e-mail at Michael.Harants@navy.mil.

Saturday, September 24, 2005

Lightning Cake with Pears and Almonds

All meals at Grandma Bertha Karoly’s Mill Valley home were good. We often enjoyed a Sunday afternoon roast leg of lamb with roasted potatoes and German red cabbage. Although, I don’t remember many desserts, I’m certain I ate any number of sweets at her table.

This recipe is adapted from Any One Can Bake, published by Royal Baking Powder Company in 1927. My grandmother purchased this book on April 18, 1927 when my father was 17 months old.

I suspect that this recipe was called lightning cake because it’s made “lightning fast.” The original cake is a brownie-like dessert with a sugar-cinnamon topping. I adapted it by folding diced Bartlett pears and sliced almonds into the batter. And a used a crumb topping made from oatmeal, flour and sugar.

LIGHTNING CAKE WITH PEARS AND ALMONDS

Use your favorite crumb topping for the cake. My favorite recipe follows.

1/2 cup milk
3 eggs
1/2 cup melted butter
1-1/2 teaspoon vanilla
1-1/2 cups sugar
1.2 teaspoon salt
3 cups all-purpose flour
1 tablespoon baking powder
2 Bartlett pears, peeled, stemmed and diced
1/2 cup sliced almonds
2 cups crumb topping (recipe follows)

Pre-heat a 12-inch Dutch oven with 9 coals underneath and 18 coals on the lid. Combine milk, eggs, sugar and vanilla in a large bowl. Sift flour, salt and baking powder in a bowl. Add dry ingredients to liquid ingredients and mix thoroughly. Dough will be stiff. Fold in pears and almonds.

Lightly oil Dutch oven. Spread dough in Dutch oven. Sprinkle crumb topping evenly over cake dough. Bake at 375 degrees for 50 minutes or until a toothpick inserted in the center comes out clean. Cool; cut into 12 to 18 servings.

CRUMB TOPPING

1-1/2 cups all-purpose flour
3/4 cup packed brown sugar
1/2 cup sugar
1/4 teaspoon salt
1 teaspoon cinnamon
1-1/2 cups old fashion rolled oats
1/2 cup softened butter, cut into pieces

Combine flour, sugars, salt, cinnamon and oats in a medium bowl. Rub in the butter with your finger tips until it’s well blended and the mixture crumbles coarsely. Refrigerate until needed. Makes about 1 quart.

Friday, September 23, 2005

Guest Chef Brings "Canadian Baking" To USS Tarawa

By JO3 Adam Stapleton, USN, USS Tarawa (LHA 1)

It may have seemed like your average "Hamburger Tuesday" aboard USS Tarawa (LHA 1), but in fact it was far from an average burger day as cooks had the aid of a professional chef to spice it all up.

"Let's try the option of adding sautéed mushrooms and onions," Chef Samuel Glass said to the wardroom culinary specialists (CSs) over the sizzle of the beef-patty "sliders" on the grill. "Let's add some flair to an old Navy favorite."

Chef Samuel Glass, center, passes on cooking tips to CS2 Tawney Cortezparedes, left, and CS3 Michelle Harvey, both USS Tarawa (LHA 1) crew members. Glass visited the San Diego-based amphibious assault ship as part of the Naval Supply Systems Command's Adopt-A-Ship program during a recent pre-deployment training exercise off the coast of Southern California in mid May. U.S. Navy Photo by PHAN (AW) Kelly Morgan.

Chef Samuel Glass, a volunteer in the Adopt-A-Ship Program, came on board the San Diego-based amphibious assault ship during pre-deployment training operations with the goal of inspiring the CS's creativity.

"It was a pleasure working with him," said Tarawa CS2 (SW/AW) Michelle Harvey. "We learned a lot of new techniques, like how to take what the menu calls for and then spice it up a bit."

This is the ninth time the Mississauga, Ontario, Canada, native has participated in the program and his third time instructing on Tarawa.

"None of the other armed forces have a program anywhere near as accessible," said the certified executive chef. "The opportunity to go underway on a ship, for me, was a thrill and an honor."

Chef Glass, the Director of Culinary Education at the Culinary Arts School of Ontario, also shared his personal philosophy on food preparation with Tarawa CSs. "I've always followed the saying, 'You're only as good as your last meal.' If you screw up on a meal, then nobody remembers how many times you've done well. That's something I try to instill in the other cooks, the art of caring about every dish you prepare."

"Time management and proper meal planning," said Harvey. "That's the main lesson I took from Chef Glass, how to really focus on dish preparation for the hours during which we serve."

Not all of the teaching is one-sided, however, as Glass also has picked up a few tricks from Sailors. "I once saw someone here chopping hard-boiled eggs and putting them in the chicken gravy. I'd never seen that done, so when I asked him about it he said, `Well, that's the way we do it in the South.' To this day I talk about how the best turkey gravy I've ever tasted was cooked by a Navy Sailor."

Tarawa CSs received training they can use in more ways than one. "I've seen how the Navy is not only providing CSs with training for life in the military, but also for life after the Navy as well," said Glass. "And to help out, after my visit, I'll file a report with NAVSUP that gives these CS's credit towards their certifications as cooks by the American Culinary Federation."

"It's a great program, and it's good for our Sailors to see a side other than the Navy," said CS1 (SW) Janelle Goosby. "What they do and learn here they can take with them and use in the civilian world."

In addition to training the CSs in the main galley, wardroom, and the Expeditionary Strike Group 1 flag mess, Chef Glass also visited USS Cleveland (LPD 7) for two days of training with their food service team. As Chef Glass' week at sea came to an end, he recounted how lucky he feels to be involved with the Adopt-a-Ship program.

"I get to do this as a volunteer chef, I get to share my love of cooking while supporting those whom I think are some unsung heroes," said Glass. "It's important to remember how hard these Sailors work. The next time you see a CS, don't hesitate to thank them for their hard work and to compliment them on a meal well done."

Thursday, September 22, 2005

Dijon Crusted Pork Chops

.
The other night I baked pork chops with a Dijon crust. After dipping the thin chops is a Dijon mustard and mayonnaise sauce, I dredged them in Panko bread crumbs. The chops were good. But the soggy crush slipped right off the chops when I removed them from the baking dish.

The top crust browned fairly well around the edges of each pork chop. The center was soggy disappointed me. My guess is the sauce pooled in the center of each chop. A messy experience indeed!

The subtle flavor of the Dijon-infused crust impressed me. The sauce, tempered with the richness of the mayonnaise and sweetness from the apple juice, contrasted the herb-flavored Panko bread crumbs very well.

This recipe was definitely a keeper. I got the idea from a U.S. Armed Forces Recipe Service recipe card. (I’ve said in the past that these recipes are ideal for any volume operation that’s looking for basic quantity recipes. You do need to test each recipe before adapting it to your menu.)

I found the recipe for Dijon baked pork chops Tuesday afternoon in my computer recipe file. I needed to do something with three pork chops that were sitting in the refrigerator. The Dijon crusted pork chop appealed to me with the marriage of distinct flavors and textures.

After dipping the pork chops in the Dijon sauce, the recipe instructed the cook to dredge it in bread crumbs and set them on lightly oiled sheet pans. Military cooks use convection ovens today. The blast of dry, hot air quickly browns the crust. The bottom crust even browns as heat is conducted up through the thin skin of the aluminum sheet pans.

Although the recipe for Dijon baked pork chops might work in an institutional setting, my challenge was to re-work the recipe for a cast iron skillet or Dutch oven.

Instead of baking the pork chop in the sometimes unpredictable heat of a Dutch oven, I elected to cook the in a skillet. I first dredged the pork chops in flour seasoned with salt and pepper. Next came a quick dip in a thinner Dijon mustard sauce. I found that you need to let the excess sauce drain from the chop.

To finish, I dredged the pork chops in bread crumb and herb mixture and placed them in hot fat. Do not crown more that four chops in a 10-inch skillet. I also reduced the heat to medium after pre-heating the skillet over medium-high heat. This gave the crust time to brown and thoroughly cook without burning. And it cooked the pork chop to a nice medium to medium-well doneness.

DIJON CRUSTED PORK CHOPS

Panko bread crumbs are used in Japanese cooking for coating fried foods. They’re ideal for breading because they create a deliciously crunchy crust. Locate Panko bread crumbs in the Asian isle of the supermarket. About 1/4 cup bread crumbs are needed for each pork chop.

1/4 cup Dijon mustard
2 tablespoons mayonnaise
1/4 cup apple juice (or chicken broth)
1/3 cup all-purpose flour
Salt and pepper, to taste
1 cup Panko bread crumbs
2 tablespoons finely chopped fresh parsley
1-1/2 tablespoons chopped fresh thyme
4 center-cup pork chops, about 5 ounces each

Combine flour, salt and pepper on a plate. Combine mustard, mayonnaise and apple juice or broth in a bowl. Combine bread crumbs, parsley and thyme on a plate. Pre-heat a 10-inch cast iron skillet over medium-high heat. Heat about 2 tablespoons oil in skillet.

Dredge pork chops in flour to coat. Then dip pork chops in mustard sauce and drain off excess. Dredge in bread crumb mixture. Place chops in skillet and cook until nicely browned, about 5 to 8 minutes per side. Add additional oil as needed to brown chops. Adjust heat under skillet to prevent burning.

Tuesday, September 20, 2005

Lots of Sausage Gravy

As announced in the IDOS Forums, Dave Herzog has accepted a challenge to bake 900 biscuits in a 22-inch MACA Dutch oven. And what’s a biscuit without gravy? Dave’s recipe for six gallons of gravy is posted below. You have to watch Dave in action at the Iron Chef Challenge for Hurricane Victims to learn his biscuit secret.

SAUSAGE GRAVY FOR A 22-INCHER

The recipe for Emeril’s essence is available on Emerils.com.

5 pounds breakfast sausage
5 pounds bacon, diced
2 pounds yellow onions, diced
3/4 cup minced garlic or 1/4 cup granulated garlic
2 tablespoons red pepper flakes
2 tablespoons black pepper
3 tablespoons kosher salt
2 tablespoons Emeril’s essence
5 cups all purpose flour
4 pounds unsalted butter
5-6 gallons whole milk, cool, not fridge cold.

Preheat a MACA 22-inch Dutch oven with about 35 coals underneath. Add the sausage and bacon together and brown until bacon is golden. Stir in onions, garlic, red and black pepper, salt and essence. Sauté until onions just turn opaque.

Add butter. When melted, stir in flour and cook for about 5 minutes, until flour turns light brown. Add milk, 1 gallon at a time, allowing gravy to thicken, up to 5 gallons. If gravy is too thick, add additional milk a little at a time to thin.

Serve over anything you want! Serves 200 to 250, depending on serving size.

Saturday, September 17, 2005

Letter from Dave Herzog

Dave Herzog sent me this letter for the Iron Chef Challenge Cookoff in Reno, Nevada on October 15, 2005. It includes much of the information that's already been published at 'Round the Chuckbox. Everything I currently know of the cookoff is found in Dave's letter.

=====<<>>=====


Dear Dutch oven cook and enthusiasts:

The Cast Iron Cooks of the West is holding a fundraising “Iron Chef” Dutch oven cookoff in Reno, Nevada on October 15, 2005 for hurricane Katrina relief efforts. The cookoff will be held in the parking lot of Sportsman’s Warehouse at 3306 Keitzke Ln. Rules, a registration sheet, and judging form is enclosed in the packet so you have an idea of how we will run this cook-off.

Each team may consist of up to 3 team members and will have a cooking area of approximately 12’ X 12’ to cook in. We are suggesting that each team bring some sort of easy up or cover in case of the weather. Each team may bring pantry type of items to supplement the secret ingredient box, which each team will receive at the cooks meeting just before the cook-off begins.

All proceeds will be going to the American Red Cross and Salvation Army hurricane Katrina relief efforts. Since we are putting this cook-off together with such a short amount of time a list of prizes is not complete but is extensive and is growing daily. If you have any questions contact me at (530) 257-0896 or e-mail at norcaldutchovendave@yahoo.com. Or you can contact Sarah Wootten in the camping dept. at Sportsman’s Warehouse in Reno at (775) 828-1500.

We will also be having a DOG at the same time as the cook-off to raise additional funds, if you don’t want to enter the cook-off. Just contact myself or Sarah to let us know you will be attending. The schedule is as follows:

9:00 a.m. start charcoal fires
9:15 a.m. cooks meeting and “secret ingredient” handout
9:30 a.m. cookoff begins
12:00 p.m. judging of cook-off
12:30 p.m. (approximately) public sampling of dishes by cook-off teams and DOG serving.

Please contact us by September 23 to enter the cook-off

Good Luck!!!

Iron Chef Challenge Dutch Oven Cookoff Rules

  1. All cooking and preparation must be done in Dutch ovens as the primary cooking utensil.

  2. Coals must not be less than 12-inches off the ground. Only charcoal may be used as the heat source.

  3. Teams may consist of 1 to 3 members.

  4. Each team will be given the “secret ingredient” at the beginning of the cookoff. The secret ingredient will be used as the main ingredient for as many dishes as possible. All dishes must to be prepared and served in the allotted cooking time.

  5. a. Teams may bring their own pantry items to assist in the preparation of the “secret ingredient” to include fresh produce, meats, spices and herbs, and commercially canned foods. No home prepared, canned food items, or wild game will be allowed to be used in any dish, with the exception of sourdough starters only. Any home prepared items, other than sourdough starts, will disqualify the team from the cook-off. NO EXCEPTIONS! Game meats may be used only if purchased from a commercial meat store or grocery store. Game must be packed in commercial packaging with labels attached to packaging and approved by the organizers.
    b. Once the cookoff starts, no team member or other person may leave the cookoff to purchase ingredients or supplies from any store to be added into any dish. Extra charcoal may be available for purchase at the cookoff for those unexpected extra heat requirements.
    c. All dishes and foods must be totally prepared on site.

  6. Practice safe food handling techniques at all times. Food poisoning of anyone is not allowed. Ice chests are recommended. Keep hot food hot and cold food cold.

  7. We use charcoal as the only heat source to cook with in the cook-off. So please, NO COOKING ON GAS STOVES, EXCEPT to boil water for sanitation purposes only.

  8. Each team must have a ABC 2 lb. minimum fire extinguisher and a metal bucket to contain ashes and dispose of properly in large ash receptacle supplied by cook-off organizers

  9. No electric or gas powered appliances may be used for the cook-off. No batteries, generators, or other may be used. Only hand cranked human powered appliances are allowed.

  10. All cooking will stop and dishes must be ready for service by the finish time at 12:00 p.m. at the front of your cooking area. NO EXCEPTIONS!

  11. Garnishing is nice but is NOT a judging factor in this competition. Keep it simple but nice.

  12. Most important HAVE LOTS OF FUN and hand in recipes with dishes (ingredient lists) so we have an idea of what you did and can make up a cook book for everyone to share. Cookbooks will be sent to each team after the competition.

Friday, September 16, 2005

Cooking for Crowds for Dummies

.
Cooking for Crowd for Dummies by By Dawn Simmons and Curt Simmons is my latest acquisition. I'm a late convert to the Dummies series. I sorta had a "holier that thou" attitude toward the books, especially any that deal with cooking.

I reasoned, why do I need these books? I'm a professional cook, after all.

This may be the book for you if you often feed crowds. Give it a try. The $20 price tag may be worth the expense. Here's the link:

http://www.dummies.com/WileyCDA/DummiesTitle/productCd-0764584693.html

Sugar High Friday #12 -- Caramel Custard Mugs in a Dutch Oven

Just incase you’re looking for an excuse to satisfy your sweet tooth -- today inaugurates 'Round the Chuckbox’s partnership with Sugar High Friday, an “international sweet tooth blogging extravaganza.”

September’s theme is Cooking up Custard, hosted by Elise over at Simply Recipes. Childhood memories of custard, tapioca and rice pudding prompted me to bake a Dutch oven caramel custard from Retro Ranch: A Roundup of Classic Cowboy Cookin’ by C.W. “Butch” Welch (Collectors Press: Portland, Oregon, 2005).

Cee Dub’s recipe is essentially the same one that Grandma Bertha Karoly cooked in the 1930s for three growing boys (dad, his brother and their first cousin). Grandma Bert’s copy of Any One Can Bake (Royal Baking Powder Co.: New York City, 1927) is scribed full of recipes, notes and prices from the Depression. (Do you know that a 10-pound bag of granulated sugar cost 53 cents in 1937? That’s an 18 cent increase from 1932!)

Like most older recipes, both cookbooks call for scalded milk. Scalding milk (heating it until just under a boil, about 180 degrees) isn’t necessary today. Scalding serves two purposes: it kills pathogenic bacteria and it destroys enzymes that may affect the way milk performs in a recipe. Modern pasteurization already destroys bacteria and enzymes.

Heating the milk really only serves one purpose: It raises the temperature of the custard mixture to speed cooking. Gently heat the milk to about 110 degrees, just until it’s warm to the touch. There’s no need to heat the milk to a scald.

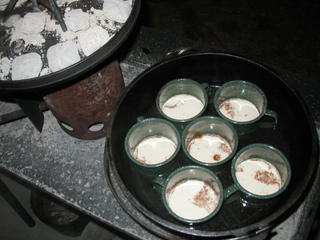
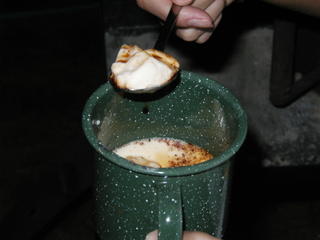
Just be sure to temper the egg mixture. To temper, slowly drizzle about 1/2-cup of the warm milk into the egg and sugar mixture. This’ll bring the egg mixture up to temperature without cooking the eggs. (Scrambled eggs custard doesn’t appeal to anyone!) The slowly whisk the remaining milk into the egg mixture.

Ubiquitous enamel coffee mugs make the perfect vessel for this camp delight. Use ramekins if you have them. But, honestly, who packs glass or ceramic ramekins in a chuckbox?

CARAMEL CUSTARD MUGS IN A DUTCH OVEN

The tools needed to transform this old-time favorite into a camp dessert are already in your chuckbox -- a 12-inch deep-style Dutch oven and 6 coffee mugs to bake the custard. You’ll also need a medium saucepan to make the caramel and heat the milk.

1 cup granulated sugar, divided
3 eggs, slightly beaten
Dash salt
1 teaspoon vanilla
2-1/2 cups milk, warmed
Ground nutmeg

Heat 1/2 cup sugar in a sturdy 1-quart sauce over low heat, stirring constantly, until sugar is melted and golden brown. Divide sugar among 6 metal coffee mugs. Tilt mugs to coat the bottom. Allow syrup to harden in mugs. Place cups in 12-inch deep-style Dutch oven on a baking rack.

Mix eggs, remaining sugar, salt and vanilla. Gradually stir warm milk into egg and sugar mixture. Pour custard into the 6 coffee mugs. Sprinkle with nutmeg. Pour hot water into the pan to the level of the custard. It’ll take 6 to 8 cups of hot water.

Bake at 350 degrees with 8 coals underneath the oven and 16 on the lid. Bake until a knife inserted in the center of the custard comes out clean, about 45 minutes. Remove mugs from the water bath. Chill if desired.

There’s no need to invert the custard onto a plate. Serve it warm or chilled right out of the mug. Just be sure to scoop a spoonful of caramel from the bottom with eat bite.

Thursday, September 15, 2005

Newsletter from CowboyCooking.com

I received an e-newsletter today from the Bar E Ranch at CowboyCooking.com.

It has news of:
  • New products--a chuckwagon grill companion to the chuckwagon fireplace set, 59-gallon wine barrel and Lodge tote bags.
  • 4th place at the chuckwagon cookoff at Gladewater, Texas.
  • Chuckwagon Recipes #3, a new cookbook by sisters Sue Cunningham and Jean Coats.
  • Photographs in the style of the old west.
Subscribe to the newsletter by signing up at the bottom of each webpage at CowboyCooking.com.

Wednesday, September 14, 2005

Sportsmans Warehouse is Location for Iron Chef Challenge

Dave Herzog posted the location for the Cast Iron Chef Challenge for Hurricane Katrina Victims this afternoon.

The Iron Chef Challenge cookoff and DOG will be held at the Sportsmans Warehouse at 3306 Kietzke Lane, Reno, Nevada. Sportsmans Warehouse is located about 1/4-mile west of US 395 at the corner of East Moana and South Kietzke lanes, off of exit 64. (Mapquest directions.)

A big brass elk decorates the front of the store.

He also announced that Miss Nevada will be one of the judges. She will meet and greet everyone.
Contact Sarah Wootten in the Camping Department at Sportsmans Warehouse at (775) 828-1500 for additional information.

Tuesday, September 13, 2005

Sugar High Friday Coming This Friday!

I'm joining the Sugar High Friday blogging event this Friday, September 16th. 'Round the Chuckbox's entry is caramel custard from Cee Dub's new cookbook, Retro Ranch: A Roundup of Classic Cowboy Cookin'.

It's a classic baked custard -- water bath and all. Except I improved on Cee Dub's recipe (is that possible?) and baked the custard in those ubiquitous enamel camp mugs.

I'm heading downstairs to taste the custard right now ... see you Friday!

More on the Cast Iron Chef Challenge for Hurricane Katrina Victims

Dave Herzog posted this message at the IDOS Forum this afternoon:

=====<<>>=====

Hey everyone!

More info for the "Iron Chef" Cook-off in Reno. Prize donations are coming in by the Dutch oven full! We have 1 maybe 2 celebrities so far to be judges. You will have to come to Reno to find out who they are! I will tell you they are very famous and both make everyone laugh hysterically. There will be live music at the event along with Dutch oven reps and products available for purchase. The location is being finalized at this moment, and I should know for sure by Thursday or Friday. Stay Tuned!

There are currently 3 teams have registeried and many more to come! Hey the entry fee is only $25 bucks! And it all goes to a great cause! Come and join us.

Monday, September 12, 2005

Cast Iron Chef Challenge for Hurricane Katrina Victims

Over the weekend, Dave Herzog posted news of the (Cast) Iron Chef Challenge for Hurricane Katrina victims next month in Reno, Nevada on Saturday, October 15, 2005.

Here’s what I know about the cookoff and Dutch oven gathering:

When: Saturday, October 15, 2005. The cook’s meeting starts at 9 a.m. promptly. The secret ingredient will be handed out at 9:15 a.m. Judging times and times for the DOG will be determined soon.

Where: Reno, Nevada. The exact location will be announced soon.

What: An Iron Chef style cookoff, complete with a box that will contain a secret ingredient. Each and every team will be given a box with the secret ingredient. Each team will make as many dishes as they can based upon the secret ingredient in their Dutch ovens. Teams may bring their own pantry stocks for the competition, but may not leave the cookoff to purchase ingredients once the boxes are handed out and the competition begins.

Deadline & Entry Fee: An entry fee of $25 applies for each team. Teams are limited to three members. The public may participate in the Dutch oven gathering for free. They are asking that the public pay a $5 fee to taste the cookoff dishes.

Dave will be cooking the 900 biscuits in a 22-inch MACA Dutch oven with tons of country gravy to compliment! Come and join us in Reno for great prizes, better food and help support a great cause. Dave is working of celebrity judges for the event.

Dave will provide updates as more information becomes available. For additional information, email Dave Herzog at norcaldutchovendave@yahoo.com. Cookoff packets should be available by next Friday, September 16, 2005.

Saturday, September 10, 2005

More Campfire Corn-on-the-Cob

Fresh corn is versatile. It’s delicious grilled, steamed, simmered and wrapped in foil. A little kosher salt and butter is all that’s needed to compliment the succulent flavor of the moist kernels.

Gilled corn has been eluded me, however. The last time I grilled a few ears next to a tri-tip roast, I noted that my experience with grilled corn was mixed. I didn't singe the kernels. The kernels, while deflated from moisture loss, were still good with butter and kosher salt.

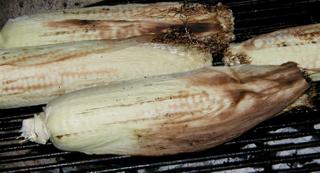
The other night I turned to steamed corn. An inch of boiling water in the pasta pot with strainer produced the succulent corn that I was looking for. But I don’t want to drag my pasta pot out of the cupboard every time I get a hankering for fresh corn-on-the-cob (which won't be much longer -- the price has doubled from last week).
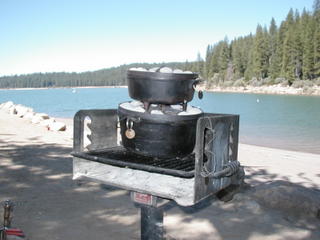
A little research led me to The Best Recipe: Grilling & Barbecue (Boston Common Press: Brookline, Mass., 2001). Cook’s test cooks found the answer to my dilemma. When grilled over direct heat, especially a hot fire (2- or 3-second hand count), the corn quickly chars. The result, according to Grilling & Barbecue, is flat, singed kernels that don’t resemble steamed corn out of the pot.

Through a typical round of grill testing (husk on, husk off, etc.), Cook’s found the perfect solution. Pull the entire husk off but the innermost layer from the corn. The result was a lightly steamed ear of corn with a grilled flavor. The fine layer of husk holds the moisture in while allowing the intense heat to toast the kernels.

GRILLED CORN-ON-THE-COB

Time the corn to cook during the rest period of a tri-tip or similar roast. Grill the meat, remove it to a platter and tent with a sheet of aluminum foil. The set the ears of corn on the grills and follow the instructions below. Remove the corn from the grill and slice the meat. Dinner’s ready.

1 to 2 ears fresh corn per person
Kosher salt
Butter

Prepare the corn by removing the entire husk except the innermost layer. Snip the tassel at the tip of the cob.

Grill corn over a medium-hot fire (3- to 4-second hand count). Turn every 1-1/2 to 2 minutes, until the husk is charred and begins to pull away from the tip, about 8 to 10 minutes.

Transfer corn to a platter. Carefully remove and discard the husk and silk. Season with kosher salt and butter, if desired.

Tuesday, September 06, 2005

A Level Cooking Field

A level pot is critical for baking in the Dutch oven. Cakes, pies and cobblers are best baked on a flat surface. Otherwise, you’ll end up with an unevenly baked dessert. The thin portion will be overcooked.

At our picnic at Sly Park yesterday, standing barbecue grill for a Dutch oven table. The chili pot legs didn’t fit snuggly in the grill slats. The 12-inch deep style Dutch oven leaned about 10 degrees as a result.

The cornbread oven before I moved it to the top side of the chili pot lid.
 I wasn’t worried about the chuckwagon chili. Chili, stews and most casseroles won’t suffer in a lopsided oven when stirred. I’ve cooked many stews, roasts and casseroles on uneven ground with little ill effect.

To create a level surface for the cornbread pot, I moved the 10-inch Dutch oven to oven side of the chili pot. This way I took advantage of the coals on lid to the chili pot and made best use of the limited grill surface.

The cornbread oven after being moved to the top end of the chili pot lid. (The oven still appears lopsided through the magic of modern digital photography!)

I could've baked the cornbread on the ground. There was little vegetation in the picnic area yesterday. Although I didn't see a great fire danger, I'm concerned about my back. I cook at table-top level when possible these days.

Monday, September 05, 2005

Cee Dub's Mexican Cornbread

I spent day at Jenkinson Lake at Sly Park with a friend and our sons. Sun burned knees (I rarely don shorts, even in the summer) and edifying discussions were the order of the day as Frank and I prepared for a men’s Bible class this Sunday while the boys swam.

I cooked my chuckwagon chili and Cee Dub’s Mexican cornbread for lunch. The cornbread, from his first cookbook, has a more robust corn flavor than traditional cornbread. Cream corn and cheddar cheese contribute to its dense texture.


Feel free to alter the recipe. Add an additional 1/4-cup cheddar cheese to boost the cheesiness of the cornbread. Or try a spicy cheese like Monterey-Jack. And you can certainly use any combination of fresh or canned chili peppers.

MEXICAN CORNBREAD

This recipe is adapted from Cee Dub’s Dutch Oven and Other Camp Cookin’: A Back Country Guide to Outdoor Cooking Spiced with Tall Tales by C.W. “Butch” Welch (Back Country press, 1999).

1 cup yellow cornmeal
1 cup all-purpose flour
1/2 teaspoon baking powder
1/2 teaspoon baking soda
1 teaspoon ground cumin
1/2 teaspoon salt
1 (7-ounce) can diced green chilies
2 eggs
1/2 cup grated cheddar cheese
1 cup butter milk
1/2 cup olive oil

Pre-heat a 10-inch Dutch oven by placing 5 hot briquettes underneath and 15 in the lid while mixing the batter.

In a medium mixing bowl, combine cornmeal, flour, baking powder, baking soda, cumin and salt. Add green chilies, eggs, cheese and butter milk. Mix just until combined. Fold in oil just until mixed.

Pour batter into pre-heated Dutch oven. Replace lid and bake with 5 briquettes underneath and 15 on lid for 25 minutes or until a toothpick inserted in the center comes out clean. Cool and cut into 8 pieces.