Showing posts with label breakfast. Show all posts

Saturday, November 09, 2019

Scones

I am posting these recipes at the request of a follower on Instagram (@fuegobbqco). Since I'm accustomed to preparing scones in bulk, I scaled my professional recipe for 100 scones down to 8. This is a straight-forward process using baker's percent. I'll let you read up on the baker's percent process on your own.

Along with biscuits, scones are a favorite at my summer camp. Scones appear on the menu each week or so during family camps. In the beginning, I'd scoop the scones onto a sheet pan.

Today, I roll the scone dough on the bench in the same manner as biscuits. The only time that I cut the scone dough into wedges is at home. I generally use a 2½" biscuit cutter to cut the scones.

SCONES

This recipe calls for less than one whole eggs. A whole large eggs weighs 1¾ ounces. Since this recipe requires 1⅛ ounces of egg, I used about two-thirds of the whisked egg in the wet ingredients. The remainder was used as the egg wash.

If desired, you could use a medium egg if you have one, or add a whole large egg. To compensate for the additional moisture, begin with 5 tablespoons of milk. Add additional milk, 1 tablespoon at a time, until the right consistence is achieved.

8 ounces all-purpose flour (1¾ cups plus 2 tablespoons)
1 ounce sugar (2¼ tablespoons)
½ ounce baking powder (3½ teaspoons)
¼ teaspoon salt
3¼ ounces butter (6½ tablespoons)
1 large egg, whisked, divided use
7 tablespoons milk

Mix dry ingredients until blended. Add butter to flour mixture. Using fingertips, rub chilled butter into dry ingredients until mixture resembles coarse meal.

Add ⅔ of the egg and the milk. Stir until wet ingredients are incorporated. Do not over mix. Dough should be as soft as can be handled. Place dough on lightly floured board or table. Knead 15-20 times, turning 90 degrees each stroke. Round up and flatted to ½-inch thick. Cut into 8 wedges.

Place on greased or lined sheet pan. (I like to bake them in a skillet.) Egg wash tops with remaining egg. Bake in a 400° oven for 15-20 minutes.

NOTE: I used the King Arthur Flour "Ingredient Weight Chart" to convert ingredient weights to volume measurements.

Friday, April 13, 2018

Salsa roja picante


Don't let the deep red hue fool you. Salsa roja picante comes with a warning. It carries a bite, and a healthy dose of heartburn if you're not careful!

Warning labels aside, the ubiquitous Mexican red table sauce is good. A common element in every taqueria salsa bar, salsa roja picante flavors any meal part. From chips to huevos rancheros to your go-to burrito, the spicy red sauce will spice up the meal.

And the best part? The recipe couldn't be simpler. Toast dried chile peppers, add water along with garlic, onion and tomato, and simmer 20 minutes. Pour it all into a blender bowl with additional flavors and whirl away. Pure goodness is the result.

Spice up breakfast!

SALSA ROJA PICANTE

Buy pequin and arbol chile peppers at well stocked markets or on-line from stores like Amazon.com. My latest batch of pequin chiles came from Spice Lab via Amazon. If the $60 per pound price tag seems a tab bit high, smaller quantities are available. So, unless you're operating a hot sauce plant, the two-ounce package (at $15) will last months.

1/2 ounce pequin chile peppers, stems pinched off
1/4 ounce arbol chile peppers, stems pinched off
1 medium tomato, core removed & seeded
2 tablespoons chopped sweet onion
2 cloves fresh garlic
2 cups cold water
2 tablespoons chopped cilantro
1-1/2 tablespoon white distilled vinegar
2 teaspoons turbinado sugar
1 teaspoon kosher salt
1/2 teaspoon ground cumin

Toast chile peppers and garlic in a dry skillet over medium heat, 2 to 3 min., or just until aroma begins to bite. Do not burn. Place chiles, tomato, onion and garlic in a saucepan with the water, bring to a boil, then reduce heat. Simmer for 20 min., then cool 10 to 15 minutes. Add cilantro, vinegar, sugar, salt and cumin to chile mixture. Puree in blender 20 sec. or until smooth. Strain if desired. Age in refrigerator. Yields 2 to 2-1/4 cups unstrained.

Wednesday, November 29, 2017

Scrambling eggs in a cast iron skillet

Cast iron cookware has been an American icon of cookery for centuries. When given reasonable care, it will outlast the cook. And it's often passed on to the next generation.

Readily available at a modest cost, millions of cooks rely on its properties to cook good food, which include the ability to generate a good crust or sear, maintain even heat over a low to medium flame and clean up with little fuss. And it's easily placed in the oven to finish a dish as most cast iron cookware is ovenproof.

I frequently use a Lodge cast iron skillet to cook scrambled eggs at home and in camp. At home, my skillet of choice is a 10-inch cast iron chef skillet (model LC3S) with sloped sides. This is the ideal for two to six eggs.

When feeding larger groups, I scale up to the 13.25-inch skillet (model L12SK3), the larger 17-inch skillet with loop handles (model L17SK3) or the massive 20-inch skillet (model 20SK). (The 20-inch skillet is no longer produced by Lodge. It does show on eBay.com from time to time; however, be aware it comes with a hefty price tag!)

I find the Lodge 13.25-inch skillet ideal for cooking one to three
dozen scrambled eggs in a single batch.

IRON SKILLET SCRAMBLED EGGS

Cooking scrambled eggs in a cast iron skillet is straight-forward, so let practice guide you. Practice will teach the right heat setting when preheating, how much butter to use and the right setting for cooking the eggs. These basic steps will ensure perfectly scrambled eggs:
  • Select the right size skillet for the job. A six- to ten-inch diameter skillet is best for a family, while the larger skillets (see my notes above) work best for large groups. I find it's best to stick with a familiar skillet, one you frequently use. The advantage is that you know what heat setting to use as it preheats, when to turn the heat down and its capacity.
  • Preheat the dry cast iron skillet (without oil or butter). Medium-low to medium heat is best for scrambled eggs. Any higher than medium and you run the risk of scorching the eggs and creating a burned-on mess that's difficult to clean.
  • Crack two to three eggs per person into a bowl. Season with salt and pepper, then vigorously whisk to combine.
  • Add butter to the skillet and let it melt. The fat adds flavor to the eggs and helps ensure a non-stick surface (when pared with a properly seasoned skillet). Olive oil can be used in place of butter. Use one tablespoon butter or oil per serving.
  • Pour the eggs into the skillet. You should hear a slight sizzle. Any louder means that the skillet is too hot. Immediately turn the heat down a notch or two.
  • Using a spatula, slowly move the curd from the edge of the skillet toward the center. Continue until the egg is set, but still a bit runny. Take care not to overcook. I always remove scrambled eggs from the skillet when they reach the soft-set stage. The eggs will continue to cook for several minutes as they cool. If desired , top eggs with cheese. Serve immediately.

A typical breakfast at Star Valley Outfitters in Bridger-Teton National Forest in Western Wyoming. This meal included scrambled eggs with cheese, pork breakfast sausage and cottage fried potatoes.


Tuesday, November 03, 2015

Baked French toast for Valley Fire victims

In late September I deployed to Middletown, California, to serve with the Mercy Chefs, where chefs cooked breakfast, lunch and dinner for victims of the Valley Fire. Many of those served had lost everything when the fire storm raged through the community on September 13. Nearly 2,000 structures -- including 1,280 homes -- were destroyed by the fast moving wildland fire.

The chefs served over 2,500 meals during the 10-day deployment from Mercy One, a 32-foot kitchen trailer. The kitchen is based near Dallas, Texas. Chefs and support staff converged on Middletown from homes in California, Colorado, North Carolina, Virginia and Texas toward the end of September.

Once the managing chef posted the menu each day, we set about preparing the different dishes for the next day. Several days into the mission, I saw an excessive amount of biscuits, cinnamon rolls and apple crumb cake in the refrigerator trailer. Quick calculations showed that the leftovers would give us five two-inch hotel pans, enough to feed a filling breakfast to 150 persons.

This recipe for baked French toast is offered as I prepared it for our fourth breakfast. (I posted a recipe for Dutch oven baked orange French toast last year.) I quickly put the formula together after briefly confirming custard ratios on the internet. Note that I didn't add any sugar or syrup to the recipe. I felt the orange juice and berries added sufficient sweetness to the dish.


BAKED FRENCH TOAST WITH MIXED BERRIES

The important thing here is to fill each pan with diced or crumbled biscuits and pastry. I understand that you won't duplicate my mix of leftovers breads. You'll need about three and one-half to four pounds bread for each hotel pan. (Remember the apples in the crumb cake added additional weight to the formula.)

6-1/2 pounds buttermilk biscuits, cut into medium dice
4-1/2 pounds iced cinnamon rolls, cut into medium dice
8-1/4 pounds apple crumb cake, crumbled
10 pounds frozen mixed berries, thawed
2 flats whole eggs (30 eggs per flat)
1 gallon whole milk
6 cups orange juice
1/4 cup ground cinnamon
1 tablespoon ground nutmeg
1/4 cup vanilla extract
1 tablespoon kosher salt

Lightly grease or spray each 12 by 20 by2-inch hotel pan. Equally divide crumbled/diced biscuits and pastry among five hotel pan. Spread 2 pounds berries over each pan.

In a large bowl, whisk the eggs, milk, juice, cinnamon, nutmeg, vanilla and salt together. Evenly pour 6 to 7 cups of the custard over the bread in each pan. Cover and place in the refrigerator overnight.

In the morning, bake in a 350-degree F oven for 45 to 60 minutes, until set and puffed up. Serves 25 to 30. Serve with fresh berries if available and maple syrup.

Wednesday, October 07, 2015

Spicy Dutch oven breakfast strata

Classic breakfast strata consists of cubed or torn bread, layered with shredded cheeses and bound together with whisked eggs. Meat and vegetables are optional. The mountain man breakfast is a common Dutch oven strata in camp. 

My first thought was to replicate a breakfast strata that we prepared for Mercy Chefs last week in Middletown, California. (I deployed with Mercy Chefs to Middletown to provide quality meals for victims of the Valley Fire.) I was going to layer scratch buttermilk biscuits, sausage, cheese and eggs into the 10-inch Dutch oven and bake for dinner.

Then I though why not use the beef taquitos from the freezer as the base? So, a layer of taquitos fit in the bottom of the Dutch oven. After spooning my salsa rachera over the taquitos, a mixture of crumbled chorizo with green chiles and onion went over the top. Ten eggs with cheddar and jack cheeses made up the final layer. After baking with charcoal for 35 minutes, we are ready to eat.

Cut the taquitos to fit into the Dutch oven. I began by arranging them in the fashion of a wheel spoke, but quickly realized the taquitos would blend into the final dish. Settle on complete coverage, not presentation in this case.
Mixing the eggs and cheese together gives you the best distribution of the cheese. Don't worry when the chorizo mixture rises to the surface. It's all good!
Let the cooked strata rest for about 10 minutes. Resting allows the proteins and starches to set, making the strata more stable before you cut into it. 
SPICY DUTCH OVEN BREAKFAST STRATA

You will need to cut the taquitos to fit in the Dutch oven. Arrange them as desired as they will blend into finished dish.

10-12 frozen beef taquitos
1/2 cup salsa
1 tablespoon vegetable oil
1/2 cup diced onion
1 (4-ounce) can diced green chiles
6 ounces pork chorizo, casing removed
10 large eggs
1/2 cup shredded sharp cheddar cheese
1/2 cup shredded Monterrey jack cheese
1/2 teaspoon kosher salt
1/4 teaspoon ground black pepper

Lightly oil (or coat with pan spray) a 10-inch Dutch oven. Arrange beef taquitos in the shape of a wheel spoke. Evenly spoon salsa over the taquitos.

Heat oil in a heavy skillet over medium-high heat. Sauté onions and chilies until soft, 2 to 3 minutes. Add chorizo and cook, crumbling with a spoon, until browned. Drain off excess fat.

Meanwhile, crack eggs into a bowl. Add cheddar and jack cheeses and season with salt and pepper. Whisk eggs and cheeses until blended. Evenly pour egg and cheese mixture over taquitos. Place lid on oven.


Bake with coals for 350 degrees until puffed and golden, about 30 to 35 minutes. Let stand 10 minutes before serving. To serve, cut into 8 pieces. If desired, serve with your favorite hot pepper sauce or salsa and sour cream on the side.

Saturday, March 07, 2015

Baked steel cup oats with fresh berries

My introduction to steel cut oats came several months ago when I purchased a box by mistake. Steel cut oats quickly became my favorite hot breakfast cereal. After enjoying its nutty flavor and chewy texture, I thought that there had to be a better way to enjoy these oats.

Several Internet searches led me to baked oatmeal. The idea of its rustic texture, browned with molasses or brown sugar, fascinated me. Baking the oats would add interest and appeal over traditional cooked oatmeal.

Then a culinary student at the Christian Culinary Academy presented individual bowls of baked oatmeal with strawberries last Thursday. The texture was amazing. Rustic and deep brown, her dish was a welcome change from cooked oatmeal. The oatmeal resembled a moist homemade granola.

Camp baked steel cut oats will add interest to any breakfast next to a roaring campfire this summer. It's the perfect meal to prepare in the evening, rest in the cooler overnight and bake in the morning. Before retiring for the night, measure dry ingredients into a bowl. After measuring the wet ingredients, marry the two, cover and place in the cooler. Be sure to place the ice chest in a secure location in bear country.

In the morning, light the charcoal briquettes in a charcoal chimney. Remove the bowl from the cooler, stir and pour into an oiled 10-inch Dutch oven. Brew the morning coffee as the oats bake and you ready yourself for the days activities. By the time everyone awakes, you'll enjoy a rustic breakfast made for the outdoors.

My purchase goof has opened my eyes to a new flavorful way to prepare oats in the morning. I plan to bake larger quantities for Oakland Feather River Camp this summer. Testing for a 12 by 20-inch hotel pan will begin in May. In addition to baked oats in the forest, larger quantities for the camp will enhance the breakfast meal.

Baked steel cut oats with fresh berries

I adapted this recipe from a 2013 blog post at Alexandra's Kitchen. Her recipe includes instructions for baking in individual dishes. My scratch-made syrup stood in for genuine maple syrup. I used a mixture of blueberries and raspberries for the test run.

3/4 cup steel cut oats
1/2 cup slivered almonds
1 teaspoon baking powder
1-1/2 teaspoons ground cinnamon
1/2 teaspoon kosher salt
1 cups fresh berries
2 cup milk
1/3 cup maple syrup
1 large egg
3 tablespoons unsalted butter, melted and cooled slightly
2 teaspoons vanilla extract

In a small bowl, mix together oats, nuts, baking powder, cinnamon and salt. In a second bowl, whisk together milk, syrup, egg, butter and vanilla. Pour the milk mixture over the oat mixture. Stir to combine. Store mixture in refrigerator or camp cooler overnight.

In the morning, scatter berries into a lightly oiled 10-inch camp-style Dutch oven. Pour milk-oat mixture over berries. Bake with coals for 375 degrees (18 coals under oven and 6 on lid) for 60 minutes or until the oats are firm and milk thoroughly absorbed. Bake several additional minutes for a crispier crust. Let cool for a few minutes before serving.

Serve with fresh berries and cream or milk. Makes about 6 servings.

Thursday, October 23, 2014

Throwback Thursday: Lots of Sausage Gravy

David passed this recipe on in the wake of Hurricane Katrina in September 2005. Please remember that references to hurricane relief are dated and no longer valid.

As announced in the IDOS Forums, Dave Herzog has accepted a challenge to bake 900 biscuits in a 22-inch MACA Dutch oven. And what’s a biscuit without gravy? Dave’s recipe for six gallons of gravy is posted below. You have to watch Dave in action at the Iron Chef Challenge for Hurricane Victims to learn his biscuit secret.

SAUSAGE GRAVY FOR A 22-INCHER

The recipe for Emeril’s essence is available on Emerils.com.

5 pounds breakfast sausage
5 pounds bacon, diced
2 pounds yellow onions, diced
3/4 cup minced garlic or 1/4 cup granulated garlic
2 tablespoons red pepper flakes
2 tablespoons black pepper
3 tablespoons kosher salt
2 tablespoons Emeril’s essence
5 cups all purpose flour
4 pounds unsalted butter
5-6 gallons whole milk, cool, not fridge cold.

Preheat a MACA 22-inch Dutch oven with about 35 coals underneath. Add the sausage and bacon together and brown until bacon is golden. Stir in onions, garlic, red and black pepper, salt and essence. Sauté until onions just turn opaque.

Add butter. When melted, stir in flour and cook for about 5 minutes, until flour turns light brown. Add milk, 1 gallon at a time, allowing gravy to thicken, up to 5 gallons. If gravy is too thick, add additional milk a little at a time to thin.

Serve over anything you want! Serves 200 to 250, depending on serving size.

Thursday, October 09, 2014

Throwback Thursday: Frank's killer breakfast

Today's throwback blends two posts from August 2005. Frank and his lovely wife, Ann, have since moved to Boise, Idaho, and have become grandparents. Debbie and I need to travel north and hold a reunion camping trip.

All camp cooks savor a day off from the kitchen. Yesterday was my day off. My duty was to make coffee, lounge beside the campfire and dish out advice. A buddy handled all culinary tasks.
Jacob and I went camping with Frank and Hunter Friday evening.

We spent the night at Wench Creek Campground on the east shore of Union Valley Reservoir in Eldorado National Forest. Camping is pleasant now that the heat wave has subsided in the Sacramento Valley. Friday’s high was about 75 degrees. The overnight low was 50.

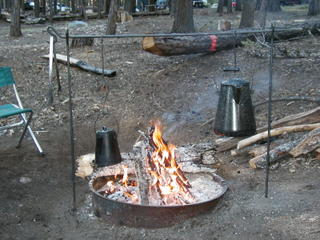
Frank prepared a killer breakfast for us. He got up about 45 minutes ahead of me Saturday morning. Frank had a good bed of coals for cooking by the time I got up at 6:30 a.m.
Frank’s breakfast is hearty -- an epicurean contradiction -- good tasting and not-so-good for you, all in one setting. A carpenter and general contractor by trade, he cooked  breakfast in two large cast iron skillets, each course in succession. He normally cooks breakfast in one skillet. When Frank told he about breakfast plans last week, I threw in an extra skillet.

Bacon and sausage patties and links inaugurated the morning meat-egg-potatoes fest. Then in quick succession, Frank fried potatoes to a crisp in the bacon fat and scrambled eggs, again in bacon fat. Lastly he cooked gravy from more bacon grease, flour and milk.

Build a roaring cookfire. I follow two rules: First, build a fire that’s twice to three times the size that you think you need. In pine and cedar country it’s easy to underestimate the amount of wood.

The second rule is equally important. Keep the fire going and avoid the tendency to let it burn out once you start cooking. Otherwise Murphy’s Law steps in and kills any further plans for breakfast.

"I love the smell of bacon in the morning."
Use this time to dice the potatoes, crack and whisk the eggs and form sausage patties. The fire will take 30 to 45 minutes to burn down to a nice bed of coals. Don’t forget to add fresh wood as the fire burns.

With the fire ready, it’s time to cook breakfast. I said that Frank cooks each course in succession. The bacon goes into the first pre-heated skillet.

Push the bacon aside if you’re using a large skillet (14 inches or larger) and add sausage patties to the skillet. You may want to cook the bacon and sausage in batches if you’re using a smaller skillet. Once browned to the desire color, the move the meat waiting plate covered with a double layer of paper towel. (I’m not sure why the paper towels are necessary—you’re going consume enough grease to worry your cardiologist!)

Don’t discard any of the rendered bacon fat. Frank divides it between three dishes (health warnings aside). The potatoes, eggs and gravy all receive generous portions of the swine nectar.

You're allowed to break one egg yoke over a campfire.
A pot-full of diced potatoes are next poured into the meat skillet. Watch for splattering grease! Crumble a few bacon strips and sausage patties into the potatoes if desired.

Fifteen to 20 minutes over a hot fire will crisp the potatoes to a nice golden color. Move the skillet to a cooler spot over the fire. Stir the potatoes occasionally to keep them from burning.

At this point, turn your attention to the scrambled eggs. It’s important to pre-heat the egg skillet over a medium fire. Otherwise, you’ll burn the eggs and ruin breakfast.

Slow cooking is best for the eggs. Stick around once you pour the whipped eggs into the skillet. They require constant stirring until cooked. Frank never left the fire until the eggs were cooked.

The secret to moist scrambled eggs is to cook them over low heat. Remove the eggs when they’re still moisture seeping out. Remember, overcooked eggs in the skillet become overcooked eggs on the plate.

Place the eggs into a waiting bowl, cover with a sheet of foil and wipe the skillet clean. The pour the remaining bacon fat into the skillet and return it to medium heat. Next place enough flour into the skillet to absorb the fat. (You’ll have to judge quantities for yourself.)

Stir the roux for a few minutes over a low flame, being careful not to brown it. The last step before breakfast is to pour three or four cups of milk into the gravy skillet. Stir constantly for about 10 minutes to work the lumps out. Once the gravy thickens, you’re ready to eat.

Give the potatoes a quick stir just before serving. Warm potatoes, eggs and gravy are a must. And pour gravy over the potatoes and eggs. After all, gravy is the culinary elixir that brings the whole meal together.

Wednesday, September 17, 2014

20-inch Lodge skillet at Upper Blue Lake

Debbie and I returned from our annual camping trip to Upper Blue Lake with my sister and husband. This year one of our daughters and granddaughters joined us, along with one of the wranglers from Oakland Camp. We enjoyed six days of sun, wind and cool mountain air.

This is the first article from the trip. As I coordinated the menu with my sister, my thought was to prepare several meals in my "new" 20-inch Lodge skillet (model 20SK). I found the skillet at an Eagle Point, Oregon, antique shop last April. Newly re-seasoned, I used the large skillet to cook four meals for the family. I wanted to cook as many meals as possible to hasten the build-up of patina.

Enjoy these photos.

The Lodge model 20SK skillet awaits dinner Thursday evening. I use the large World War II Navy surplus coffee boiler to heat water for washing dishes. The boiler was manufactured by Vollrath.
Spicy Japanese buckwheat noodles (called soba noodles) was on the menu Thursday evening. The sauce was made from sesame oil, rice vinegar, soy sauce and chili garlic sauce. Two (9.5-ounce) packages soba noodles and two pounds shrimp were used.
I fried 1-1/2 pounds thick sliced bacon for breakfast Friday morning. The small pot holds syrup for hotcakes.
Oat blueberry hotcakes were cooked in the skillet. The batter ran until it set in the less than level skillet 
To make the hotcake batter, I doubled my families traditional hotcake recipe, then replaced 1 cup of the flour with a cup of old fashion oats. I dropped a 6-ounce package fresh blueberries to the batter at the last minute.
Friday evening I prepared succotash with kale to accompany grilled chicken. After sauteing onion, roasted red pepper and garlic, I added a bunch of kale.
After adding two (1-pound) packages frozen whole kernel corn to the vegetables, I scooped the dish into the waiting pot. Garlic bread is warming in the foil packages to the left. My brother-in-law grilled chicken for the entree.
We used Saturday's leftover tri-tip to make fajitas for lunch Sunday. I'm seasoning the meat and vegetables with scratch-made taco seasoning.

Wednesday, August 27, 2014

Baked orange French toast

The Stanley Ranch Cook Book is one my favorite sources for inspiration and recipes. It’s hosted by the Stanley Ranch in Fossil, Oregon. Many recipes seem to the contribution of the unnamed ranch cook. (Edit: The cookbook is no longer available on-line).

The recipe for baked orange French toast caught my eye while pursuing side dishes last week. This recipe is the contribution of by Marlene Stanley, who owns the ranch with husband her Rick. Once I prepared my rendition for camp in a Dutch oven, I discovered the subtle orange flavor throughout. It doesn't overwhelm. Instead, the orange juice and zest give the breakfast dish wonderful balance between traditional French toast and the orange flavor.

BAKED ORANGE FRENCH TOAST

Eliminate the pecans to make the recipe nut free. Marlene Stanley’s version called for 2/3-cup orange juice and 1/3-cup orange liqueur. Since I generally don’t purchase liqueurs, I used a full cup of juice. I’m certain the liqueur will give the French toast an even richer flavor.

12 ounces day old French bread, cut into 1-inch cubes
1 cup toasted pecan pieces (see recipe below)
6 large eggs
1 cup half and half
1 cup orange juice
1 tablespoon orange zest
3 tablespoons granulated sugar
1/4 cup melted butter

Place bread cubes in a lightly greased 9- or 10-inch round cake pan. Spread pecans evenly over bread. Whisk eggs, half and half, orange juice, orange zest and sugar together in a medium bowl. Pour batter evenly over the bread. Push bread down into the batter.

Cover and place in refrigerator or ice cooler. Refrigerate at least four hours or overnight if being served for breakfast. In the morning, take the pan out of the refrigerator or ice cooler. Light 28 charcoal briquettes. Meanwhile, pour melted butter evenly over bread.

When coals are barely covered with ash, pre-heat a 12-inch Dutch oven with 8 coals underneath and 20 on the lid. (Alternatively, pre-heat the oven to 350 degrees F.; bake in oven as directed.) Remove lid and place the pan inside the Dutch oven. Replace the lid and bake 40 minutes, until French toast is set and puffed up.

Remove pan from Dutch oven. Cool 10 minutes. Cut into 8 wedges. Offer 1 or 2 wedges to each person. Serve with syrup. Marlene Stanley recommends serving a sauce of melted butter and marmalade on the side.

TOASTED PECANS

Toasting brings out the wonderfully nutty flavor of the pecan. Remove from the heat as soon as you smell wonderfully nutty aroma of the nuts. Stop the cooking by placing the nuts in a small bowl.

1 cup chopped pecans (approximately 2-1/4 ounces)
1 tablespoon unsalted butter

Melt butter in a small heavy skillet over medium heat. Add pecans and toss to coat with butter. Toast, stirring frequently, until lightly toasted, about 5 to 8 minutes. Do not brown. Remove from heat and use as directed.

Thursday, July 10, 2014

Hotcakes at Oakland Camp

Whole wheat hotcakes on the griddle at Oakland Feather River Camp earlier this week. Last month, the local appliance service technician replaced the four thermostats to the camp griddle. During the initial service call, John of Az-Tech Appliance discovered the thermometer tubes had split. The burners were either on or off. There was no middle ground. The griddle now works as it should.

Tuesday, July 01, 2014

Oat hotcakes

At Oakland Feather River Camp, campers travel down both sides of the buffet line. To facilitate movement, I place a pan of hotcakes or French toast facing each direction as pictured. It never seems to work. Campers grab cakes from the first pan they see regardless of the side it's facing!
OAT HOT CAKES

For apple, banana, blueberry or peach hot cakes, prepare 1 pound 8 ounces to 2 pounds fruit. Drop a handful of selected fruit onto the hotcake just prior to turning on the griddle. Continue cooking.

1 pound 12 ounces all-purpose or pastry flour
8 ounces old fashion oats
3-1/2 tablespoons baking powder
1 tablespoon baking soda
1 tablespoon salt
3 ounces sugar
14 ounces eggs (8 large)
1 quart 2 cups buttermilk
8 ounces vegetable oil or melted bacon grease

In a large bowl, mix flour, oats, baking powder, baking soda, salt and sugar. In a separate bowl, whisk eggs and buttermilk until blended. Combine dry and wet ingredients; mix just until blended. Do not over mix.

Blend in vegetable oil or melted bacon grease. Pour 1/5-cup batter (#20 disher) onto lightly greased hot griddle (350 to 375 degrees). A #16 disher will give a larger hot cake. Cook on one side until top is covered with bubbles and underside is browned, 1 to 1-1/2 min. Turn, cook on other side 1-1/2 to 2 minutes.


Yield is approximately 50 hotcakes, depending of size.

Sunday, June 29, 2014

Baked asparagus frittata with basil and Swiss cheese

Set-up for baked asparagus frittata with
basil and Swiss cheese.
Two weeks ago I prepared baked asparagus frittata with basil and Swiss cheese for the Feather River Adult Art Camp. The process is the same that I used during the 2013 season (click for recipe).

To begin, I cut one pound of asparagus for each 2-1/2-inch hotel pan. Next the asparagus with a splash of canola-olive blend oil went into each pan. Five pans were placed in a 325-degree convection oven for around 10 minutes.

Once the asparagus was a bright green color, I removed the pans and poured in three cartons of liquid egg, along with a handful of chopped fresh basil and parsley and grated Parmesan cheese. I returned the pans to the oven and baked until the eggs was almost set. Each pans was then topped with 15 slices of Swiss cheese and given another five minutes in the oven.

The frittata was a hit. One campers said, "I've never seen that up here." I find that one pan of frittata feeds 35 family campers at Oakland Feather River Camp. We also place a pan of plain scrambled eggs on the serving line for campers that don't like frittata.


Sunday, June 22, 2014

Baked Dutch apple pancake recipe

I recently adapted a recipe for big Dutch apple from the January 2014 issue of Sunset Magazine. Thanks to a test by fellow chef Paul Kleiforth, I added caramelized apples to the original recipe. The result is a wonderful breakfast dish. It's a refreshing alternative to hot griddle cakes or French toast.

After testing Paul's baked Dutch apple pancake on staff at Oakland Feather River Camp last month, I introduced it to the adult campers of the art camp this week. They loved it. After receiving several compliments from the older campers, many in their sixties and seventies, I will place it on the menu every other week.

BAKED DUTCH APPLE PANCAKE

I prepared six 2-1/2-inch hotel pans of the baked apple pancake for around 140 adult campers Friday. The picture shows me portioning eight cups batter into each pan. Liquid eggs stand in for fresh eggs at Oakland Camp. Use 14 large or 16 medium eggs if you don't buy liquid eggs. To date, I've simultaneously baked six pans in the oven.

One pan will serve 25 campers. At Oakland Camp, we place a pan of plain scrambled eggs on the vegetarian line for campers that prefer them.

8 ounces butter
1/2 can sliced apples, drained, juices reserved
2 ounces sugar
1.5 pounds eggs
3 cups all-purpose flour
1 cup reserved apple juice
2 cups milk
Toppings: nutmeg, powdered sugar, lemon wedges and honey

Place butter in a 12 by 20 by 2-1/2-inch hotel pan and set on lowest rack of oven. Preheat oven to 425 degrees in a conventional oven or 375 degrees in a convection oven. Combine apples and sugar. Remove pan from oven and place apples in pan. Return to oven and cook until lightly caramelized, 10 to 15 minutes.

While the apple caramelizes, quickly mix batter. Put eggs in a blender or food processor and whirl on high speed for 1 minute. With motor running, gradually pour in milk and juice, then slowly add flour; continue whirling 30 seconds. (Or, in a bowl, beat eggs until blended; gradually beat in milk, then flour.)

Remove pan from oven and pour batter over apples. Return pan to oven and bake until pancake is puffy and well browned, 20 to 25 minutes, rotating pan halfway through baking. When working with multiple pans in the oven, rotate from top to bottom shelves if necessary for even cooking.

Dust pancake with nutmeg if desired, then powdered sugar. Cut as desired and serve with more powdered sugar and lemon wedges, plus a drizzle of honey if you like.

Wednesday, June 04, 2014

Chef under pressure

Credence Clearwater Revival song melting in the CD player? Oven alarm sounding? It's not a problem for this chef. Note his steady hand as he calmly sprinkles sugar and cinnamon over the baked apple pancake.

Sunday, June 01, 2014

Friday, May 30, 2014

Working on baked apple pancake recipe for camp

Stay tuned to 'Round the Chuckbox. I'm working on a baked apple pancake, or big Dutch baby, for breakfast at Oakland Feather River Camp. We've done two test runs to date. The first followed the original recipe from the January 2014 issue of Sunset Magazine. It was good. But I felt it needed something to add interest to the recipe for our campers.

The first test recipe for the bug Dutch baby. We served it with honey and lemon juice.
For the second test, I doubled the recipe and prepared it in a full-sized two-inch hotel pan with caramelized apples. This is more practical for large groups instead of using multiple skillets. I though the finished product had a cake-like quality to it. Several staffers agreed.

For our next test, I plan to adjust the quantity of flour and add lemon juice or apple cider reduction to the batter. Apple cider will certainly complement the caramelized apples. I'll report back after my next test.

I'm caramelizing fresh apples for the second test recipe. While I though the recipe was good, it needs perfection before I post it on these pages.

Friday, May 16, 2014

High altitude cinnamon rolls

A quick note from my cell: I'm paying closer attention to the effects of altitude on our bakery products at Oakland Feather River Camp this season. We used our standard sea-level cinnamon roll formula without modification. After a two-day ferment in the refrigerator, I made about 30 rolls.

They were then proofed them until one and one-half their original size (instead of doubling). I let oven spring do the rest. The result was cinnamon roll with around one-half less of the centers popping out. The rolls were baked at 325 degrees F. in a convection oven. 

Oakland Camp is located at 3,500 elevation. My next adjustment us to use about 10 percent less yeast. More to come.

Sunday, May 04, 2014

Meals during pre-camp

During the first week of the season at Oakland Feather River Camp, staff are on their own for meals. The half-dozen employees that commute from nearby Quincy bring lunch. Debbie and I fend for ourselves. Other than the camp manager, who lives on the property with his wife, we're the only ones living at camp.

The dietary kitchen -- so-called because campers prepare special diets in it -- serves as our home kitchen for the first week. Late next week the cooks begin cooking breakfast and dinner for the dozen pre-camp employees. The sous chef and pre-cooks arrive on Thursday to clean the kitchen and begin preparing meals on Friday.

Sometimes breakfast for dinner is the best meal. Friday evening I cooked bacon (not pictured), cottage potatoes and fried eggs in the Lodge #12 skillet. Sorry, there were no leftovers!

I brought two 12-inch Dutch ovens for use during pre-camp and a couple cook's evening cookouts. Three large Lodge skillets (including the 20-inch skillet I found in Eagle Point, Oregon, in April) were also packed for use in the main kitchen. Pre-camp gives me the opportunity to do a lot of Dutch oven cooking. Once camp opens in mid-June, I'm too busy to cook in Dutch ovens.

Thursday evening, our first full day at camp, Debbie and I visited Moon's, our favorite restaurant in Quincy. Mike and Lisa Kelly are wonderful hosts, and they serve great food. Hickory smoked ribs with rosemary-garlic mashed potatoes and freshly baked garlic bread is my most ordered meal. Debbie enjoys the twice-baked potato. She always returns to camp with leftovers to use for lunch or dinner.

Saturday's dinner was bratwurst with layered cabbage and red potatoes in a Lodge 12-inch camp oven. A layer of sliced red potatoes went on the bottom. Sliced onions came next, then shredded green cabbage. The dish was baked with charcoal briquettes for 350 to 400 degrees for around 45 minutes. Don't forget to season each layer. Adjust quantities of sausages, potatoes and cabbage as needed to feed your group.

Friday and Saturday evenings we cooked dinner in cast iron. You can see the results in the two photographs. I'm planning a busman's holiday cookout for cooks this Friday. After two busy days cleaning and organizing the kitchen, it'll give the cooks time to bond as the culinary team at Oakland Camp. And off their skill. Everyone, along with maintenance and housekeeping staff if they choose to join in, will have fun.

Saturday, August 24, 2013

Chef Steven's rules for sausage gravy

After four decades of cooking in military, institutional and camp kitchens, I've learned to follow a number of personal cooking rules. As self-imposed culinary guidelines, they help me prepare and serve great food to my diners, whether at home or in camp. These rules provide consistency each time I prepare a dish.

Earlier this summer, the camp director asked my if I could prepare a "mean" biscuits and gravy. Up to the challenge, we set a date where I could premier biscuits and gravy. I took my standard biscuits and gravy recipe, modified it to use a butter and flour roux (previously, I stirred the flour in with the crumbled sausage meat) and presented camp-made biscuits with my chef's sausage gravy to the staff in mid-May.

Beginning in the third week of June, we presented scratch buttermilk biscuits and rich sausage gravy to the campers every other week. By request, I broke my "pork only" rule to prepare turkey sausage gravy for our largest camp (alongside pork sausage gravy) at the end of July. I came away validating my rule. Campers selected pork gravy three times as often as they did turkey gravy! (The same held true for real bacon vs. turkey bacon!)

Here are my rules for great sausage gravy:
  • Crumble, finely chop or grind the sausage. Diced sausage may look good on the plate. But it's the fine pieces that carry flavor into the gravy. Throughout the summer, I used pre-cooked patties with success. Grinding partially thawed patties in the food processor gave it the texture I was looking for.
  • Don't skip on the milk. The fat in whole milk adds body and richness to the gravy. If you must, drink two percent or skim milk in a glass, not in the gravy. Whole milk works best. And a little cream makes even richer gravy! Unfortunately to some, good gravy isn't low in fat!
  • A butter roux is the best thickening agent for gravy. Leave the cornstarch to pudding cookery, where its magic sheen works best. And don't forget to cook out the flour taste in the roux.
  • Traditional American breakfast sausage works best for traditional American biscuits and gravy. Use pork sausage, not beef. SOS is made with beef, not pork. Though related, they're not the same.
  • Think long and hard before adding a new ingredient or two the gravy. I've successfully worked a modest amount of roasted diced red peppers into my gravy. Leave the mushrooms for a great mushroom sauce or pasta dish. They don't belong in sausage gravy.
  • The best biscuits are made from scratch. Develop a good recipe and stick to it.
Oh yes, there's one final rule: Good sausage gravy must leave a mild case of heartburn, especially when cased with several mugs of coffee. Sorry; it's a rule!