Showing posts with label camping. Show all posts

Wednesday, September 17, 2014

20-inch Lodge skillet at Upper Blue Lake

Debbie and I returned from our annual camping trip to Upper Blue Lake with my sister and husband. This year one of our daughters and granddaughters joined us, along with one of the wranglers from Oakland Camp. We enjoyed six days of sun, wind and cool mountain air.

This is the first article from the trip. As I coordinated the menu with my sister, my thought was to prepare several meals in my "new" 20-inch Lodge skillet (model 20SK). I found the skillet at an Eagle Point, Oregon, antique shop last April. Newly re-seasoned, I used the large skillet to cook four meals for the family. I wanted to cook as many meals as possible to hasten the build-up of patina.

Enjoy these photos.

The Lodge model 20SK skillet awaits dinner Thursday evening. I use the large World War II Navy surplus coffee boiler to heat water for washing dishes. The boiler was manufactured by Vollrath.
Spicy Japanese buckwheat noodles (called soba noodles) was on the menu Thursday evening. The sauce was made from sesame oil, rice vinegar, soy sauce and chili garlic sauce. Two (9.5-ounce) packages soba noodles and two pounds shrimp were used.
I fried 1-1/2 pounds thick sliced bacon for breakfast Friday morning. The small pot holds syrup for hotcakes.
Oat blueberry hotcakes were cooked in the skillet. The batter ran until it set in the less than level skillet 
To make the hotcake batter, I doubled my families traditional hotcake recipe, then replaced 1 cup of the flour with a cup of old fashion oats. I dropped a 6-ounce package fresh blueberries to the batter at the last minute.
Friday evening I prepared succotash with kale to accompany grilled chicken. After sauteing onion, roasted red pepper and garlic, I added a bunch of kale.
After adding two (1-pound) packages frozen whole kernel corn to the vegetables, I scooped the dish into the waiting pot. Garlic bread is warming in the foil packages to the left. My brother-in-law grilled chicken for the entree.
We used Saturday's leftover tri-tip to make fajitas for lunch Sunday. I'm seasoning the meat and vegetables with scratch-made taco seasoning.

Sunday, March 30, 2014

My bear story

As a kid I attended Camp San Joaquin in Sequoia National Forest each summer. Instead of participating in the regular "kumbaya" camp session for the ninth grade, I elected to go on the high school boys backpack trip on the High Sierra Trail.

At camp our adult leaders divided the food and equipment, briefed the boys on trip expectations and back country safety. Father Fletcher Davis, an accomplished backpacker and mountain climber, explained the realities of trail life, including foot care, burying human waste and bears.

As a lifelong backpacker myself (at the ripe age of 13 or 14!), I half listened. Father Davis continued onto the topic of black bears, a very real reality in the Sierra Nevada back country. If a bear wanders into camp, bang the pots and pans in a loud manner, he explained. Nine times out of ten the bear will run.

Somehow the math didn't work out for one alert boy. What happens on the tenth time, he impatiently asked? Father Davis' retort was calm and to the point: You won't be around to know!

Sunday, September 29, 2013

Ready, bake, flop

Or should I say, ready, bake fizzle? That's precisely what happened two weeks ago on our annual camping trip to Upper Blue Lake with my sister and family. I mixed a double batch of my no-knead bread at home early in the week before heading to the lake, located in the southeastern reaches of Eldorado National Forest. We readied for the trip as the dough slowly fermented in the home refrigerator.

I set the dough aside Thursday and Friday while we enjoyed relief from the heat of the Sacramento Valley and Sierra Nevada foothills. After exploring nearby lakes and four-wheel drive trails with my sister, I settled in to prepare dinner. I quickly got ready to bake two breads from the dough. Eighteen biscuits went into a 12-inch camp oven. My thought was to bake the biscuits, then set them aside for breakfast. The remaining dough was formed into five balls and placed inside a 12-inch deep camp oven.

Since the biscuits were rising at this point, I already had half of what I needed to fix for the replacement meal. Encouraged on by more than one B&G enthusiast in camp (notably, my brother-in-law's nephew), I lit a roaring campfire. Hot coals were soon being shoveled onto the waiting Dutch oven. The photos tells the story.

I usually burn pine and cedar wood when I camp in the National Forest. It's a matter of supply. Since I don't see the need to buy firewood when it's available for free, I burn the wood that I find on the forest floor. It's different when we camp with my sister and brother-in-law. Jim brings a mixture of hard and soft woods with then to the campground.
Sunday afternoon before the camping trip, I mixed a 4-pound dough (flour weight) and fermented in in the refrigerator. The dough went into the cooler Wednesday afternoon in preparation for departure. I filled a 12-inch Dutch oven with biscuit-sized pieces of dough late Friday afternoon.

The Cambro container is a bit messy because the batch of dough was too large for its 8-quart capacity. I had to punch the dough down as it fermented Sunday. The dough settled down once I placed it in the fridge for a cold slow ferment.
The 12-inch camp oven held 18 golf ball-sized biscuits. To form each biscuit, I pinched off a piece of dough and molded it into a smooth ball.
While the biscuits appear done in the photograph, they're doughy on the bottom. Within 15 to 20 minutes, the coals gave out. When I dug the half done biscuits out of the Dutch oven, I learned they were nearly raw underneath. To rescue them, I placed the dough on the grill. While I generally have success when cooking with campfire coals, sometimes the coals burn out.

Tuesday, September 03, 2013

Annual camping trip to Blue Lakes

Debbie and I are joining my sister's family for our annual camping trip to Upper Blue Lake in Eldorado National Forest next week. Each year we collaborate on meals at the lake. Elizabeth and I divide responsibility for each breakfast and dinner. Each family prepares their own lunches.

In the past I've prepared a variety of Dutch oven favorites. Sourdough bread stood in for a sweet loaf when I prepared Dutch oven bread pudding three years ago. That year we didn't camp at the lake, but visited them mid-week. I brought the proper bread two years ago. I'm now under orders to replicate the bread pudding each year! (As I write, I realized that I failed to post the recipe last year. Here's Dian Thomas' recipe from 2007.)

Blue Lakes split pea soup with ham shank was ready for dinner two years ago when the family arrived. Midway through our vacation, we moved camp to Upper Blue Lake from South Lake Tahoe. Jim and Elizabeth, a brother and our mother were scheduled to arrive Thursday afternoon. A bowl of hearty soup hit the spot. As one of our mother's favorites, the soup warmed her in the brisk evening air at the 8,000-foot elevation.

Last year my sister "hired" a sous chef for me (a family friend). Ashley, a third-year high school culinary student, chopped and cut her way through the camp kitchen. With impeccable knife skills, she sliced 14 apples for apple crisp in a 14-inch Dutch oven. Ashley then prepared and cut zucchini, yellow squash, red onion and carrot for roasted summer vegetables.

Scrambled eggs with chives and pepper-jack cheese for breakfast, salsa with fire roasted tomatoes for the afternoon snack, and Dutch oven bread in time for dinner filled our Saturday. As a culinary student, I found Ashley hungry for information. Her enthusiasm for cooking and willingness to jump in gave this chef a smile.

Bread pudding for breakfast rounded out the weekend's campground feast. Since the kids (young and old!) enjoyed s'mores Saturday after dinner, we decided bread pudding would fit in our Sunday morning breakfast menu. We essentially had French toast in a pot!

For our 2013 visit to Upper Blue Lake, I'd like to introduce sous chef Ashley to one or two new Dutch oven dishes. We'll also build on the dishes that we prepared last year. Repetition will help solidify the camp cooking skills she learned last year.

I'll have more to say after I finalize the menu.

Saturday, January 12, 2013

Yeast raised hotcakes for camp

This recipe looks forward to spring and summer when campers head outdoors. It began as another blog post, one prepared in my home kitchen. As I mixed the batter last night, my thoughts carried me to our camp kitchen at Upper Blue Lake last September. Why not offer the recipe for the camp kitchen?

"Yeasted pancakes ... have a bubbly texture and a clean, slightly earthy (from the cinnamon) flavor that I can't resist," promises Daniel Leader. "It is easy to make this batter just before bedtime, so that it is ready for the griddle when you are the next morning." He wrote Simply Great Breads: Sweet and Savory Yeasted Treats from America's Premier Artisan Baker (The Tauton Press: Newtown, Conn., 2011) with Lauren Chattman.

Other than to slightly adjust the quantity of the flour and modify the instructions, the recipe remains true to Leader's original. Even though I tested the recipe for yeast raised hotcakes at home, it can be quickly assembled in camp.
 
Mix the dry ingredients in a zipper top bag, expel excess air and you're ready to travel. The only other task is to make sure you pack buttermilk, honey, butter, eggs and vanilla. While you can measure precise quantities for the wet ingredients, I pack them in their original containers so they can used for other dishes.

As Leader explains, mix the dry and wet ingredients (except eggs and vanilla) on the evening before your hotcake feast. After "kneading" with a wire whisk, cover the bowl with plastic wrap and set inside the cooler. The yeast will work through the night, giving the batter a sour edge. 

Light the campfire first thing in the morning. As the campfire burns, mix the eggs and vanilla into the batter and set aside. Cook the hotcakes on the griddle when the fire is ready. Have the butter and hot syrup ready so your hungry campers can begin eating as each hotcake comes off the griddle.

Oat hotcakes on the griddle last September at Upper Blue Lake Campground in Eldorado National Forest.
YEAST RAISED HOTCAKES

While I haven't tested the recipe for larger groups, I see no reason why doubling it won't give you the same wonderful results.
Dry ingredients (mix at home):
12 ounces all-purpose flour (2-1/2 cups)
2-1/2 teaspoons instant yeast
1 teaspoon kosher salt
3/4 teaspoon ground cinnamon

Wet ingredients (prepare in camp):
1-3/4 cups buttermilk
1/4 cup honey
5 tablespoons melted unsalted butter
2 large eggs
1-1/2 teaspoon vanilla extract

At home. Measure or weigh flour, yeast, salt and cinnamon in to a zipper top bag or other container. Pack the buttermilk, honey, butter, eggs and vanilla.

In camp, during the evening before breakfast. Pour dry ingredients into a bowl. Stir in buttermilk, honey and butter. Slowly whisk to moisten

ingredients. Continue whisking for about two minutes until batter is smooth, about 250 strokes. Cover bowl with plastic wrap and place in the cooler overnight, taking care so it doesn't spill.

In camp, on the day of breakfast. Light a campfire and burn until you have a bed of hot coals. When coals are ready, spread under a lightly greased cast iron skillet or griddle and heat just until it smokes. (Hotcakes can be cooked over a campstove if desired.)

Stir eggs and vanilla into batter. For each hotcake, pour about 1/4 cup of batter onto the hot greased griddle or skillet. Turn when the surface of each hotcake is bubbly and edges are slightly dry. Cook until golden brown.

Serve immediately. Dish hotcakes directly onto the plates of hungry campers. Serve with butter and brown sugar syrup (recipe follows). Makes 15 to 16 hotcakes.

BROWN SUGAR SYRUP

Some things are just too easy to make at home, including hotcakes and brown sugar syrup. I figure, why buy the bottled stuff when you can easily produce quality syrup at home.

1 cup brown sugar
1 cup granulated sugar
1/4 cup corn syrup
2 cups water
3 tablespoons unsalted butter

In a medium saucepan, bring the sugars, corn syrup and water to a boil. Reduce heat to a vigorous simmer until thickened to a syrupy consistency, about 30 minutes. Stir in butter. Let cool slightly. Store in the refrigerator for up to one month.

Saturday, October 13, 2012

Oat hotcakes in camp

I am posting this recipe by request. After a camping trip with my sister's family to Upper Blue Lake in Eldorado National Forest last month, I received this email from Elizabeth: "Hope you are going to post the recipe for your impromptu hotcakes. Both Ashley and Naomi want it!"

Elizabeth and I worked out the menu in the month leading to the trip. With family favorites, like campfire grilled chicken and roast trip-tip planned for the dinner meals, I was to bring my Dutch ovens into camp, prepare my much requested bread pudding for a dessert and the family hotcake recipe for Saturday morning breakfast.

Everyone enjoyed dinner and dessert Friday evening. My brother-in-law grilled chicken breasts and thighs to perfection over the cooking fire while I introduced Ashley, a young culinary student and my niece's high school friend, to cast iron Dutch ovens. As Ashley sliced 14 apples (a mixture of Granny Smith, honeycrisp and Fuji) for apple crisp, I prepared the 14-inch Dutch oven for the dessert.

I enjoyed a lazy Saturday morning next to the campfire with a cup of coffee while the fishing brigade worked the lake. As Elizabeth and I talked about our late-morning breakfast, I learned that I had misread her email. I was supposed to prepare the hotcake mix at home (click for my original article on "Hotcakes at 9,000 feet").

After a quick inventory, I realized that flour was in short supply in camp. Elizabeth had purposely left her flour at home. And my supply amounted to a meager cup of all-purpose flour. So, I prepared the hotcake batter with ingredients on hand. Quick cooking rolled oats filled in for most of the flour.

Oat hotcakes are a new camp favorite.

OAT HOTCAKES IN CAMP

These are approximate measurements as I eyeballed each ingredient. For a richer flavor, substitute molasses or dark brown sugar for the white sugar. Try adding toasted pecans or walnuts for a nutty flavor. Raisins or currants will also work in this recipe. Click for my oatmeal walnut hotcake recipe from 2011.

1 cup all-purpose flour
2 cups quick cooking rolled oats
2 tablespoons granulated sugar
1 tablespoon baking powder
1 teaspoon kosher salt
3 large eggs
1 teaspoon vanilla
1-1/2 cups milk
1/4 cup liquid bacon grease or vegetable oil

Light a campfire and burn until you have a bed of hot coals. (Hotcakes can be cooked over a campstove if desired.)

In a bowl, stir flour, oats, sugar, baking powder and salt together. Crack eggs into the dry mixture. Add milk and vanilla. Whisk just until the batter is blended. Add the oil or bacon grease and mix again just until the batter is blended. The batter will be slightly lumpy.

When the coals are ready, spread them under a lightly greased cast iron skillet or griddle and heat just until it smokes. For each hotcake, pour about 1/4 cup of batter onto the hot griddle or skillet. Turn when each hotcake’s surface is bubbly and the edges are slightly dry. Cook until golden brown.

Serve with butter and brown sugar syrup (recipe follows). While I didn't count how many hotcakes that I cooked, each person in camp (11 total) received one cake. It should give you around 12 hotcakes.

BROWN SUGAR SYRUP

Some things are just too easy to make at home, including hotcakes and brown sugar syrup. I figure, why buy the bottled stuff when you can easily produce quality syrup at home.

1 cup brown sugar
1 cup granulated sugar
1/4 cup corn syrup
2 cups water
3 tablespoons unsalted butter

In a medium saucepan, bring the sugars, corn syrup and water to a boil. Reduce heat to a vigorous simmer until thickened to a syrupy consistency, about 30 minutes. Stir in butter. Let cool slightly. Store in the refrigerator for up to one month.

Monday, September 05, 2011

Code of the campfire #1

The code of the campfire says wait until the neighbor party pulls out of the camp to snag firewood remnents. Pace about or talk about your next campfire dinner, but don't enter the camp until their trailer clears the driveway.

With many campers leaving for home after the Labor Day holiday, I scoured over a dozen campsites for wood. I now have enough firewood to burn two fires each day for three days.

The camp to my north provided enough wood to boil water for our morning coffee and breakfast. Four large 18-inch wedges came from our New Hampshire neighbors to the south. The retired couple purchased the wood in Minnasota! Another site yielded an odd collection of cast off lumber.

Part two of the code says don't be greedy. Share your wood with a party that that needs wood. It's a blessing to help other campers.

Sent from my Samsung Captivate(tm) on AT&T

Saturday, May 14, 2011

Oatmeal walnut hotcakes

I enjoy breakfast for dinner. Earlier this week, I prepared scrambled eggs with bacon and toast. Nothing to write about, really. Sometimes a simple meal is all you need to satisfy hunger at the end of the day, especially when covered with a few shots of Cholula hot sauce.

I changed coarse tonight. After mulling over several options (including two thawing duck leg quarters), I settled on hotcakes. Thinking back to the granola pancakes on the menu at work one Sunday per month, I didn't think the one cereal in the cupboard would work.

I took my standard hotcake recipe (click here for the recipe) and folded 3/4-cup old fashion oatmeal and 1/2-cup finely diced walnuts into the batter. After tasting the batter, I mixed a bit of vanilla extract and a spoonful of extra sugar in for extra flavor. Some additional milk gave me a batter with the right consistency.

Toasting enhances the sweet, nutty flavor of the walnuts. To toast, set a heavy skillet over medium-high heat. Pour in the walnuts and toast 3 to 5 minutes, stirring frequently. And watch the amount of walnuts you add to the batter, otherwise the hotcakes will be too mealy.

Sunday, December 12, 2010

Hotcakes at 9,000 feet

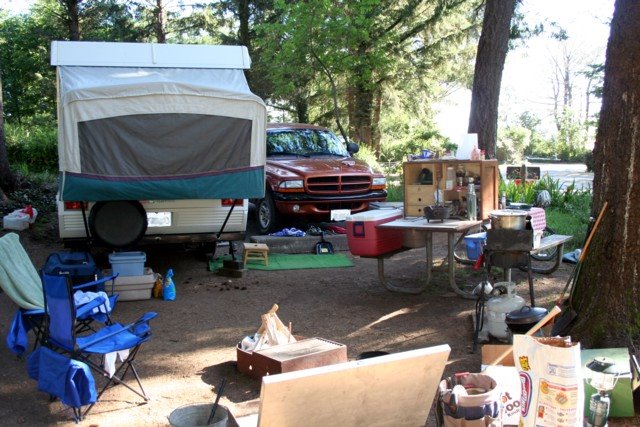
I posted this story August 2000 on Suite101.com, about two weeks after returning home from a family backpacking trips up the Middle Fork San Joaquin River. We were going to celebrate the 30th anniversary of a family backpacking trip to Mt. Whitney, but couldn't travel about the 10,000-foot elevation mark due to my mother's health.

A few weeks ago, I cooked hotcakes and bacon over a campfire in the Ansel Adams Wilderness. During the four-day backpacking trip, the two hotcake breakfasts tasted much better than freeze-dried scrambled eggs and homemade granola cereal. These golden brown wheat cakes brought back fond memories of childhood camping vacations and weekend backpacking trips in the Sierra Nevada.

Hotcakes became a weekend event at in the Karoly house early in my parent’s life together. Although Mom was the principle cook in the family, Saturday mornings served as a time for us five siblings to help Dad measure flour and milk into a bowl and to crack a couple eggs. While he mixed the batter, Dad said, “Limps do not affect the flavor.” We heard his gentle reminder not to over mix the hotcake batter each Saturday.

One sibling made syrup from brown sugar and water, while others got the dishes out and set the table. With a glass of Donald Duck orange juice in front each of seven place settings, Dad grilled golden hotcakes on a aluminum griddle that’s reportedly cast from the block of an old Ford V8. At mealtime, a platter of hotcakes and a plate of bacon strips or sausage patties sat ready to nourish the Karolys once more.

Whether it was Saturday morning breakfast or camping trips to places like Buck Meadow in the Sierra National Forest or the Cottonwood Lakes near Mt. Whitney, hotcakes have been a Karoly tradition since my father started making them for his growing family sometime in the 1950s. Since then, Dad has served hotcakes on every camping and backpacking trip. Hotcakes will forever bring back memories of the pressed steel backpacking griddle that Dad inherited from my grandfather and family breakfasts in California's great snowy range.

BUTTERMILK HOTCAKES

Nothing hits the spot like hotcakes that are smothered with brown sugar syrup, especially if they’re made from scratch. Scratch hotcakes are superior to many of the prepared mixes on the market today. This recipe is adapted from an early edition of the Better Homes and Gardens New Cook Book. Except for the addition of buttermilk, this is the recipe I’ve known my whole life.

1-1/4 cups all-purpose flour
1 Tbsp. granulated sugar
1/3 cup dry buttermilk blend (see note)
1 tsp. baking powder
1/2 tsp. baking soda
1/2 tsp. salt
1 cup water
1 egg
2 Tbsp. cooking oil or melted bacon grease

At home. Stir together flour, sugar, dry buttermilk blend, baking powder, soda and salt. Place hotcake mix into a suitable container. Pack the egg and oil.

For backpacking trips, we place the whole egg inside the dry mix. The theory goes like this: Should the egg break, remove the shell, add water and mix. I’ll have to test it one-day -- we've never broken an egg in my memory.

In camp. Light a campfire and burn until you have a bed of hot coals. (Hotcakes can be cooked over a campstove if desired.)

Pour mix into a bowl. Crack the egg into the dry mixture. Add the water and mix with a wire whip just until the batter is blended. Add the oil or bacon grease and mix again just until the batter is blended. The batter will be slightly lumpy.

When the coals are ready, spread them under a lightly greased cast iron skillet or griddle and heat just until it smokes. For each hotcake, pour about 1/4 cup of batter onto the hot griddle or skillet. Turn when each hotcake’s surface is bubbly and the edges are slightly dry. Cook until golden brown. Serve with butter and brown sugar syrup (recipe follows).

This recipe makes about eight 4-inch hotcakes and can be easily doubled for larger groups.

Buttermilk note: I use Saco Cultured Buttermilk Blend, which is sold in a 12-oz. container. Call Saco Foods toll-free at 1-800-373-7226 or email askus@sacofoods.com for information about their products. Substitute 1-1/3 cups cultured buttermilk for the dry buttermilk and water if desired.

BROWN SUGAR SYRUP

This formula for this recipe is two parts sugar to one-part water. It produces syrup that’s superior to bottled syrups. After eating hotcakes smothered in brown sugar syrup for nearby half a century, nothing beats it, except genuine maple syrup.

1 cup boiling water
2 cups packed brown sugar
1/2 teaspoon imitation maple flavor

Add brown sugar to boiling water and cook until dissolved. Remove from heat. Add maple flavor and mix. For milder syrup, substitute 1 cup granulated sugar for 1-cup brown sugar.

Makes about two cups.

Thursday, December 09, 2010

Taking better photographs

I've reprinted a couple of photography tips from a member of the Royal Tine discussion group. MTTrapper was invited to write the November tip of the month for the website. He graciously allowed me to use his tip on 'Round the Chuckbox.

What's your favorite photograph?


Here's a few tips on taking better photographs.

1. Get a tripod and a wireless remote.

Modern Digital Single Lens Reflex (DSLR) cameras are now reasonably priced. A Canon Rebel series can be bought with a couple of lenses for well under a grand. But, most people ignore the tried and true accessories like a tripod and wireless remote.

Why do you need them?

Here's an example:

I shot this photo at 1/10th of a second. If I had hand held the camera the entire photo would be blurry. Instead, the only blurring is in her hand which shows action in a still photo.

Shooting closeups really add drama to the shot, but macro photos require precise focus. A tripod steadies the camera.

Shots like this are really eye catching, but require exposures up to an hour or so. You can't hold a camera steady that long.

Set up the camera on a tripod and then with the remote and delayed timer, take a photo of yourself.

The remote timer also allows you to fire the camera without touching the camera, thus eliminating camera shake.

2. Use a flash for daylight shots.

A flash fills in the shadows under the brims of hats and gives the entire photo much more snap.

If you want decent photos to help sell anything on eBay or Craig's List, a tripod and flash are a necessity to create photos that sell.

Photographs and article used by permission.

Sunday, August 01, 2010

Critters

We encountered a number of camp critters during our week-long camping trip to the Lake Tahoe area this year. Two bears and untold chipmunks and squirrels had the potential to ruin the trip.

Although my loss to bears and chipmunks was minimal, we almost lost our entire food supply to a hungry black bear just after we moved from Kit Carson Campground to Tahoe Valley Campground.

In all we tossed one jar of peanut butter and a container of Hershey's cocoa powder. And in the process I re-learned the importance of locking the ice chest and food in the truck each night.

What proceeds is a do-as-I-say-no-as-I-do story. When we first arrived at Kit Carson, the camp host said, "We've been lucky this year -- no bear sightings. But put your food in the truck each night anyway.

I listened and quickly agreed with the host. It's long been my practice to secure our food in the truck each night when camping in the Sierra Nevada. There were no bears at Kit Carson during our three-day visit.

The chipmunks struck within hours of setting camp up at Tahoe Valley. While away at the supermarket, the cute fury critters almost decapitates our only jar of peanut butter. I suspect we ran them off as we drove up to the campsite.

That night I broke my number one rule in bear country. Out of laziness, I neglected to move all of the food into the backseat of the pick up before going to bed.

We'll be okay, I reasoned. After all, we didn't see any bears at Tahoe Valley last time we visited (in 2007).

At 1 a.m., my daughter bolted from her bed and yelled, "Dad, there's a bear out there!" I quickly crawled over my wife (and calmed her in the process) and joined my daughter in the doorway to the tent trailer.

A small to medium cinnamon-brown black bear had a grip on our circa 1978 Coleman ice cooler. He was minutes away from tearing the lid open and feasting on eggs, Italian sausage and three different cheeses (Parmesan, cheddar and blue).

My 23-year-old daughter blocked the door as I tried to slip by her. I didn't really have a plan at that point. I suppose I would've grabbed a couple pots and become a one-man precession orchestra.

At that point, my sole purpose was to chase the bear back into the forest. A diet berries, fish and nuts seemed more appropriate than the contents of my vintage ice chest.

Content to remain safely in the trailer for the moment, I told my daughter to throw something at him. She peeled a banana and threw it his way.

That did it! The bear charged off to the next victim. I quickly leaped out of the trailer and recovered the ice chest.

I had re-learned my lesson. I will never again leave my ice chest and dry food unattended in bear country.

In honor of a scrambled ice chest (with 1-1/2 doz. eggs inside!), we had scrambled eggs with sausage and spinach for breakfast Wednesday.

Sorry, no pictures of bears. I was too busy protecting my food to snap a few for the record. We did see a larger black bear late Thursday afternoon in the campground, but my focus was again locking up.

Thursday, July 22, 2010

Deep dish pizza rice revisited

I first made my Dutch oven deep dish pizza rice on a camping trip to the North California coast in July 2006. My then 14-year-old son Jacob devoured two hefty helpings as he mumbled "This is good!" over and over.

Now that he's 18 and growing. He asked for "that pizza stuff" several times this week on our camping trip to South Lake Tahoe. I prepared the dish in a 10-inch Dutch oven for the second time last night.

Here's my revised recipe. I didn't change too much from the original recipe that was posted on July 26, 2010. I added half of a 3-ounce bag of baby spinach and used prepared pizza sauce in place of pesto.

Heat 1 or 2 tablespoons olive oil in a 10-inch Dutch oven over medium-high heat. Add onions and garlic and sweat until translucent.

Add rice and stir to coat with oil. Fry rice while stirring frequently until it takes on a light-brown color. Add 4 ounces each pre-cooked Italian sausage and peperoni. Cut the peperoni into quarters or chop as desired. Reserve 13 peperoni slices for the final step.

Add about 3 ounces of washed and dried baby spinach to the rice. Continue cooking for several minutes to wilt the rice. Many other green vegetables will work in place of spinach. I'd like to try broccoli rabe, cut into 2-inch pieces next time.

My three-year-old granddaughter didn't flinch at the sight of cooked spinach last night! She matched her uncle bite-for-bite (adjusted for age, of course!).

Combine 2-1/2 cups chicken stock, 1/2-cup prepared pizza sauce and 1 teaspoon dried oregano. Pour into rice mixture and stir. Cover with lid. Bake 20 minutes or until rice is done. Use coals for approximately 350 degrees (5 charcoal briquettes under the oven and 16 on lid in temperate weather).

When done, spread 1-1/2 cups shredded cheese over the rice. Arrange the reserved 13 peperoni slices over the rice. Return lid to oven and continue baking until cheese is melted.

Enjoy! Serves a family of four to six. Multiply the recipe one and one-half times for a 12-inch Dutch oven.

To Lib: Use a three or four-quart home Dutch oven for the casserole. Sweat onions on the burner, saute rice, wilt spinach, then add pizza sauce and stock and bring to a boil. Cover and place in a 350-degree oven and bake for about 20 minutes. Top with cheese and peperoni and finish in oven.

Wednesday, July 21, 2010

Don't feed the critters

It's not my mission in life to feed the squirrels. But just when you think you have the fury critters figured out, they strike at the peanut butter.

Sunday, July 18, 2010

Camping

We left early yesterday afternoon for a week long camping trip in the California High Desert just south of Lake Tahoe.

We first arrived in the Caples Lake and Silver Lake area only to find all available campsites taken. I'm sure the large wedding party at the Caples Lake Resort saturated the area.

After shuttling between the two lakes in our quest for a campsite, we drove over Carson Pass into the Hope Valley. My first thought was to drove south to the Blue Lakes (a favorite of my sister's family).

I wanted to check the campgrounds on the West Fork Carson River first. Just after I pulled into Kit Carson Campground, I saw the "campground full" sign. Committed, I drove through the upper loop. We found a vacant campsite and set up the trailer for three nights.

I quickly learned that a trip to the Blue Lake would've been fruitless. The campground host for American Land and Leisure, campground manager for Toiyaby National Forest, said all campgrounds were full.

We plan to camp at Kit Carson through Tuesday, then shift to South Lake Tahoe.

Sunday, August 10, 2008

Shelter Cove at Odell Lake

We spent the last couple days of our 2008 vacation at Oregon's Odell Lake, which is known for its abundant Kokanee fisheries. As we crossed the Cascades on State Route 58, I suggested to Debbie that we camp at the north end of the lake.

Even though she enjoyed the lake during our 2006 camping trip, the south end of the lake is know for its brisk wind and whitecaps on the lake. I suggested that we should try Shelter Cove, a private resort on the sheltered north end.

After five midnight marathons at my brother-in-law's house, our camp at Shelter Cove gave us a change to relax in front of the campfire and do nothing for three days. Shelter Cove's spaciously wooded RV campground gave us a chance to spread out and stretch our legs.

Sometimes camping is about doing a whole lot of doing nothing. It's a time to relax and enjoy the great American outdoors. You don't need grand list of accomplishments to enjoy a nice, lake-side campsite.

After pulling into camp Wednesday evening, I spent much of Thursday catching up on my notebook. Coffee in hand, I spent most of Thursday alternating between our camp and the community campfire, which burned most of the day.

Although I carry the notebook with me almost everywhere I go, I didn't take the time to write in it. I spent most of my time talking to family since we all live far apart. And when I wasn't talking, I processed photos on the laptop.

I'd select Shelter Cove if you have a choice between the two resorts at Odell Lake. Blessed by a gentler wind, Shelter Cove's spacious campground contains some 88 sites. Most have electricity and are spacious enough to park even the largest Class A motorhome.

We plan to return to Shelter Cove in the next two years. I like the idea of having a favorite place -- one that we can return to year-after-year.

Saturday, July 19, 2008

Chicken Adobo

We set out for the Kipsak Peninsula in Washington State early Thursday morning. The Valley of the Rogue State Park, located just off Exit 45B in Southern Oregon on I-5, broke the 18-hour trip into two manageable segments. The park is a family favorite with its expansive areas of grass and park-like trees.

I wanted to prepare an easy dinner before it got dark. This easy chicken adobo recipe, reminiscent of the Philippine national dish, fit the bill. Dinner was ready in an hour with steamed rice and a quick salad.

CHICKEN ADOBO

When doubling this recipe, you'll need a larger skillet to make sure the sauce properly reduces. Use a heavy 12- or 14-inch skillet for large batches. The larger surface area of skillet will give the sauce the breathing room it needs to properly reduce.

You may need to thicken the sauce with cornstarch when preparing more than 12 pieces of chicken.

1 tablespoon vegetable oil
6 chicken thighs without skin
3 cloves garlic, minced
2/3 cup cider vinegar
1/3 cup soy sauce
1 teaspoon whole black peppercorns
1 bay leaf

Heat oil in a 10-inch cast iron skillet over medium-high heat. Add chicken and cook until lightly browned, about 5 minutes, then turn over and cook an additional 5 minutes. Transfer chicken to a plate and set aside.

Pour off all but 1 tablespoon of pan drippings and return pan to low heat. Add garlic and saute until soft, about 1 minute. Add remaining ingredients and stir to incorporate. Return chicken to pan and cook, covered, for 20 minutes.

Uncover, increase heat to medium-low and cook 15 to 20 minutes more, occasionally spooning sauce over chicken, until sauce thickens a bit and chicken is tender and nicely glazed with sauce. Remove bay leaf before eating.

This recipe is adapted from the March 2007 issue of Sunset Magazine.

Sunday, August 05, 2007

This Ain't Camping -- Max Yasgur's Farm at Tahoe Valley Campground

A bit of culture shock. That's how I'd characterize this year's camping trip to South Lake Tahoe.

A few years ago, I wouldn't have been caught dead rocking to David Crosby and Stephen Stills lookalikes on a camping trip.

But this year is different. We're spending the week at the Tahoe Valley RV Campground in South Lake Tahoe.

As a card carrying member of the dirt camping crowd, I've had to adjust to flowing water, electricity on demand and hot showers.

max YASGUR'S FARM, a musical revue band that plays the tunes of the Woodstock era, including many ballads from Crosby, Stills and Nash, entertained campers this evening.

After dinner, we walked over to the big white entertainment tent and took a seat. The band started around 7 p.m. and played the tunes of the 60s and 70s for three hours.

It was a fun evening of music and good, family oriented entertainment. I'll have to try this more often.

Friday, July 28, 2006

Movin' On

We ended our five-day stay at the Harris Beach State Park in Brookings, Oregon and have moving up the coast to Florence, which is about half-way between California and Washington.

I'd recommend Harris Beach to anyone who likes to camp along the Oregon coast. Its 149 campsites and 6 yurts are all situated close to water and showers. Many sites come with electrical hookups as well.

The staff are helpful and courteous, even when they're correcting minor rule violations! The other night a ranger approached our neighbor's camp and asked them to turn down the boom box, saying, "You know, that's one of my favorite CDs. But I've got to ask you ..."

This is our fourth time using the campground. Each time we visit, usually in July, we encounter different weather. Be ready for cold, foggy mornings. A heat wave is defined as any temperatures above 90.

I prefer C Loop. The campsites (both RV and tent sites) that are the roomiest are situated on the outside of the loops. D Loop is closest to U.S. 101. Expect lots of highway noise until later in the evening.

Reserve your site ahead. We've learned the painful lesson that Harris Beach is popular. It's almost impossible to get a reservation this time of year. When you find unreserved blocks of days, they rarely include electrical hookups. These are the least desirable sites as well.

We were fortunate this year. I made a reservation a week before heading north for a tent site with no hookups. The spot (C5) wasn't as roomy as we like, but it was acceptable.

We're heading inland tomorrow and plan to end up somewhere along Orgeon Highway 58, possiable Odell Lake. Until then ...

Thursday, July 27, 2006

Camping on the Information Supper Highway

Being connected to the Internet at the campground is great. All you need is a reliable electrical source.

Sunday as we approached Harris Beach State Park turnoff, I noticed a sign that said, "Wireless Internet." The ranger at campground entrance confirmed that the campground had a wireless connection.

She cautioned that the signal didn't reach all 149 campsites. "You may need to park in the campground office parking lot to find an adequate connection." Just park your car in the employee parking lot and connect, she added.

Sunday evening I opened the wireless connection dialog box on the laptop, located the signal and logged in to Road Connect -- Oregon's roadside Internet provider. Access for seven days cost $6.99.

Being connected is great. It allows me to answer email, blog on last night's dinner and checkout SeaLionCaves.com (we've planned a visit there Friday).

But campsite C5 has one drawback: It's classified as "No hook, typical site." That means no electricity.

The batteries on my connectivity devises -- laptop, Palm Pilot, cell phone and digital camera -- require frequent charging. The phone and PDA can be charged via the cigarette lighter in the truck. The other two require an electrical outlet.

But I've only found one outlet at Harris Beach to charge the laptop and camera batteries. I've resisted the urge to sit in the men's rest room and baby sit the laptop (and serf the Internet) while the batteries charge.

Fortunately, we're headed to my sister-in-law's house this evening to fill up on conversation, grilled chicken and electricity.

I'll be connected through Sunday at motels, roadside rest stops and coffee houses. Then we're heading into dark territory (remember Steven Segal in Under Siege 2?).

Any one have an extension cord and satellite Internet connection?

Sunday, July 23, 2006

Darle Coates' Modern-day Chuckwagon

How do you like this: I'm camping and connected to the Internet! We're at Harris Beach Campground, part of the Oregon State Parks system in Brookings Oregon.

Here's a picture and story from Daryle Coates from Texas:

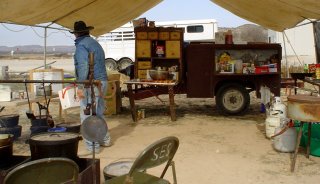
The story on the trailer is interesting. I got the gig to feed the International Guests in the International Room at the Houston Livestock Show and Rodeo one meal. This consisted of BBQ goat, pinto beans, cole slaw, potato salad, cobbler and condiments. I did this 2 years in a row.

There were over 500 each year. I needed something to haul the necessities and a larger shade. I found this service bed that had been for sale a long time and purchased it. I did some welding on the frame to add a space for a chuck box and a cooler. Later I also added a water storage tank.

There had been an old barn on the place where I was raised. When I was young, my Father tore it down and moved the lumber to another ranch and built a small barn. Many years later, I tore down the barn and used some of the wood to build the chuck box. That barn wood is approaching 100 years old. I had a tarp company make me a 16x20 tarp and made the frame using preformed corners, etc.

I am not a carpenter and will never build another chuck box, but I am sure proud of the one I have. I will send you a better pic of it.

Stay cool on your vacation.