Showing posts with label beans. Show all posts

Tuesday, October 13, 2015

Navy bean soup at Upper Blue Lake

Last month I prepared Navy bean soup for my sister and her husband at Upper Blue Lake in Eldorado National Forest. This was the fifth year that Debbie and I joined them at the lake. They camped at the lake several years before us.

In the weeks leading up to the trip, my sister and I coordinate the menu. We split the dinners and breakfasts. Each family is left to its own devises for lunch. I usually pack too much food. My original thought was to prepare Navy bean soup for lunch. The planned meal (sauteed chicken breast with cilantro cream sauce) remained in the cooler.

Since we snacked that day, I suspended a 10-inch Dutch oven over the fire at noon and began the soup. This not the first time I have cooked soup at the lake. In 2011, I prepared split pea soup for our mother, who was camping with us. You can view the recipe and the story behind the recipe.

To begin the soup, I set the Dutch oven over the cooking fire. After it pre-heated, 6 ounces diced salt pork was rendered in the pot. One diced carrot and 1 diced onion went into the pot next. The vegetables and salt pork were stirred every couple minutes until lightly caramelized.
One pound small white beans were added to the pot along with 6 cups cold water. The beans were seasoned with bay leaves, granulated garlic, coarse ground black pepper and cayenne pepper. I added 2 additional cups of water after the beans had cooked three hours. I spent most of the afternoon reading and tending the fire.
Around 4 o'clock, I hiked up the mountain to this grove of Lodgepole pine trees. The is situated on a shelf on southern slope of The Nipple, a peak that overlooks Upper Blue Lake. During the hike, I left the soup over a small cooking fire. I added water to the beans and recharged the fire upon my return, about 45 minutes later.
The pot of soup was suspended over the fire from on a tripod. I left the lid on the pot to aid in cooking the beans. Given the altitude of 8,100 feet above sea level, it took just over 6 hours to soften the beans to the consistence of soup. The soup was ready to serve around 6 p.m. The convertible fire iron set was built by Campmaster of Mesa, Arizona, in the early 1990s. The iron set can be set up as a bipod or trip pod.

Tuesday, February 11, 2014

Vegan black bean chili

At Oakland Feather River Camp, vegetarian meals are offered in addition to the regular meat-based meal. The vegetarian meal is served on a separate steam line to avoid confusion. This allows vegetarian diners (and meat eaters who enjoy vegetarian cuisine as well) to select their meal without having to worry about meat products. Any food item placed on the vegetarian line is prepared without meat, poultry or fish.

I often serve the same entrée and side dishes on both meat and vegetarian lines. When chili con carne is menued on the regular menu, for instance, bean chili is placed on the vegetarian serving line. This simplifies production and allows the cooks to make efficient use of their time. While the chili con carne and black bean chili are cooked in separate pots, the beans for both entrees will be cooked in the same pot, then divided between the two applications.

When we have a number of vegans in camp, I instruct the vegetarian cook to prepare as many entrées as possible without animal products. This helps to avoid duplication of effort for the vegetarian and vegan population at camp. To please vegetarian campers, we place grated cheese and sour cream on the vegetarian line.

I began preparing vegan black bean chili for the Argonaut Farm to Fork Café in Coloma, California, in December. It quickly became a favorite of our customers. And I enjoy cooking the chili week after week. This recipe will supplant the one we were using last summer at camp.

Adapted from Chef Helen Lacono's gem of a cookbook, Kaua'i Farmers' Market Soups (self-published in 2013), the chili is a marriage of freshly cooked black beans with a rich puree of onions, poblano chiles, carrots, red bell peppers and garlic. A pot of beans surrounded by a smooth, mildly spiced sauce, makes for a wonderful bowl of comfort food.

VEGAN BLACK BEAN CHILI

Use the black bean chili recipe as a starting point, adding or subtracting ingredients to suit the tastes of your campers. For a chunky chili, skip the puréeing step. Simply cut the vegetables to uniform size, sauté in olive oil and add to the cooked beans.

For a smoky chili, replace the paprika with smoked paprika. Chipotle peppers add a smoky dimension as well. You can also roast the poblano chiles and red bell peppers over an open flame if desired.

For a meat chili, add 3-1/2 to 4 pounds grilled diced Italian sausage or cooked ground turkey to the chili. My favorite is a chicken and apple sausage.

3 pounds black beans
2 teaspoons kosher salt
1 pound onion, diced small
8 ounces carrot, diced small
1 pound poblano pepper, diced small
1-1/4 pounds red bell pepper, diced small
1 ounce  garlic, minced
1/2 cup olive oil
1/4 cup chili powder
2 tablespoons ground cumin
2 tablespoons paprika
1/4 cup dried oregano
2 tablespoons dried basil
1/2 teaspoon cayenne pepper
3 cups crushed tomatoes
1/4 cup Worcestershire sauce
2 tablespoons Tamari soy sauce
Vegetable stock

Pick over beans, removing discolored beans and foreign matter. Wash thoroughly. Place beans and salt in 10 to 12-quart stockpot. Cover with cold water and bring to a boil. Reduce heat to simmer and cover. Add water as necessary to keep the beans covered. Simmer 1-1/2 hours or until just tender. Drain beans, reserving cooking liquid if used to thin the chili.

Puree onion, carrot, chili pepper, bell pepper and garlic in a blender or food processor. In a heavy skillet, heat oil over medium heat. Cook puree mixture in olive oil for 10 to 15 minutes. Add chili powder, cumin, paprika, cayenne, oregano and basil to puree mixture. Continue cooking for 1 to 2 minutes. Add to beans in stockpot.

Add tomato, Worcestershire sauce and soy sauce to chili. Simmer over low heat 20 to 30 minutes to develop flavor. Thin chili to desired consistency with vegetable stock or reserved bean liquid. Adjust seasoning.

Makes 6-1/2 quarts. Portion into 25 (8-ounce) or 20 (10-ounce) servings. If desired, serve over steamed brown rice and garnish with fresh salsa.

Wednesday, August 31, 2011

El charro pinto beans

By Konrad "Teddy Bear" Haskins

My basic pinto bean recipe is very simple. Beans, cumin, garlic, onion and chili with a little left over meat and finish seasoning.

Most recipe books go for a clean, simple and sterile recipe which leaves a whole story untold. For this recipe I like a whole small to medium yellow or red onion. Sweet onions (Walla Walla, Vidalia, Texas 1015 and Mayan sweet) are so mild. I up-size to a large if I'm using a sweet onion.

Mild chili powder works but I prefer using a whole Ancho (mild) pepper cut in two. You want to cooking the pepper halves with the beans and then when done, scrape the flesh of the pepper from the skin and discard the skin stirring the flesh back in.

Granulated garlic works in a pinch but I prefer a quarter to half a head of garlic. Whack the cloves with the side of a chef's knife. This crushes them, releasing flavor and makes peeling much easier. No flailing needed; just put the flat side of the knife over the clove and push down with the palm of your hand.

You'll save a ton of money if you buy whole cumin seeds and whole Ancho chili peppers in the Mexican or the bulk spice isle. Those little glass or plastic jars in the regular spice section can be ten times more expensive. New Mexico and California chilies can be substituted for Ancho.

I use two cups of pinto beans to eight cups of water. If you soak the beans and cumin seeds overnight they will cook faster. As BBQ is not that fast I usually just start with dry beans. With a large pit I put my Dutch oven of beans under some beef or pork to catch the drippings. Leftover beef or pork juice and meat works just fine. Throw some leftover BBQ in the freezer to make you next bean pot very happy.

I don't add salt until right at the end. I normal use about a tablespoon of BBQ rub right at the end as a finishing seasoning. If using straight kosher salt, I'd use a teaspoon or less. Use salt or rub, not both. If you don't have left over BBQ for the special flavor boost then use up to a cup of spaghetti sauce, added a half hour before the beans are done cooking.

How long? Well it's BBQ; so it's done when it's done. At 250 degrees F to 275 degrees for around four hours in a Dutch Oven with a good fitting lid. Allow around two hours if you pre-soaked the beans and cumin seeds overnight in the same eight cups of water you're going to cook them in. While it's okay to soak in an aluminum Dutch oven, I wouldn't soak in a cast iron Dutch oven. For cast iron do the overnight soak in a plastic or stainless steel container.

Enjoy.

This article was first published in the August 2011 edition of The BBQ Institute® Newsletter. Click on http://bbqinstitute.com/newsletter.htm to receive the free newsletter each month. Konrad is an award-winning barbecue pitmaster and instructor. He is based out of Texas.

Saturday, July 31, 2010

Black bean and corn salad

On my last day at work before taking a week-long vacation, the thermometer topped 100 degrees in Sacramento. I made three salads for lunch as a replacement for soup. I usually forgo the soup once it gets over 95 degrees.

My "salad fest" included a black bean and corn salad. Instead of consulting recipe resources in my office, I tossed the salad together as I found appropriate ingredients in the refrigerator and pantry.

I also served a vegetable salad made with a 4-pound bag of Sysco California blend vegetables. To prepare, I blanched the vegetable in boiling water for a few minutes, drained and cooled in ice water. The cold vegetables were then tossed in a couple cups of Italian dressing.

A tossed romaine salad rounded out the menu. The main course consisted of cheese tortellini with marinara sauce.

The residents loved the salad offerings. "That black bean salad was hecka good," said one of the older ladies. A second resident added this note: "Have I ever told you how much I love that stuff?"

BLACK BEAN AND CORN SALAD

Use 3-1/4 cups frozen corn, 6 Roma tomatoes, 1/2 large red onion and 1 large red bell pepper if you don't have a scale.

Salad:

2 (28-ounce) cans black beans, drained and rinsed
1 pound frozen whole kernel corn, thawed
1 pound tomatoes, seeded and diced
8 ounces chopped red onion
8 ounces diced red bell pepper
3 jalapeno chili peppers, minced
1/2 cup chopped cilantro

Dressing:

1 tablespoon dried oregano
2 teaspoons paprika
1 teaspoon ground cumin
1 teaspoon granulated garlic
1 teaspoon kosher salt
1/2 teaspoon ground black pepper
1/2 cup red wine vinegar
1 cup extra virgin olive oil

Combine beans, corn, tomatoes, onion, bell pepper, jalapenos and cilantro in large bowl. Toss to mix well.

Combine oregano, paprika, cumin, garlic, salt, black pepper and vinegar in small bowl. Add olive oil to vinegar mixture and whisk to combine. Drizzle dressing over salad and stir to combine.

Recipe yields about 3-1/2 quarts or 25 (1/2-cup) portions.

Saturday, July 10, 2010

Barbecue bacon and bean salad

Now that the weather has turned toward the century mark in Sacramento, I'm no longer preparing soup each day at lunch. A hearty salad works in the place of soup most days.

My challenge is to maintain interest in the salads that I serve. I do this by offering a new salad each day. Each salad is built around new and interesting ingredients.

Aside from the tradition macaroni, potato and tomato salads, I plan to incorporate ingredients like beans, corn, cous cous, celery root and mangoes into lunchtime salads. Up to this point, I've introduced several salsa varieties, including mango, roasted red pepper, cucumber and melon and citrus.

This recipe comes to 'Round the Chuckbox by way of the June 30, 2010 edition of The Sacramento Bee (Taste Section, page D4). The summer recipe was part of a recipe spread for Independence Day.

The recipe for barbecue bacon and bean salad caught my eye because it presented flavors that I enjoy -- beans, bacon and barbecue sauce. I worked it up for 25 servings and substituted celery for fennel, a flavor that the ladies aren't too keen on.

BARBECUE BACON AND BEAN SALAD

Two pounds dry white beans will give approximately 3 quarts of cooked beans. One #10 can or 8 (15-ounce) cans of white beans, drained, will give the same yield.

2 pounds bacon, diced
1 pound chopped onion
2 teaspoons smoked paprika
2 cups prepared barbecue sauce
2 pounds frozen whole kernel corn, thawed
3 quarts cooked white beans
8 ounces celery, diced
1/4 cup cider vinegar
Salt and ground black pepper, to taste

Cook bacon in a heavy skillet for about 4 minutes. Add onion and continue cooking until bacon is crispy and onion tender. Remove the pan from the heat. Drain most of grease, leaving the bacon and onions in the pan. Stir in smoked paprika and barbecue sauce. Transfer to a bowl and cool.

In a large bowl, mix together corn, beans and celery. Mix in the cooled bacon mixture, tossing well. Sprinkle in the cider vinegar and season with salt and pepper. Garnish with chopped chives or parsley.

Sunday, May 23, 2010

Texas caviar soup

I'm not sure where I first got the idea for a pureed black-eyed pea soup with salsa fresca.

While I may have copied another chef's creation off of a TV food show like Guy Fieri's Diners, Drive Ins and Dives, I like to believe that the soup is my own creation. But I doubt that's true.

Texas caviar is the inspiration for my rendition of the spicy soup. Instead of marinating black-eyed peas in a zesty vinaigrette with red onion, celery, sweet bell pepper and garlic, I separated the dish into its basic components -- beans and salsa.

The soup was a hit with the residents at work. The addition of chipoltle peppers gave the pureed bean soup a smooth smokey feel it it.

The star of the dish was a fresh salsa garnish. While most residents enjoy a more traditional tomato salsa with roasted tomatoes, onion, garlic and jalapeno chilies, chopped fine in the food processor, this salsa is a bit chunkier.

TEXAS CAVIAR SOUP

This recipe uses the "hot soak" method of cooking black-eyed peas that's recommended by the California Dry Bean Board.

Soup:
2 pounds black-eyed peas
3 quarts chicken or vegetable stock
3 chipotle peppers with adobo sauce, minced
2 tablespoons chili powder
1 tablespoon cumin
2 teaspoons coriander
2 teaspoons granulated garlic
Salt and pepper, to taste

Salsa:
4 medium tomatoes, diced
1 medium onion, diced
2 jalapeno chilies, seeded and minced
4 cloves garlic, minced
2 tablespoons lemon juice
1-1/2 tablespoons cilantro, chopped
Salt & pepper, to taste

Place black-eyed peas a heavy 8-quart stockpot or Dutch oven and cover with sufficient water. Boil for 3 to 4 minutes. Discard water.

Add 3 quarts chicken or vegetable stock, chipoltes, chili powder, cumin, coriander and granulated garlic to peas. Bring mixture to a boil, cover, reduce heat and simmer for 45 minutes or until peas are tender.

Meanwhile, make salsa. Combine tomatoes, onion, chilies, garlic, lemon juice and cilantro in a bowl. Season with salt and pepper to taste. Set aside.

Puree black-eyed peas with cooking liquid in food processor or blender until smooth. Thin with a little water or stock if puree is too thick. Season to taste with salt and pepper. Return puree to stockpot and keep warm over low heat.

To serve, ladle 8-ounces soup into each bowl. Spoon 1 or 2 tablespoons salsa on soup. Dizzle with hot chili oil if desired.

Makes about 1 gallon.

Saturday, January 09, 2010

Split pea soup for a crowd

Sometimes it's the simplest recipes that impress people the most. This is especially true with split pea soup. A pot of its rich green goodness will please any crowd.

From scratch, split pea soup can be ready for the table in about two hours. Simply add a mirepoix, a bit of ham or bacon and two or three basic herbs to a three pounds of green split peas and you have the recipe.

I simmered a pot of split pea soup for the ladies at the residential facility last Thursday. From initial comments, I though the soup was going to be a failure.

Residents inquired about the source of the wonderful aroma in the house throughout the morning. Many seemed disappointed when I explained that it was the soup. Their faces told me the soup may not be a popular as I had hoped.

That all changed when I called lunch at 11:30 p.m.

"I have not eaten split pea soup since I was a teenager," said Sarah (not her real name), a middle-aged resident who recently entered the program.

Sarah changed her mind saw a bowl of soup on the table at mealtime. "That soup was good."

The soup was a success. In my three weeks on the job, this was the first time the ladies ate all of the soup. Four or five servings are left after most meals.

I recorded "None left -- very well accepted" in my notebook. It looks like I now have several new converts to split pea soup.

SPLIT PEA SOUP

A ham bone or ham hock can be used to flavor the cooking liquid when ham stock isn't available. Simmer the water and bone together for an hour or more before making the soup. This'll extract more flavor from the bone.

6 ounces salt pork, diced small
10 ounces onion, chopped
5 ounces celery, chopped
5 ounces carrot, chopped
6 quarts ham or chicken stock
3 pounds green split peas
3 bay leaves
1-1/2 teaspoons dried thyme
Salt and black pepper, to taste

Cook salt pork slowly in a heavy sauce pot to render the fat. Do not brown. Add chopped onion, celery and carrot and sweat in fat until the vegetables are slightly softened.

Add the stock and bring to a boil. Add split peas, bay leaves and thyme. Cover and simmer until the peas are soft, about 1 to 1-1/2 hours. Puree soup if desired.

If soup is to thick bring it to proper consistency with a little stock or water. Season with salt and pepper to taste. If ham hock is used, trim off the meat, dice and add to the soup.

Serves 25 (8-ounce) portions.

Post Script ...
I can't seem to convert one of my daughters. She posted "Ewwwwwwwww ..." in response to a status update on Facebook!.

Friday, March 27, 2009

A pot of beans

I love beans. I can't say it any better than that.

But I haven't always had this love affair with beans. Growing up in the California's San Joaquin Valley in the 1960s, beans came in two forms -- canned re-fried beans on Taco night and my mom's Boston baked beans.

Despite her professed dislike of beans, my mother made a mean pot of baked beans, the kind bathed in a slow oven for hours. I don't think she's made them in a decade or more.

I didn't discover the true world of beans until I enlisted in the U.S. Navy in 1970. Then it took two years until I advanced in my career as a Navy cook to the point where I could cook in the pots (coppers to the Navy cook).

Even then, my bean education wasn't complete. Chief Brown, the engineering department's leading chief on the U.S.S. Cocopa, instructed this young seagoing cook in the ways of pinto bean cookery one lazy Saturday morning when most of the crew had slipped ashore for liberty.

Born and raised in the South, Chief Brown wasn't going to let this inexperienced cook ruin a pot of his favorite legume. At this point, a man who normally found in one of two places -- in engine room babying the tugboat's four large 16-cylinder Alco locomotive engines or fishing off the fantail in port – had become the Cocopa's master chef.

The chief, dressed in a set of Navy-grey coveralls, stepped into the galley and checked the water level in the beans. He propped his khaki chief's cap on the back of his head and scolded me.

Beans don't cook without water, the chief barked. Most of the water had evaporated from the pot. My theory on bean cookery -- pot beans should be crunchy like green beans -- didn't set well with the man.

My bean cooking technique has improved since that long summer in the South China Sea. I learned to cook beans (along with many other comfort foods) for the crew.

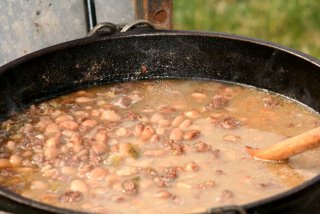
Today, I love to eat a basic pot of beans, one seasoned with chopped meat from a ham hock, sweet onion, cumin and Old Bay. They're the perfect accompiment to almost any meal.

POT BEANS

Substitute pinto, pink, red or black beans for pink beans. Adjust cooking time to the variety. Pinto beans will take 1-1/2 to 2 hours while red and black beans take about 1 to 1-1/2 hours. Substitute chopped meat for ham hock if desired.

10 portions for the home kitchen:
1 pound pink beans
1 small ham hock
1 medium sweet onion, chopped
2-3 teaspoons ground cumin
3/4 teaspoon Old Bay Seafood seasoning
2 teaspoons dried oregano
1 bay leaf
Crushed red pepper, to taste

50 portions for the camp kitchen:
5 pounds pink beans
1-2 pounds chopped meat (ham hock, ham, bacon as desired)
2 pounds chopped sweet onion
4 tablespoons ground cumin
4 teaspoons Old Bay Seafood seasoning
4 teaspoons dried oregano
4 bay leaves
1/2 teaspoon crushed red pepper (optional)

Pick over beans, removing discolored beans and foreign matter. Wash beans thoroughly and drain.

Cover with cold water. Bring to a boil in stockpot and boil 2 to 3 minutes. Cut heat and soak, covered, for 1 hour.

Add onions, ham hock and seasonings. Do not salt beans until you taste the broth after the ham hock has cooked about 15 to 20 minutes.

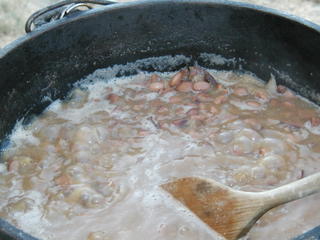
Reduce heat and cover. Simmer 1 hour or until beans are just tender. Add more water if necessary to cover beans.

Five pounds of beans makes about 7-1/2 quarts and serves 50 (1/2-cup) portions.

NOTE: This recipe uses the quick soak method. If desired, use the traditional method:

Step 1 - Pour cold water over the beans to cover.
Step 2 - Soak beans for 8 hours or overnight.
Step 3 - Drain beans and discard soak water (cold water starts the rehydration process slowly so beans will appear wrinkled after soaking).
Step 4 - Rinse beans with fresh, cool water.

From the Northharvest Bean Growers Association: Soaking softens and returns moisture to dry-packaged beans, and reduces cooking time. Soaking also makes beans easier to digest by breaking down the oligosaccharides -- the indigestible sugars that cause flatulence.

During the soaking process beans will rehydrate to at least two to three times their dry size, so it is important to begin with a large pot. A longer soaking time (up to four hours) allows a greater amount of gas-causing properties to dissolve in water, making beans more easily digestible. After soaking, rinse and cook beans in fresh water.

Monday, March 02, 2009

Chickpea patties

There's one reason why I continue to read Sunset magazine. I've found few problems with the recipes it prints. They are well-developed and come to the plate with exceptional taste.

Over the past year, I've found several vegetarian recipes that I can use at camp this summer. They include asparagus and prosciutto strata, baked chili rellenos and pepper-potato fritatta. While I haven't published my renditions of these recipes yet, you can locate my vegetarian recipes by clicking here.

I made the patties for my mother's birthday last week. She enjoys dishes like this, especially when she found out that it can be used as a substitute for chicken in almost any chicken breast or sandwich recipe.

I found that you have to work quickly while the dough is still hot. Otherwise, the dough will crack and break apart as you form it into patties. Two cooks may need to work together when forming large quantities.

I sauteed the patties in a cast iron skillet in a light coating of olive oil. This gave them a golden color and boosted the flavor. The patties have a nice nuttiness about them that complements the cumin and cayenne.

Don't overdo the spices, however. You want the nutty flavor from the garbanzos to predominate.

CHICKPEA PATTIES FOR 25

My local supermarket carries 22-ounce packages of garbanzo bean flour. ). I found Bob's Red Mill brand, along with 20 to 30 other types of flour and whole grains, in the natural grains aisle of the market. Red Mill also markets a 25-pound bag for commercial applications.

28 ounces chickpea (garbanzo) flour (about 5-2/3 cups)
2 teaspoons kosher salt
2 teaspoon freshly ground black pepper
1 teaspoon ground cumin
1 teaspoon cayenne
10-1/3 cups water
1 cup chopped green onion
1 cup chopped flat-leaf parsley

In a large saucepan, mix chickpea flour and dry seasonings. Gradually whisk in water until smooth. Cook over medium heat, whisking often, until mixture begins to thicken, 3 to 5 minutes. Switch to a spoon and stir until mixture pulls away from pan bottom and mounds in center of pan, 4 to 6 minutes. Stir in green onion and parsley.

Using an oiled #24 disher, quickly scoop mixture onto an oiled sheet pan. Press each dough ball flat with lightly oiled fingers. The patties will have the appearance of a cookie. Store in the refrigerator until needed.

Heat a large cast iron skillet over medium-high heat. When hot, add enough olive oil to lightly coat the bottom of the pan. (Or use the lightly oiled griddle.) Saute patties for 3 to 5 minutes, or until golden. Turn and repeat.

Makes 50 patties. Serve 2 patties per person. Use as a substitute for chicken on the menu or as a stand alone menu item.

Tuesday, June 10, 2008

Bean pot


Bean pot
Originally uploaded by SeabeeCook
Another old bean pot warms in the morning sun at the El Dorado County Historical Museum in Placerville, California. This pot has weathered the years in the museum yard and is in good condition.

Careful rust removal and high temperature re-seasoning should give you an usage cast iron pot. You should be able to pass it on to your grandchildren.

This and many other surplus items will be sold at a museum yard sale in August. I'll post the date of the sale as soon as it's made public.

Saturday, June 07, 2008

If there's a hole in the bean pot ...

The picture of the rusting bean pot reminds me pot of beans cookin' over a campfire.

Today, the bean pot warms in the morning sun at the El Dorado County Historical Museum in Placerville, California, never to be used again. It won't hold any more beans.

I looked for missing piece this morning at the museum, but couldn't find it. I'd be a nice pot if you could weld the broken piece back onto the pot.

A flower pot is about the only use you'll get out it now.

This pot and many other surplus items will be sold at a museum yard sale in August. I'll post more information on the sale when it's released.

Sunday, May 04, 2008

More chili beans at the engine house

Yesterday's blog title was a little deceptive. I posted the recipe for corn salad instead of my pot of cowboy or chili beans.

So, here's the bean recipe. It's similar to the recipe for piquinto beans with spicy red sauce. The chili beans have a more smokey flavor from the ham hocks.

COWBOY BEANS

Menu with Dutch oven corn bread and corn, tomato and jalapeno salad.

3 pounds dried pink or pinto beans
3 pounds ham hocks
3 jalapeno chili peppers, seeded and chopped (3 to 4)
1-1/2 quarts canned tomatoes with green chiles
12 ounces onions, sliced
3 cloves garlic, minced
2 teaspoons black pepper

Cover beans with water and bring to a boil. Cut the heat and let the beans set for 1 hour.

Add ham hocks to beans. Add additional water to cover if necessary. Cook slowly until tender, about 1 hour. Remove ham hocks from beans. Cut meat from bone and discard bones. Roughly chop meat and return to beans.

Add chili peppers, tomatoes, onions, garlic, cumin and black pepper to beans. Cook slowly in kettle an additional 1-2 hours, until beans are soft and juice is thick. Add water as needed to keep beans from drying.

This recipe makes about 6-1/4 quarts. As with all recipes, the size of the serving utensil will determine how many portions you get. Plan on 50 (1/2-cup), 25 (1-cup) or 16 (1-1/4-cup) portions. One recipe will fit in a 12x20x4-inch hotel pan.

Wednesday, December 12, 2007

Piquinto Beans with Spicy Red Sauce

Now this recipe for blog no. 12 ...

Last September these lively beans accompanied a grilled tri-tip roast for a fund raiser and silent auction in Pleasanton, California. The potatoes, along with creamy scalloped potatoes and the roast, formed the menu.

A mixed green salad, dressed with a vibrant line-cilantro vinaigrette, and Dutch oven peach crisp completed the meal.

PIQUINTO BEANS WITH SPICY RED SAUCE

One pound of dry beans yields about two quarts when cooked. Use an eight-quart Dutch oven for this recipe.

3 pounds pink beans
8 ounces bacon, chopped
12 ounces onion, chopped
3 cloves garlic, minced
2-1/4 cups tomato puree
3/4 cup chili sauce
3 tablespoons sugar
1 tablespoon salt
1 tablespoon dry mustard

Pick over beans to remove dirt and small stones. Cover with water and bring to a boil. Cut the heat and let the beans set for 1 hour.

Saute bacon and until lightly browned. Add the onion and sweat until soft. Add the garlic and sweat a minute or two longer. Pour bacon and onion mixture into the bean pot.

Bring to a boil and simmer 2 hours, covered, or until beans are tender. Combine the tomato puree, chili sauce, sugar, mustard and salt. Drain most of liquid off beans and stir in sauce. Makes 6 quarts or about 50 (1/2-cup) servings.

Saturday, October 06, 2007

Old Fashioned Navy Bean Soup

The crew of the El Dorado Western Railroad pulled its star attraction out of the engine house this morning for the second annual Fall Home and Harvest Show.

I used the occasion to prepare lunch for 12 volunteers of the railway and museum. In honor of our locomotive's 100th year, I selected dining car recipes from two railroad cookbooks -- Chesapeake and Ohio Dining Car Recipes, compiled by E. Stirling "Tod" Hanger, Jr. (C&O Historical Society: Clifton Forge, VA, 1995), and Dining By Rail: The History and Recipes of America's Golden Age of Railroad Cuisine, by James D. Porterfield (St. Martin's Griffin: New York, 1993).

The old fashion navy bean soup is composite recipe from the Denver and Rio Grand Western Railroad and the Chesapeake and Ohio Railway. I also prepared cole slaw from the Missouri Pacific Lines and toasted hot Mexican sandwich from the Santa Fe.

The 100-year old locomotive (Diamond and Caldor No. 4) is located at the El Dorado Historical Museum. Volunteers are on hand each Saturday from 8 a.m. to about 1 p.m. to show visitors the inner workings of a geared Shay locomotive.

OLD FASHION NAVY BEAN SOUP

I use low-sodium beef broth in the recipe so I can control the amount of salt that gets added to the recipe. I'd rather add salt later than use a heavily salted beef stock or base.

You need an 8-quart stockpot or No. 10 Dutch oven for this recipe. Use a 12-inch deep camp oven if you're cooking over hot coals outdoors.

2 pounds navy beans
4 quarts low sodium beef broth
12 ounces bacon, chopped
2 medium onions, chopped
2 medium carrots, diced small
6 medium tomatoes, peeled and diced
1/4 cup all-purpose flour
1/2 cup cold water
1 cup heavy cream
1/4 cup flat leaf parsley, chopped
Salt, to taste
Black pepper, to taste

Pick over beans, removing discolored beans and foreign matter. Wash thoroughly in cold water. Cover beans with beef broth and bring to a boil. Boil 2 minutes. Turn off heat. Cover and let stand 1 hour.

Saute bacon in a heavy large skillet until crisp. Drain off most of the bacon fat. Add onions and carrots and sweat under medium-low heat until soft. Add tomatoes and cook for 2 minutes before adding bacon-vegetable mixture to the bean pot.

Bring beans to a boil, cover and simmer 2 hours or until beans are tender. If needed, thicken soup with a flour and paste. Stir in the heavy cream and parsley just before serving.

Serves 20 (1-cup) portions. When used as the main course, the recipe will only serve 12 to 16 persons. This recipe yields about 5 to 5-1/2 quarts.

Friday, July 13, 2007

Camp -- Three-Bean Salad

"Three-bean salad is adult food." That's what my staff told me at camp last week.

"Campers don't eat exotic salads," I warned two years ago. 'Exotic' meant any salad except except tossed green salad and potato salad.

"Prepare small quantities of salads such as three-bean, cucumber and onion, and marinated tomato for the adults and some older campers."

Undaunted by my cook's warnings (all mothers) -- and my own writing -- I directed the salad cook to prepare a large pan of three-bean salad for the campers last week.

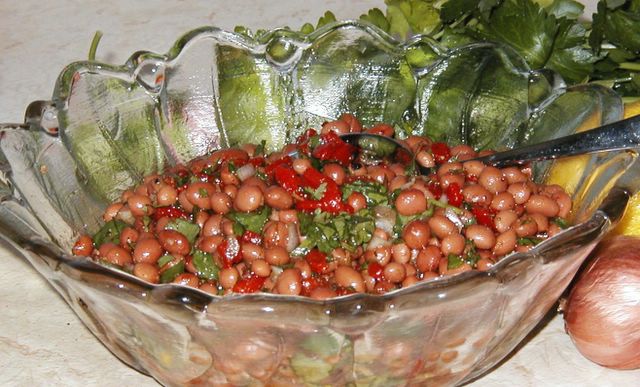
This camper frowns at the cole slaw and three-bean salad as she passes the salad bar. The Independence Day barbecue featured a full salad bar in the outdoor dining area.

About two gallons of the stuff was prepared and placed on the salad bar for each lunch and dinner.

By Saturday morning, a medium bowl of the salad with an R.I.P sign sat near the dining room exit. In between its creation and demise, two staff members (myself and a male counselor) each did their personal best to reduce stocks.

I can affirm this one fact: kids at the Northern California FC Camp consumed less than half of the three-bean salad.

This is one tradition the kids choose to ignore. It seems that we need to leave three-bean out of the mom, apple pie and grilled burger equation.

Tossed salad with ranch dressing was more to their liking. It seems these mothers know a thing or two about kid's tastes.

What happened to the three-bean salad, you ask? Two quarts came home with me. A bowl a day and it'll be gone by Sunday.

And the rest? Sad to say, I listened to a few mothers and resisted the urge to freeze it for the 2008 camp.

THREE-BEAN SALAD

This recipe makes about 3 quarts. One or two recipes are sufficient for a camp of 150 children of mixed ages and adults for the salad bar for a week. One recipe prepares 24 (1/2-cup) servings if portioning is called for.

Add additional sugar for a sweeter salad if desired. Substitute canned cannellini beans for the green or kidney beans if desired. Use beans with contrasting textures when selecting beans to use for the salad.

1-1/2 cups apple cider vinegar
2/3 cup granulated sugar
2/3 cup vegetable oil
2 teaspoons salt
1/2 teaspoon black pepper
2 (15-ounce) cans green beans, drained and rinsed
2 (15-ounce) cans kidney beans, drained and rinsed
2 (15-ounce) cans garbanzo beans, drained and rinsed
1 red onion, diced fine
1/2 green bell pepper, diced fine
1/2 red bell pepper, diced fine
1/4 cup chopped Italian parsley

Heat vinegar, sugar, oil, salt and pepper together in a saucepan over medium heat, stirring occasional, about 5 minutes. Cool dressing to room temperature. Combine canned beans, onion, green and red bell pepper, parsley and cooled dressing. Mix well and chill until service. Portion into 1/2-cup servings if desired.

Sunday, June 18, 2006

Round Top Texas Beans

This recipe is adapted from More Cee Dubs Dutch Oven and Camp Cookin' by C.W. "Butch" Welch (Back Country Press, 2000). I last prepared the bean dish at the Carson City Rendezvous last week.

I couldn't locate ham hocks at the local market in Carson City. A pound of breakfast sausage worked just as well.

ROUND TOP TEXAS BEANS

Use a 12-inch camp oven for this recipe. Bottom heat is all you'll need to simmer the beans. Twenty coals underneath the oven will the beans to a boil in quick order. Remove all but eight to 10 coals to simmer. Replace the hot coals every 45 to 60 minutes. You can also cook the beans in the Dutch oven over a propane or gasoline camp stove.

To double the recipe, use a 14-inch deep Dutch oven.

2 cups diced onions
5 cloves garlic, minced
3 tablespoons vegetable oil
2 pounds dry pinto beans
2 ham hocks
1-1/2 tablespoons ground cumin
2 teaspoons ground coriander
1/4-1/2 teaspoon crushed red peppers
1 tablespoon hot pepper sauce
Salt and black pepper, to taste

Sweat onions and garlic in vegetable oil until soft. Add beans to camp oven and cover with water. Add ham hocks and place camp oven over a bed of coals. Simmer the beans for 2 to 2-1/2 hours or until tender. Add spices, stir and continue to simmer to develop flavor. The beans will thicken as they cook. Makes 16 (1-cup) or 32 (1/2-cup) servings.

Cee Dub said: "The longer they cook, the better they get! Serve with some fresh chopped onions, sliced jalapenos and more hot sauce on the side for garnishes. We discovered that some Texans liked them with a splash of vinegar, and still others liked them with a little sugar sprinkled on top."

Tuesday, August 09, 2005

Southern Baked Beans More Follow Up

I want to clarify a few things about my Southern baked beans follow up from Sunday.

The reason the beans took four hours to bake (really, simmer) is twofold: tardy briquette lighting by the cook and the presence of an acid. Sodium from the ham may have contributed as well.

The beans should've benefited from the long traditional baking that transforms the beans and sugars into richly glazed berries. Otherwise, you're simply eating another simmered bean dish.

PS--I found a recipe for honey-glazed baked (pinto) beans in a later edition of Joy of Cooking in a rare library visit yesterday. As a bonus, I'll post Joy of Cooking's instructions for campfire beans when I post the honey-glazed recipe. Campfire beans are buried in a cast iron kettle for four or more hours. I last blogged on this topic last March 13, 2005.

Sunday, August 07, 2005

Southern Baked Beans Follow Up

The Southern baked beans didn't turn out as promised. They were good -- spotted brown pinto beans in a sweet sauce with a blast of vinegar. While I enjoyed the flavor, the dish took two hours longer that the recipe instructed. The beans remained firm right up to the end. They only softened in the last 30 minutes of simmering.

Part of the reason for the extended cooking time isn't the fault of the original recipe writer. I neglected to start the second batch of charcoal briquettes in time to keep the pot going. I'm certain that I lost 30 minutes lighting the additional coals.

Southern baked beans at a lively simmer over a propane burner.

The second batch of coals also burned quickly. A hot wind blew along the east exposure of the house yesterday. As a result the coals burned much quicker than expected. By the time I had checked the beans, the wind had reduced the coals to nubs.

To keep the beans cooking, I moved the Dutch oven to my propane burner. It took an additional 90 minutes to tenderize the beans.

Yesterday's experience highlights an overriding principle of Dutch oven cooking: Your dish will be done when it's done. Don't forget the impact of ambient temperature, wind conditions and moisture on cooking times. (And don't forget to light the second batch of coals on time!)

The presence of an acid is the other factor that impacts tenderness of the beans. Next time I baked this dish I plan to add the cider vinegar much later in the cooking process. I'll add the add the cider vinegar with the molasses.

Bean math

The Northwest Bean Growers Association offers these facts about bean yields:
  • One #10 can of beans yields 12 cups of cooked beans, drained.
  • One 15-ounce can of beans equals 1-1/2 cups of cooked beans.
  • One cup of dry beans yields 3 cups cooked.
  • One pound of dry beans yields 6 cups cooked.
  • One pound of dry beans makes about 9 servings of baked beans or 12 servings of bean soup.

Saturday, August 06, 2005

Southern Baked Beans

I'm baking this baked beans on the patio right now. I'll post pictures and a taste report this evening.

SOUTHERN BAKED BEANS

This recipe, which is attributed to the University of North Carolina at Chapel Hill, is from the July 15, 2005 issue of Foodservice Director. I've modified the recipe for camp Dutch ovens. Double the recipe for a 12-inch deep Dutch oven.

1 pound pinto beans, soaked in water for 24 hours
2 tablespoons corn oil
6 ounces country ham, fine dice
2 medium sweet onions, diced
1-1/4 teaspoons garlic powder
1/4 cup packed brown sugar
1/2 cup apple cider vinegar
2 tablespoons honey
4 cups water
1/4 cup black strap molasses
Salt and pepper to taste

Rinse soaked beans under cold running water. Place beans and 6 cups water in a 10-inch Dutch oven. Cover and bring to a boil over high heat. Cook 3 minutes, remove from heat and let stand 1 hour. Drain and rinse beans. Set aside.

In the same Dutch oven over medium heat, add oil, country ham and onions. Saute until onions are glossy, about 7 minutes. Add garlic, brown sugar, cider vinegar, honey, beans and 4 cups water.

Bake at 350 degrees (17 briquettes on lid and 8 under oven) for 1 hour. Remove lid and stir in molasses. Return lid and continue cooking until soft, about 1 hour additional. Serves 8 (1-cup) portions.

Tuesday, March 29, 2005

Red Bean Salad

When I returned to Bakersfield after an 8-1/2-year stint in the Navy, I discovered Mossman’s, a country buffet in Bakersfield. They served several wonderful bean salads. Zesty ingredients like lemon juice and hot peppers brought life to the legume.


RED BEAN SALAD

Make sure you thoroughly rinse the gloppy, salty liquid from the beans. Roast a ripe red bell pepper over an open flame until the skin is completely charred if desired. When the pepper is blackened, wrap it in plastic wrap and let it steam and cool. When cool enough to handle, pull stem out, scrape charred skin off and chop.

2 (15-ounce) cans red beans
2 tablespoons chopped jalapeno pepper
2 tablespoons minced shallot
2 teaspoons minced garlic
1 teaspoon sweet paprika
2 teaspoons cumin
1/2 teaspoon kosher salt
1/4 teaspoons black pepper
1 teaspoons grated lemon zest
1/4 cup lemon juice
1/4 cup extra-virgin olive oil
1 medium roasted red bell pepper
1/2 chopped cilantro
1/4 chopped flat-leaf parsley

Rinse and drain canned beans. In a medium bowl, whisk together jalapeno pepper, shallot, paprika, cumin, salt, pepper, and lemon zest and juice. Let mixture set for 30 minutes to marry flavors.

Toss dressing with beans. Fold in olive oil, roasted pepper, cilantro and parsley. Check seasoning and serve cold. Serves 4 to 6.