Monday, April 28, 2014

Classic Lodge skillet located at Eagle Point antique shop

Chef Steven and his assistant scramble
eggs in the Daybreak Camp
Lodge 20-inch skillet.
I introduced my perspective on collecting cast iron cookware on these pages some five years ago. A self-imposed spending limit of $100 restrained me from investing hundreds of dollars in cookware that I’d never use. Any new purchase -- mainly cookware capable of feeding a crowd -- had to fill a specific need in my outdoor kitchen. Functionality was my watchword. Any piece must be ready to work, I reasoned. There are no museum pieces in my outfit.

With more than two dozen cast iron Dutch ovens and skillets in my modest collection, I saw little need to expand my holdings as I rarely use the entire collection in one setting today. Yet, for some time I’ve felt that one skillet was missing from my collection.

My introduction to Lodge’s heavy 20-inch skillet came in the Daybreak Camp kitchen in 2002. Unknown to me, Lodge had discontinued production of the skillet sometime before I first saw it. For the next seven years I put the camp’s skillet to work frying potatoes and scrambling eggs for one week each July. A pall of sadness fell over me each time I left the skillet on the range for the next group.

I’ve been searching for the skillet since then. A number of leads in the intervening years came up empty, including a call to a Bishop, California, hardware store that forgot to pull its webpage ad after they sold the last unit. Discouraged, search efforts waned over the past five or six years. I felt that I’d missed my chance to ever own one.

Scrambled eggs ready for campers on
Independence Day 2006.
Then, by chance, I found a 20-inch Lodge skillet (model 20SK) Saturday at an Eagle Point, Oregon, antique shop on Saturday. Debbie and I stopped at the Butte Creek Mill to briefly meet fellow Dutch oven cook Ron Clanton of the Rogue River Dutch Cookers. As we waited for Ron, my wife drifted to the antique store, located next to the water-powered grist mill.

Curious as to where Debbie had disappeared, I walked to the antique shop and found her. And I found my skillet! Inside, I saw several cast iron bean pots and skillets. Then the massive skillet jumped out at me as I rounded the corner toward the back of the shop. Its rusty hulk was propped against a vintage piece of furniture. As I inspected the skillet, I immediately realized that I was holding the object of my decade-long search.

The skillet is in decent condition. Though rusted inside and out, there is little pitting on the cooking surface. It looks like most of the rust is on the surface. I should be able to remove it with steel wool and wire brush. It’s my project for the first week of camp, when Debbie and I work alone in the kitchen. Once cleaned, it’ll receive a coat of shortening and an hour-long bake in one of the convection ovens. I’ll give the skillet a test run when the cooks arrive next week.

A rare find, my "new" Lodge 20-inch
skillet needs a bit of elbow grease
and seasoning in a hot oven before
I put it to work.
As it turned out, Ron missed our appointment because he was sick. Yet, the missed opportunity to meet and share our love for outdoor cooking opened into the chance to see the great millworks in Eagle Point and trace of Southern Oregon pioneer history. And I acquired a great piece of cast iron cookware, one that I would’ve missed had Ron been well.

With a $55 price tag, I acquired a great piece of cast iron cookware for well under my price cap. The skillet will serve me well at Oakland Feather River Camp and on the range. The Lodge skillet will certainly feed a crowd. And it’ll soon take center stage on my sauté line, next to 14- and 17-inch Lodge skillets.

Thank you, Ron. I plan to bring the skillet to Eagle Point next November for the annual Gobble ‘Till You Wobble (link takes you to the 2013 event) at the mill. We’ll see you to cook, talk about shared craft and enjoy some wonderful Thanksgiving vittles!

Saturday, April 19, 2014

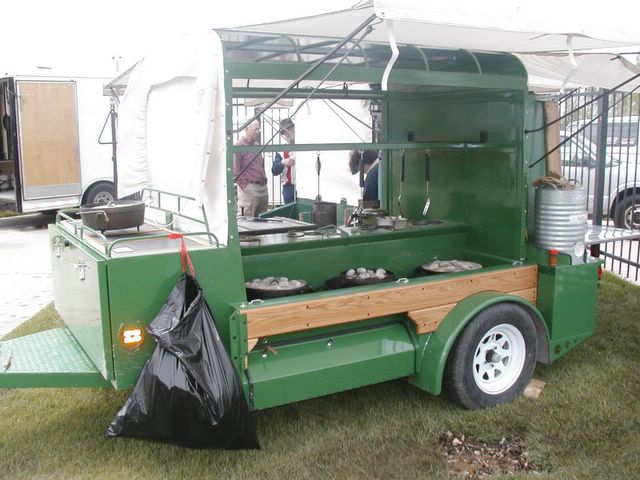
Throwback: Dutch oven trailer at 2005 IDOS spring convention

The Dutch oven trailer was the most impressive piece of Dutch oven equipment at the 2005 Dutch Oven convention in Farmington, Utah. Builder Lynn Benson made the trailer for personal use. A trailer dedicated to cooking made sense to him as Lynn was tired of loading and unloading the pickup each time he cooked in Dutch ovens.

Benson manufactured trailers in Sandy, Utah, at the time. When I talked to him at the convention, the plan was to use trailer as the prototype for a line of cooking trailers. He was still in the process of finishing a smaller version of the trailer during the convention. The trailer was to be known as the Dutch wagon.

Though no longer active, Benson hosted a website to market and sell the trailer for a couple years. It doesn't look like the business took off. I suspect that little demand led to low sales numbers for the trailer. With a niche market, it'd be a tough business pursuit.

Benson's trailer is one of the best ideas for a cooking trailer that I've seen. The trailer featured efficient use of space for a cooking trailer. A chuckbox -- appropriately situated on the back end of the trailer -- provided storage for staples, utensils and supplies. Cooking surfaces on either side of the wagon allowed you to cook in cast iron Dutch ovens, over a gas or charcoal grill and on a two-burner propane stove.

While I doubt that I would ever purchase such a trailer, it intrigued me. Enjoy the photographs from the convention.

The larger of the two Dutch wagons at the convention. The right side is set up for Dutch oven cooking, with space for several ovens. Propane is stored under the igloo jug. A traditional chuckbox is situated at the rear of the trailer.

The right side of the larger trailer. The trailer is designed so you can drop your own two-burger stove in place -- no need to purchase a new stove. The gas or charcoal grill is located under the silver and green cover.
Like the chuckwagon of cattle drive days, the Dutch Wagon includes a roomy chuckbox at the rear of the trailer.

Monday, April 14, 2014

Comments on 'Round the Chuckbox

I turned Google+ comments off today on 'Round the Chuckbox. As a result, the original comment form is once again visible at the end of each article. You may post a comment by typing it into the comment box and clicking the publish button. Your comment will be visible as soon as I approve it.

You may have noticed that you were forced to establish a Google+ profile in order to post a comment. This happened when I switched to Google+ comments last September. It sounded nice at the time. However, I quickly learned that the blogger commend mechanism was shut down in the process. Plus I lost the ability to moderate comments.

The most noticeable result of using Google+ comments was the sudden drop in comments. While 'Round the Chuckbox has never inspired a flood of comments, readers have had their moments. Every month or so an article would inspire interactive conversation.

You'll notice that Google+ comments from the last seven months have disappeared. Please return and comment if you'd like to re-join the conversation. Comments on 'Round the Chuckbox are subject to moderation, as they were prior to September. I'll approve comments for publication as quickly as I see them. (Please note that I delete spam and inappropriate remarks.)

Thank you for being a loyal 'Round the Chuckbox reader. I appreciate your readership and would love to see a vibrant exchange of ideas on the blog.

CSCS Steven C. Karoly, USN, Retired
Chef-blogger on 'Round the Chuckbox

Sunday, April 13, 2014

Chicken succotash skillet with kale

Last time I prepared succotash for the pages of 'Round the Chuckbox, it featured Southwestern flavors. Mild poblano chili peppers, pinto and lima beans, tomatillos and whole kernel corn combined in the skillet for an interesting flavor profile. Succotash is a great way to add interest to vegetables at the dinner table.

Though often viewed as a mixture of corn and lima beans, succotash takes its name from Narragansett Indian name for boiled or broken kernels of corn. It has its roots in the Native American cuisine. You could say that any mixture of vegetables is succotash.

I enjoy cooking succotash because of it's versatility. Unless you're looking authenticity, let your culinary creativity be your guide. I often begin with whole kernel corn as my foundation. From there, I add meat or vegetables to create the flavor that I'm looking for. It's also a great way to use leftover meat or vegetables.

I prepared this version last night in my outdoor kitchen. It includes flavors that I enjoy. I've included a series of photos to show you how I prepared the succotash. Remember that you can use any combinations of vegetables you desire. Enjoy ...

This Wagner's 1891 Original reproduction 11-3/4-inch skillet is used for most of stovetop cooking at home. My wife and I purchased it over 30 years ago at a Davis, California, hardware as newlyweds. A vintage Griswold skillet with domed lid is one of my key cast iron pieces in the camping outfit.
You can use any cooked chicken or turkey for the succotash. I sautéed a large chicken breast (about 16 ounces), butterflied, in the skillet over medium-high heat. After a brief rest, the chicken was cubed and set aside.
From this point, each step builds on the last. Crisp 4 ounces bacon over medium-high heat. Push the bacon to one side and spoon out the excess grease. You need about 2 tablespoons of fat for the dish.
Next, 1 onion, diced, and 1 red bell pepper, diced, are tossed into the skillet. Sauté over medium heat until the onion is translucent. Add 2 teaspoons minced garlic and continue cooking for an additional two or three minutes.
Roughly chop 1 bunch of kale. Heap in the skillet. Gently stir into the bacon, onion and pepper mixture, taking care not to spill the kale.
The kale will cook down within 3 to 5 minutes. At this point, watch the heat under the skillet so you don't burn the kale.
Pour 16 ounces of frozen whole kernel corn over the kale mixture. Stir into the onion, pepper and kale mixture, and continue cooking until the corn is hot.
Add the diced chicken to the succotash and stir. Bring the dish to serving temperature and season with salt and pepper to taste.
The finished dish -- chicken succotash skillet with kale. It serves 6 to 8.

Tuesday, April 01, 2014

Campfire cooking with charcoal briquettes

Over 10 years ago, a reader to my former writing project on Suite101.com posed a series of Dutch oven questions. The reader -- named Sheila -- found that the Dutch oven was the ideal piece of camp cookware because it solved a few "camp cooking problems."

Even after summer campfire restrictions were in place, the Dutch oven let her avoid "hot dogs, red meat and a lot of processed foods." She was able to create a myriad of one-pot meals in the three-legged cast iron pot.

Sheila's questions

Camping took her mind off of her ailments, said Sheila. Since she often didn't have the energy to build a campfire, she used charcoal briquettes to cook her meals. "A lot of times I go camping because I’m not feeling well and making a fire, especially learning by trial and error," said Sheila, "is exhausting and time consuming."

Here's her dilemma: "I found that the charcoal briquettes sank into the soft ashes in the fire pit that the state park provides. I’m thinking that next time I’ll put the briquettes into an aluminum cake pan and cook from there."

Sheila believed that charcoal briquettes were a good "way to cook up dinner." She asked:
  1. Can you perk coffee on charcoal briquettes?
  2. Will an old lightweight aluminum coffee pot work?
  3. Can you cook pancakes or eggs on a cast iron griddle over charcoal briquettes?
  4. What types of pots are good on charcoal briquettes in addition to cast iron?
"I’d like to try some cast iron Dutch oven and other types of charcoal briquette cooking using what I have and see if I like it first before getting any special equipment," concluded Sheila. "I was just checking to see if I got some of the beginner’s rules correct."
Cooking with charcoal briquettes
The answer to Sheila's questions was a resounding yes. While I prefer campfire cooking, charcoal briquettes are a good substitute for those times when campfires are banned.

Here are my general rules:

Cooking with charcoal. Charcoal makes a good ready-made source of heat for camping. The briquettes are easy to count and light. And they burn at a predictable rate. Here are four considerations :
  1. Chimney charcoal starter. Don't use lighter fluid to ignite charcoal briquettes. Instead, crumple one or two sheets of newsprint in the bottom compartment of a chimney charcoal starter and light. You'll have gray ash-covered coals in about 20 minutes.
  2. Heat control. Control the heat by adding and removing burning briquettes. This takes practice. Start by placing a thick field of briquettes under the skillet or pot. Then watch the food. If it's cooking too fast, remove briquettes with a pair of tongs. Add burning briquettes if the food is cooking too slow. And, yes, Sheila can brew coffee in the aluminum coffee pot and fry breakfast on the cast iron griddle.
  3. Fire safety. You need nearby water source to douse any fires. Purchase a galvanized steel bucket and ash shovel to collect spent briquettes. Drown spent coals inside the bucket. When all fires have been extinguished, discard the ash and briquettes. 
  4. Wind shield. Charcoal briquettes burn hotter and faster under windy conditions. In a brisk wind, coals that normally burn for 60 minutes may evaporate within 30 to 45 minutes instead.
Use a firepan. It's important to protect the environment and to guard against wildland fires. Any fireproof implement can be turned into a firepan. Set a baking sheet (or any iron or steel sheet) between two or more bricks to hold the coals. You can also cook in a kettle-style barbecue. You'll need to elevate the pots and pans two to three inches above the coals.

Cookware. Any cookware can be used when cooking over a charcoal fire. However, don't place burning charcoal briquettes directly on top of any cookware that isn't cast iron. Conversely, don't set anything directly on the briquettes. Thin-skinned cookware (like aluminum) will warp. And enamel pots can burn and chip. Either suspend pots over the coals with a chain or use a grill to hold them two to three inches above the fire.

After our conversation on Suite101.com, Sheila purchased several fireproof bricks at a local brickyard and a pizza sheet and grill at a secondhand store. She planned to suspend the grill between two bricks, about two and one-half inches above the charcoal. After setting the pizza sheet on top of one or two bricks, she said that she'd burn the charcoal directly on the pizza sheet.

Sunday, March 30, 2014

My bear story

As a kid I attended Camp San Joaquin in Sequoia National Forest each summer. Instead of participating in the regular "kumbaya" camp session for the ninth grade, I elected to go on the high school boys backpack trip on the High Sierra Trail.

At camp our adult leaders divided the food and equipment, briefed the boys on trip expectations and back country safety. Father Fletcher Davis, an accomplished backpacker and mountain climber, explained the realities of trail life, including foot care, burying human waste and bears.

As a lifelong backpacker myself (at the ripe age of 13 or 14!), I half listened. Father Davis continued onto the topic of black bears, a very real reality in the Sierra Nevada back country. If a bear wanders into camp, bang the pots and pans in a loud manner, he explained. Nine times out of ten the bear will run.

Somehow the math didn't work out for one alert boy. What happens on the tenth time, he impatiently asked? Father Davis' retort was calm and to the point: You won't be around to know!

Monday, March 24, 2014

Recovering a rusty Dutch oven

"You can't beat cast iron," says Scott Leysath, the Sporting Chef on the Sportsman Channel. "No matter how it's been abused, you can always bring it back to life."

Watch Cee Dub demonstrate how to rescue a rusty cast iron Dutch oven in this Camp Chef video. You can heat the oven inside your home oven. However, open the windows for ventilation and be ready to fan the smoke alarm.

At the end of the video, Scott gives the link to Cee Dub's website, where you can purchase Lodge and Camp Chef outdoor cookware.


Pre-camp meal service

The kitchen crew at Oakland Feather River Camp cooks for staff during the pre-camp phase of the summer. In the first four weeks of meal service, the cooks, housekeepers, maintenance staff and camp management eat breakfast and lunch in the Chow Palace. Staff that live on site enjoy leftovers or prepare their own food for dinner.

Weekend groups converge on the Oakland Camp on the third and fourth weekends of May. After a week of training, this is my first opportunity to test the cooks with the full menu. It gives me a chance to test the menu and the their skill. It also introduces the cooks to camp traditions and camp culture, two aspects of camp life that dictate how we serve campers in the Chow Palace. Any kinks are worked out in the next week.

The cooks work long days as they cook and serve the meals for 100 or more campers on these weekends. They also wash dishes and clean the Chow Palace without assistance from the dishwashers. Full staffing with the dishwashers doesn't occur until staff training week.

Staff training week begins on the second Saturday of June. With full staffing in all departments, the kitchen serves around 30 to 35, many first termers at Oakland Feather River Camp. The unique aspect of the week is that the kitchen pulls double duty, cooking and serving meals and attending the training sessions. It's a challenging week, but one that we work through to accomplish both goals.

Full camp begins in earnest on the third Sunday in June.

Pre-camp meals are served from the serving line in May 2013. With 10 to 12 at each meal, it doesn't make sense to wheel the buffet lines into the dining hall yet. The buffet lines are first used during staff training week (second week of June). The kitchen serving line is used to serve vegetarian and vegan meals for the summer camp sessions (third week of June to mid-August).

Tuesday, March 18, 2014

Raising the ensign

During the 2013 camp session, I was selected to lead the Independence Day ceremonies around the camp flagstaff. I am told that the honor has fallen to the chef for the last several years. As a retired U.S. Navy senior chief petty officer, the ceremony had special meaning to me. The raising of the ensign at 8 o'clock in the morning was always a memorable time of day.

At Oakland Feather River Camp, the emcee gives a brief talk on the historical significance of the 4th of July, raises the flag and leads campers in the Pledge of Allegiance. Afterwards we sing America The Beautiful, then adjourn for a fun afternoon of games and field activities. (Of course, culinary staff return to the kitchen to finish the barbecue!)


Saturday, March 15, 2014

Sea-going coffee break

I'm envious. The crew of the USS Cocopa (ATF-101) -- a sister ship to the USS Hitchiti (ATF-103) -- never enjoyed "twice-daily coffee breaks." The busy routine of the sea-going tug precluded such niceties of civilian life. At best, the crew gulped down their coffee before running off to stand watch or to put in a full day of work.

September 23, 1958
COFFEE IS A GREAT STIMULANT--Just ask any crewmember of the Fleet Tug USS Hitchiti. The ship's galley bakes fresh coffee rolls and pastry to be served during the twice-daily coffee breaks.

US Navy photo.

Monday, March 10, 2014

Re-purposing leftovers at camp

The cooks must find creative ways to re-purpose leftovers at Oakland Feather River Camp. Serving reheated leftovers in their original form is frowned on by camp management. With few exceptions, campers expect freshly prepared meals.

As the chef, I understand the restrictions. Campers pay over $90 per night to camp under the towering Ponderosa pines. They expect three newly prepared meals in the Chow Palace each day. It's not fair to serve to recycle meals.

While I try to plan meals as closely as possible to demand, there are times that campers don't eat what we expect then to. As a result, we're left with numerous pans of leftovers in the walk-in. So, I'm driven to find ways to work within the spirit of the policy. For obvious reasons, I cannot discard leftovers. It's cost prohibitive and poor management of limited resources.

Re-purposing leftovers is an important tool. Most of our solutions last summer were simple. We didn't have time to completely convert each leftover dish into something new. Where possible, our normal solution was to use the item as a basic ingredient in another dish.

I've saved leftover French toast to use in bread pudding for years. The custard-infused toast enhances the sweet dessert. It adds another layer of cinnamon-nutmeg goodness. Last May, in the wake of our first weekend camp, I learned that these campers weren't big on bread. Faced with some 150 leftover dinner rolls, I saved them in the freezer a later bread pudding.

The cooks routinely left the sauce off of one-third of the Friday night barbequed chicken. The meat was pulled from the bone and refrigerated. It was then used for chicken salad for the salad bar, chicken chili (as an alternative to beef or pork chili) or breakfast burritos.

Likewise, the meat was often pulled from the leftover pork spareribs. Sauced meat was repurposed as pulled pork. The smokey notes of un-sauced meat made for great chili verde.

Options to use leftover vegetables abound as well. Many work well in salads. Leftover whole kernel corn was used to prepare corn and tomato salsa. Add fresh diced tomatoes, minced chili peppers, garlic and chopped cilantro. We served the salsa with the appropriate meal.

Yes, there are times that I allowed the cooks to serve reheated leftovers alongside the planned meal. Our largest camp -- a private group of more than 300 campers -- expects leftovers. In that instance, they become a blessing by relieving the pressure placed on the regular menu by the large group.

We also served leftovers for dinner on Independence Day last summer. After stuffing themselves at a midday barbecue, most campers enjoyed the leftovers, which were served alongside limited portions of the regular dinner meal. The camp director was happy, as were the campers. It gave them a chance to eat as much or as little as they desired.

Not all of my attempts to repurpose leftovers have enjoyed complete successful. One time I renamed leftover macaroni and cheese and served it for breakfast to a limited reception. I named it "Thomas Jefferson Frittata" as a tribute to his role in bringing pasta to America. By the end of the meal the campers only ate one of the two leftover pans.

Most ideas that I've presented are basic. I'd love to hear your ideas for using leftovers in the camp kitchen. If I acquire enough ideas, I'll present them in a future blog post.

My personal breakfast this morning consisted of leftover sautéed cabbage and carrots, roasted broccolini and grilled Polish sausage.

STOCKING THE STAFF REFRIGERATOR

Last summer, the cooks stocked leftovers in the staff refrigerator, which is located in the break room. They placed eight to 10 portions of the entrée and side dishes into zipper lock bags. As the week progressed, the stock of leftovers progressively grew to unmanageable proportions. I found myself discarding older leftovers two or three times each week.

This practice has it's limitations as most staff eat in the Chow Palace during regular meal periods. It's great for the occasional staff member who misses the meal and those with the midnight munchies. Space limitations are compounded by the fact that the staff refrigerator is the designated place for staff to store small quantities of personal food.

I plan to revisit this process this year. At times I felt the cooks were using the staff refrigerator to avoid stocking leftovers in the walk-in. If managed closely, it can work to the benefit of staff who find the need to miss a meal. Yet, the cooks need to respect staff that store personal food in the refrigerator.

Thursday, March 06, 2014

Sourdough cinnamon rolls by Kent Rollins

Here's a nice video by cowboy and chef Kent Rollins.


YouTube description: "Kent Rollins shows how to make these glorious lil' pastries."

Sunday, March 02, 2014

Dutch oven pot pie revisited

The last time I visited Dutch oven pot pie on 'Round the Chuckbox, refrigerator biscuit dough stood in for the top crust. Biscuit dough gave me a quick way to prepare pot pie in camp. The filling was made using canned cream of mushroom soup, frozen vegetables and pre-cooked chicken.

On Saturday, I prepared Dutch oven pot pie with dark turkey meat, frozen broccoli and a scratch-made sauce. The sauce was a basic velouté, prepared with turkey stock and a roux. Once ready, I stirred in diced cooked turkey and broccoli florets. It cooked long enough for the broccoli to begin thawing before placing biscuits on the surface.

Instead of using biscuit dough, I pinched off 12 golf ball-sized pieces of dough from a batch of artisan no-knead bread dough. After lightly rounding each dough ball, I placed them on top of the pot pie filling. With charcoal briquettes for approximately 400 degrees (5 under and 20 on the lid), the biscuits baked for around 30 minutes. As you can see in the image below, the biscuit topping took on a golden color.

In the enclosed environment of the Dutch oven, the biscuits enjoyed a steam bath as they baked under the intense heat of the coals on the lid. The steam imparted the tough and chewy crust that we enjoy on sourdough bread. And it gave the biscuit topping a shinny coat as well.

Yet, the bottom of the biscuit crust was moist and soft. It reminded me of dumplings being bathed on a pot of turkey stew. While the dough remained chewy on the underside, it absorbed the rich goodness of the pot pie gravy.

My impromptu turkey pot pie with no-knead biscuit crust was a hit last night. I was able to put the dough, which had been fermenting in the refrigerator all week, to good use. My only regret? There was only sufficient pot pie for four modest servings. Once we scooped up the turkey filling, three or four biscuits remained. But that's okay. I'll finish them at dinner tonight.


Saturday, March 01, 2014

Chicken spaghetti

It's time to revisit this recipe for chicken spaghetti. While I originally prepared it in a 10-inch cast iron skillet, the casserole easily converts to a 12-inch camp-style Dutch oven. Enjoy ...


Tonight's meal comes from jail and fits every stereotype of jail food. It's heavy, starchy and loaded with fat.

But the creator of this baked chicken casserole missed one important stereotype about jail food -- it tastes good. And yes, it fills you, and makes you feel good about the meal.

The cooks at the Ionia County Jail, Ionia, Michigan, regularly prepare chicken spaghetti. "Inmates ask to take this recipe with them when they are released," said cook Cindi Ruehs. Cole slaw, peas, mixed fruit, bread and margarine accompany the meal.

The recipe was featured on the 2008 Jones Zylon Cooking for Crowds calendar. Jones-Zylon supplies the serving trays, dishes, flatware, carts and racks to corrections, schools and healthcare.

Monday night, I found that Reuhs' chicken spaghetti recipe easily converts into a skillet casserole dish. You'll get eight to 12 servings in a standard 10-inch skillet. A precooked (4-1/2-pound) fryer and a one-pound box of spaghetti formed the base for my recipe.

I roasted the chicken Sunday evening with one sliced onion and one carrot in a 375-degree F. oven. Monday, while spaghetti cooked in a large stockpot, I boned and diced the chicken, discarding the skin. The roasted onion and carrot added a nice flavor element to the casserole.

When cooked to al dente, I dumped the drained spaghetti and diced chicken into the skillet. I then mixed 2 (14-ounce) cans of condensed cream of chicken soup, 1 cup milk, 1 teaspoon kosher salt and 1/2 teaspoon pepper together in a medium bowl. The sauce, chicken and pasta were mixed in the skillet.

I baked the casserole in a pre-heated 350-degree oven for about 30 minutes. Although Reuhs' adds cheese to the sauce, I elected to top the dish with shredded sharp cheddar cheese after crisping the pasta in the oven. Once I spread the cheese over the casserole, it took another 20 minutes to add some color to the cheese and bring the whole dish to 165-degrees in the center.

Chicken spaghetti is a great one-skillet dish. Add frozen broccoli flowerets or peas to boost its flavor profile. A handful of diced flat leaf parsley makes a simple garnish.

And the nutrition profile isn't as bad as you'd think. One serving (at eight servings per skillet) contains 533 calories with 54 percent of the calories from fat. You can reduce fat in the recipe by using Campbell's 98% fat free condensed soup and discarding the chicken skin.

CHICKEN SPAGHETTI

25 pounds diced chicken
4 cups diced green peppers
12 pounds spaghetti
3 (50-ounce) cans chicken soup
3 (50-ounce) cans mushroom soup
5 pounds shredded cheese
3 tablespoons salt
3 tablespoons pepper
3 pounds margarine

Day before serving: Cook and dice chicken. Save chicken stock to cook spaghetti in. Dice green peppers. Day of serving: Start preparation about 2:30 p.m.

Remove fat from stock. Cook spaghetti in stock. In tilt skillet, melt margarine and sauté green peppers until tender. Add soups to butter mixture and heat until warm.

Add cooked spaghetti and diced chicken. Heat to temp (165-degrees F.). Add cheese and mix in.

Servings: 120 (8-ounce) black or orange handle spoodle.

Thursday, February 27, 2014

The camp menu

I used a two-week cycle menu last summer at Oakland Feather River Camp. Even though I felt a one-week menu would've worked, the extra week doubled the meals for campers and staff. The added week was a selling point for the cooks and camp staff. It gave the cooks more variety to work with and helped alleviate staff menu burnout. (I often read that summer camp staff quickly tire of eating that same things week and week.)

By the time the camp hired me in early-April, my notebook was filled with ideas for the salad bar, vegetarian meals and the main menu. I quickly sketched the menu out after I arrived at camp in May. Once the cooks arrived (a week after my report date), I trained them how to execute each the menu item. Two weekend sessions in May gave the cooks the opportunity to present the full menu to camps of large numbers.

Menu rotation began in early June with staff training week. The second week was used for the first session of the summer, Adult Art Camp and the first of five week-long family camps. I revised the menu to include kid-approved favorites for Camp Kidd and Camp Sierra, held in late June. The two weeks rotated until the end of camp in mid-August.

This year I plan to begin staff training with the second menu week. Since many families come to the same session each year, flipping the menu will let them experience the other side of the menu when they come to camp.

An early menu draft for the 2014 summer season. I plan to recycle unpopular and high-cost menu items, find ways to add more interest to breakfast and rework some of the side dishes. Kid-friendly dishes will compliment meals, such as the fish dinner on Saturday, that weren't popular with children.

Friday, February 21, 2014

Oakland Feather River Camp needs cooks and dishwashers for 2014 summer season

Oakland Feather River Camp posted this job advertisement for summer food service staff today. To apply, follow the link to the SF Bay Area Craigslist post and click the 'reply' button in the upper left corner of the page. An application can be found on the camp website. A companion ad has been posted to the American Camp Association job board.

I am returning to the camp in May as the chef and food service manager.


Oakland Feather River Camp is looking for skilled, flexible, friendly, accountable and mature summer staff for our Family Camp. The staff of Oakland Feather River Camp creates the atmosphere in which campers develop memories that will be treasured for a lifetime.

We will be hiring the following positions: Head Cook, Prep Cooks, Vegan/Vegetarian Cook, and Dishwashers. Ideal candidates are energetic and enthusiastic people who like to connect with others in an authentic way have experience camping or living out of doors, are friendly, helpful, organized and safety focused. All camp staff must have a desire to serve people while living in a rustic, natural environment.

Under the direction of the Food Service Manager these staff will prepare food for to ensure the timely service of quality meals with ample selection and nutrition for 250 - 300 campers daily. All cooks must be safety oriented, friendly, helpful, organized, knowledgeable about food and cooking and have experience working in a commercial kitchen.

Kitchen staff must be considerate of individuals with special diets and/or food allergies and will participate cooperatively as part of a supportive and cohesive team. Knowledge of a commercial kitchen and the health and safety procedures and regulations associated with food preparation is a priority.

Oakland Feather River Camp is located in Quincy, California, approximately 250 miles from the San Francisco Bay Area. The camp is located at 3,500 feet in elevation on 65 acres in the beautiful Plumas National Forest. In this pristine environment we provide family and youth campers with exciting and fun activities as well as opportunities for laid back relaxation. We offer rustic cabins and tent-cabins on platforms with nearby restrooms and hot showers, and three healthy meals a day. Campers come for as short or long as they like.

All camp positions require a combination of education and relevant experience that would likely provide the required knowledge, skills, certifications and abilities to successfully perform the duties required. Applicants shall be at least 18 years of age, have a valid drivers license and submit to required background checks.

All staff work six days per week. Salary is DOE. Room and board are provided for duration of the summer season.

Tuesday, February 11, 2014

Vegan black bean chili

At Oakland Feather River Camp, vegetarian meals are offered in addition to the regular meat-based meal. The vegetarian meal is served on a separate steam line to avoid confusion. This allows vegetarian diners (and meat eaters who enjoy vegetarian cuisine as well) to select their meal without having to worry about meat products. Any food item placed on the vegetarian line is prepared without meat, poultry or fish.

I often serve the same entrée and side dishes on both meat and vegetarian lines. When chili con carne is menued on the regular menu, for instance, bean chili is placed on the vegetarian serving line. This simplifies production and allows the cooks to make efficient use of their time. While the chili con carne and black bean chili are cooked in separate pots, the beans for both entrees will be cooked in the same pot, then divided between the two applications.

When we have a number of vegans in camp, I instruct the vegetarian cook to prepare as many entrées as possible without animal products. This helps to avoid duplication of effort for the vegetarian and vegan population at camp. To please vegetarian campers, we place grated cheese and sour cream on the vegetarian line.

I began preparing vegan black bean chili for the Argonaut Farm to Fork Café in Coloma, California, in December. It quickly became a favorite of our customers. And I enjoy cooking the chili week after week. This recipe will supplant the one we were using last summer at camp.

Adapted from Chef Helen Lacono's gem of a cookbook, Kaua'i Farmers' Market Soups (self-published in 2013), the chili is a marriage of freshly cooked black beans with a rich puree of onions, poblano chiles, carrots, red bell peppers and garlic. A pot of beans surrounded by a smooth, mildly spiced sauce, makes for a wonderful bowl of comfort food.

VEGAN BLACK BEAN CHILI

Use the black bean chili recipe as a starting point, adding or subtracting ingredients to suit the tastes of your campers. For a chunky chili, skip the puréeing step. Simply cut the vegetables to uniform size, sauté in olive oil and add to the cooked beans.

For a smoky chili, replace the paprika with smoked paprika. Chipotle peppers add a smoky dimension as well. You can also roast the poblano chiles and red bell peppers over an open flame if desired.

For a meat chili, add 3-1/2 to 4 pounds grilled diced Italian sausage or cooked ground turkey to the chili. My favorite is a chicken and apple sausage.

3 pounds black beans
2 teaspoons kosher salt
1 pound onion, diced small
8 ounces carrot, diced small
1 pound poblano pepper, diced small
1-1/4 pounds red bell pepper, diced small
1 ounce  garlic, minced
1/2 cup olive oil
1/4 cup chili powder
2 tablespoons ground cumin
2 tablespoons paprika
1/4 cup dried oregano
2 tablespoons dried basil
1/2 teaspoon cayenne pepper
3 cups crushed tomatoes
1/4 cup Worcestershire sauce
2 tablespoons Tamari soy sauce
Vegetable stock

Pick over beans, removing discolored beans and foreign matter. Wash thoroughly. Place beans and salt in 10 to 12-quart stockpot. Cover with cold water and bring to a boil. Reduce heat to simmer and cover. Add water as necessary to keep the beans covered. Simmer 1-1/2 hours or until just tender. Drain beans, reserving cooking liquid if used to thin the chili.

Puree onion, carrot, chili pepper, bell pepper and garlic in a blender or food processor. In a heavy skillet, heat oil over medium heat. Cook puree mixture in olive oil for 10 to 15 minutes. Add chili powder, cumin, paprika, cayenne, oregano and basil to puree mixture. Continue cooking for 1 to 2 minutes. Add to beans in stockpot.

Add tomato, Worcestershire sauce and soy sauce to chili. Simmer over low heat 20 to 30 minutes to develop flavor. Thin chili to desired consistency with vegetable stock or reserved bean liquid. Adjust seasoning.

Makes 6-1/2 quarts. Portion into 25 (8-ounce) or 20 (10-ounce) servings. If desired, serve over steamed brown rice and garnish with fresh salsa.

Thursday, January 23, 2014

Red lentil, sweet potato and apple soup

I recently traveled 3,000 miles to find suitable soup weather. With no measurable rain and snow since early December, Northern California has been enjoying unseasonably pleasant days. Spring-like days have left us wondering how long this drought will endure. While the mornings often see sub-freezing temperatures, each afternoon brings a new record high.

As I prepared to fly to the East Coast to visit my mother, Northern Virginia and Washington, DC, was recovering from a week of freezing temperatures. With lows in the teens and highs hovering in the mid-30s, the city barely had time to thaw each day before nightfall. That was the week airline flights were being canceled by the thousands.

A wonderful bowl of soup certainly made sense when I arrived. My mother and I enjoyed grilled lamb and kubideh kebabs over saffron basmati rice at Café Shirez on the Friday of my visit. After running errands on the warm, rainy afternoon, we settled in for a quiet evening of soup, conversation and reading.

I wanted to test a soup with red lentil, sweet potato and apples for work. Since mom is always open to try new flavors, I felt she would enjoy it. (Click here and here for soups that mom has enjoyed in the past.) And I was also able to freeze several portions for later enjoyment.

As part of my winter job at Coloma Resort, I've been cooking soups for the Argonaut Café. I introduced the soup on my return to California to positive reviews. The café features a fresh soup each day at noon. I will post personal recipes as I develop them.

We long for soup weather in California. I want to escape a cold, rainy day and cuddle with a warm bowl of red lentil, sweet potato and apple soup. Lord willing, soup weather will return to California soon.

RED LENTIL, SWEET POTATO AND APPLE SOUP

This recipe is to feed a crowd. To serve a family, divide the recipe in fourths and proceed with the instructions.

8 ounces unsalted butter
2 pounds onion, diced small
3 pounds sweet potato, peeled and cubed
2 pounds carrot, peeled and cubed
2-1/2 pounds Granny Smith apple, peeled and cubed
8 ounces red lentils
1 tablespoon fresh grated ginger
2 teaspoons ground cumin
2 teaspoons ground coriander
2 teaspoons chili powder
4 teaspoons kosher salt
2 teaspoons ground black pepper
2 quarts chicken or vegetable stock
2 quarts apple cider

In 10- to 12-quart stockpot, melt butter over medium heat; add onions, sweet potatoes, carrots and apples. Sweat over medium heat until onion is translucent and soft, stirring often.

Stir in lentils, ginger, cumin, coriander, chili powder, salt and pepper. Pour stock and cider into pot. Bring to boil over high heat. Reduce to simmer, cover and cook until vegetables and lentils are soft, 30 to 45 min.

Puree soup in blender or food processor, in batches if necessary, until smooth. Thin with water or stock as needed.

Prepares approximately 6-1/4 quarts. Serves 25 (8-ounce) portions. Garnish soup with sour cream, crème fraiche or plain yogurt.

Tuesday, January 21, 2014

Cast iron soup station

Last week my mother and I joined my sister for lunch at the Virginia Theological Seminary, where she's an employee. Dining facilities at the school are called The Refectory and are operated by Meriwether-Godsey, an employee-owned company that specializes in premier dining services. Meals for students, staff and visitors are prepared under the leadership of dining services manager Benjamin Judd.

The layout of service stations impressed me the most about the operation. Set up in the main dining hall, four primary stations allowed diners to freely move about as they selected their meal. Each station included a large buffet stand with a wood framed sneeze shield. Ornate chaffing dishes held the hot food on the meat and vegetarian stations. The salad bar and build-your-own sandwich station each contained an ice well with plenty of space for square and round ingredient containers.

The soup station caught my eye as I walked past it. Looking back I should've taken more than one cell phone picture. Unfortunately, I couldn't locate any photos of The Refectory in the Internet.

The picture shows the layout of the soup pots, cups and bowls. The station was located on the inside end cap to the sandwich station. As I think about the layout, locating soup and sandwiches adjacent to each other makes sense. Two Lodge two cast iron Dutch ovens -- each placed over a heat source -- held the soup, vegetable (vegetarian, I believe) on the left with cream of cauliflower to the right.


Two cast iron Lodge Dutch ovens make up the soup station at Virginia Theological Seminary. They appear to be Lodge Model L8DOL3 Dutch ovens with loop handles.

Tuesday, December 03, 2013

No mixer, no problem

Last Saturday I catered a banquet for the San Jose Youth Shakespeare in the Bay Area. With an ambitious menu at hand, I began meal production with rosemary-garlic dinner rolls at 12:30 in the afternoon. After unloading the equipment, food and supplies into the kitchen, I setup the scale, opened the bag of bread flour and began measuring.

With over 20 pounds of flour, along with yeast, salt, sugar, egg, oil, herbs and water to mix, I'd normally knead the dough in a 20-quart stand mixer. However, the kitchen at the rental hall was not equipped with one. With a large bus tub, I mixed the dough by hand. The pictures tell the rest of the story.

All in ingredients were weighed into a 20 by 15 by 7-inch bus tub. The formula called for 100% bread flour, 6% sugar, 4% chopped fresh parsley, 4% minced garlic, 2% instant yeast, 2 % kosher salt and 1% dried rosemary for the dry ingredients. I used 20 pounds 5 ounces flours as the basis for the dough. Click here for a discussion on baker's percent.

After pouring in about 55% water, 16% egg and 8% olive oil, I mixed the dough by hand. It took several minutes for the dough to come together.

After the dry ingredients were thoroughly mixed into the wet, I cleaned my hands and let the dough rest for 10 minutes. This lets the flour begin to absorb moisture and hydrate.

I started others on separate projects before working on the dough. My niece learned how to dice 10 pounds of yellow onions as another (to my right) set up the buffet area. As the dough came together, I folded the corners into the center of the bus tub. And two gallons of apple cider reduced on the range behind me.

Once the dough was workable, I turned it out onto the bench and continued kneading.

I could only fold the dough 10 to 15 turns before it was too stiff to handle. I gave the dough a 10 to 15-minute rest between kneading sessions. I then divided the dough in half and set each piece in a bus tub to ferment.

Once the dough fermented 90 minutes in an out-of-the-way corner of the kitchen, it was all hands on deck to cut and mold individual rolls. This process took around 30 minutes. We produced 455 rolls Saturday. The diners ate 2 rolls each on average.